
Spider plants are arguably one of the easiest to grow indoors. They’re also pet-friendly, so they don’t need to be kept up and out of the way. There’s also something nostalgic about them, at least for those of us who grew up with houseplants. These plants look gorgeous and dramatic in large containers, but they can also look dainty and cute in smaller containers.
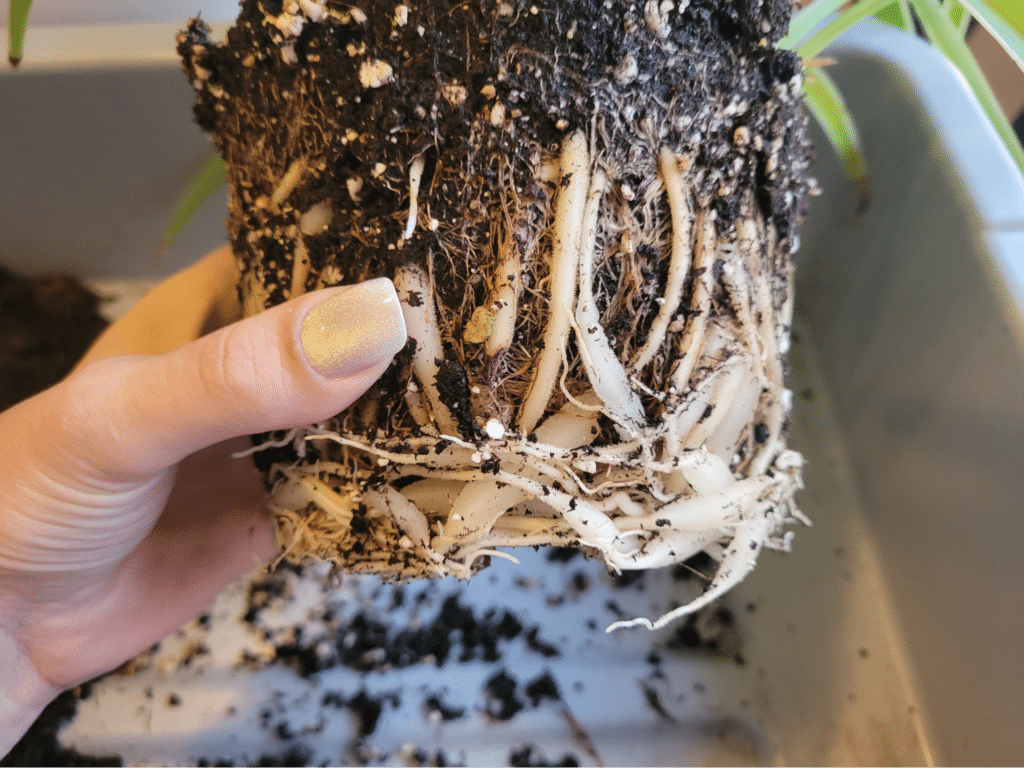
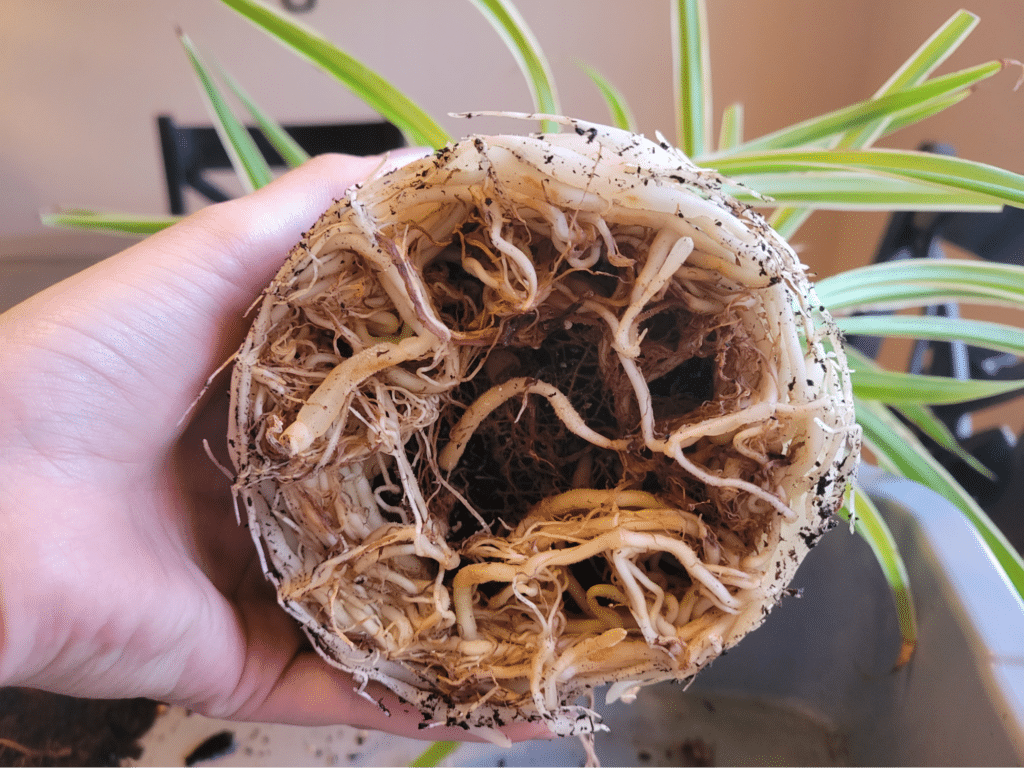
Most spider plants don’t like to be repotted very often. In fact, they spend most of their time and effort building a root system that works for the pot they’re in, which can take months. However, if spider plants are allowed to become pot-bound, you’re in for a mess and at least a few hours untangling some gnarly, finger-shaped roots.
Spider plants can grow comfortably in both soil and LECA (lightweight expanded clay aggregate), better known as clay pebbles. In fact, they’re one of those plants that can make it fully hydroponic if cared for correctly. Being such easy-care plants, spider plants are perfect for practicing if you’re new to indoor plants and gardening.
A good rule of thumb to follow is this: re-pot your spider plant once every 1-2 years, depending on the pot size, the growing medium, and the amount of sunlight it receives. For instance, if your spider plant gets lots of bright, indirect light, nutrients, and water, it’ll need to be re-potted more often than a plant that sits on a dark shelf away from a window.
Repotting Spider Plants in Leca
We have a spider plant that was in desperate need of a good re-pot; however, instead of going for the usual soil mixture, we’ve opted for leca, which is a great option for spider plants given their incredible ability to draw moisture up from the bottom of a pot. For this, we’ll need a pot that’s self-watering, or a combination of a grower pot with drainage inside a decorative pot without drainage.
You can follow these same steps for soil, which is the most common option for plants like this one. Spider plants are capable of thriving in both leca and soil, so it’s up to you!
Supplies
- A larger-sized pot (at least two inches wider in diameter)
- Leca or soil
- A skewer, pencil, or another pointy object for breaking roots loose
- Hydrogen peroxide spray
- Clean, sharp plant shears or scissors
- Liquid plant nutrients/fertilizer
- Fresh water
- Large bowl, bucket, or sink with a strainer
Step 1: Un-pot your spider plant
First and foremost, you should remove your spider plant from its pot. To make this easier, you can soak the whole pot for about an hour beforehand, or simply water the day before you plan to re-pot to help loosen things up.
If it’s terribly pot-bound, try using a twisting motion to gently pull the pot away or running your skewer along the side of the pot (between the soil and pot) to loosen the soil from it. Check the bottom of the pot to ensure that no roots are coming through; if they are, you can simply trim them off to avoid pulling on the intact roots inside the pot.
Step 2: Remove old soil
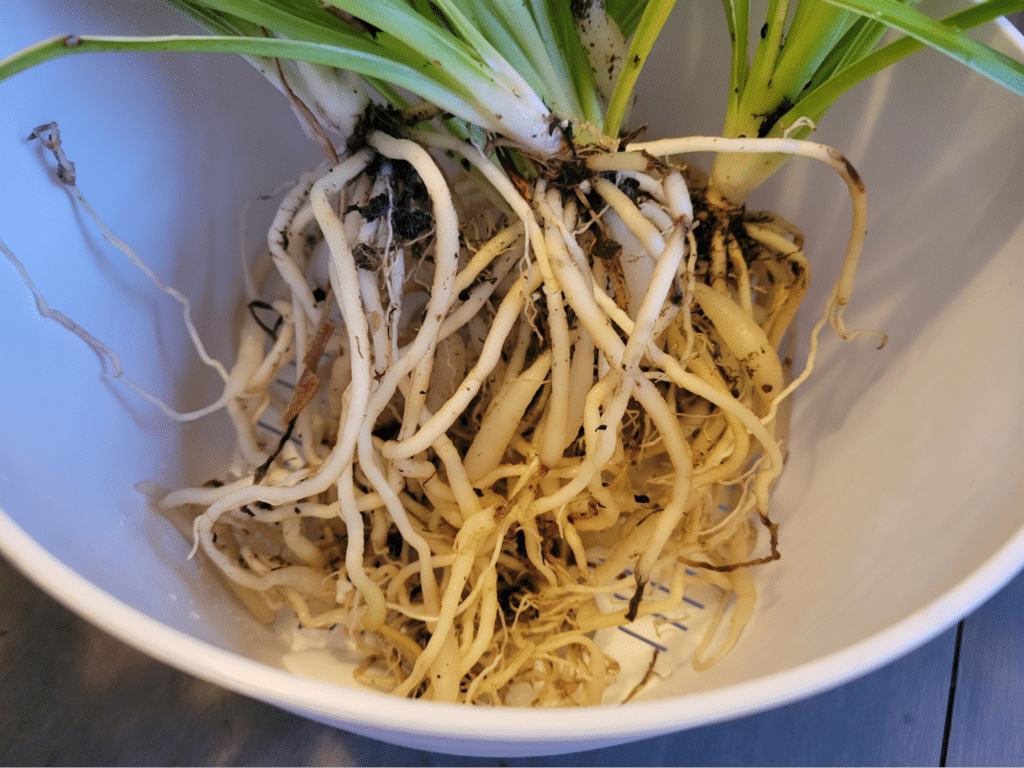
This is a step that shouldn’t be skipped. Spider plants have thick, water-hoarding roots that are incredibly prone to root rot, soil gnats, mealybugs, and anything else that eats soft plant tissue– all of which can be incredibly difficult to eradicate.
By removing as much soil as possible from the roots, you’re also getting rid of pest larvae, fungal invaders, and mold spores, which helps to give your spider plant a longer chance to build up its root system before these things inevitably find their way into the new soil. Gently break away hardened soil, and soak off any remainder.
Step 3: Arrange the roots and backfill
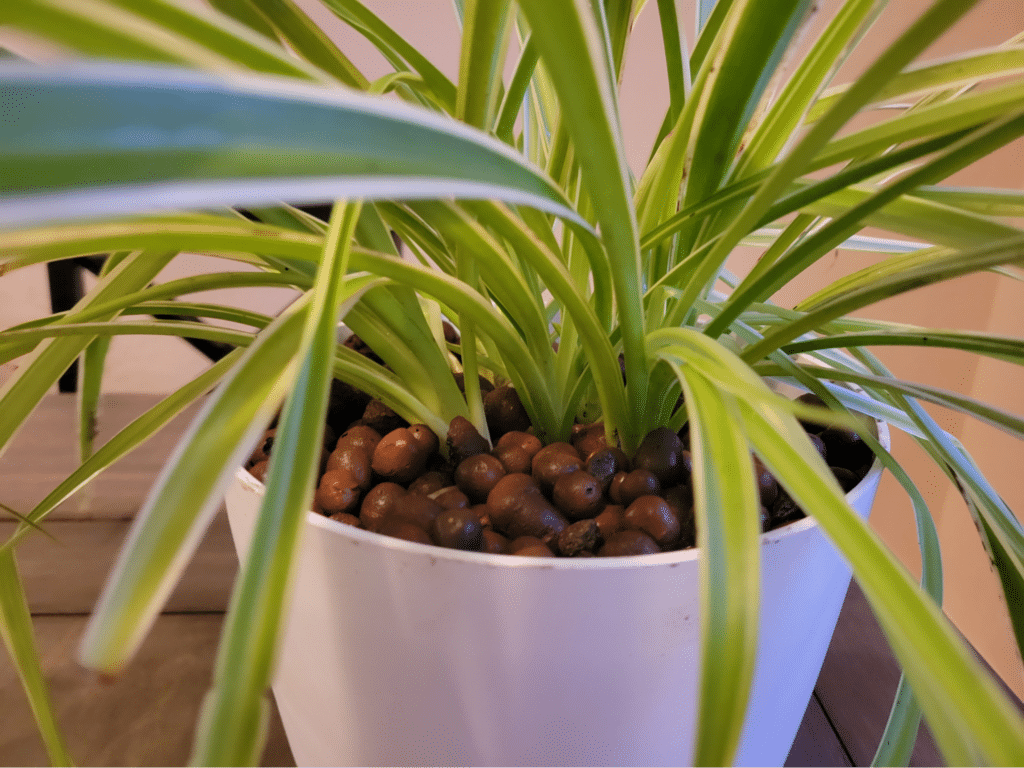
Be sure to thoroughly rinse your leca before you use it. You can either soak it in water and rinse, or use a strainer to rinse the pebbles until the water runs clear. Removing the dust will not only prevent a huge mess, but will also pre-moisten the pebbles, which helps prevent shock during the re-potting process.
Here’s where the repotting begins. At this point, you can add a bit of soil or leca to the bottom of your new pot to give the roots some room to grow down. Arrange your spider plant in its new pot so that just the crown of the plant sits above where the soil line will be. Be sure to allow a little headroom; spider plants grow quickly after a re-pot!
Once your plant is in its new pot, you can begin to backfill. Add soil or leca around the roots of the plant, tapping the pot down on a hard surface every so often to help distribute the growing medium between smaller roots near the bottom. Continue doing this until all of the roots are covered in a nice, even layer and are not exposed.
Step 4: Water!
If you’re using clay pebbles, you’ll need to add liquid fertilizer to your water, since clay pebbles don’t provide any nutrients. As a general rule of thumb, you should dilute fertilizer twice as much as instructed on the bottle, considering that it will sit in a concentrated puddle at the bottom of the pot, slowly wicked up as the plant’s roots drink.
For soil, however, all you need to do is water the plant thoroughly, ensuring that water drains from the bottom of the pot and that all of the soil is saturated all the way through. You can easily check to make sure that the soil is fully saturated by inserting a skewer into the soil and pulling it back up quickly. If dry soil sticks to the skewer, keep watering!
Care & Watering
Since re-potting is stressful for spider plants, it’s a good idea to check up on them daily to make sure they aren’t exhibiting signs of excessive stress for the first few days. While it’s normal for spider plants to droop for a few days after a re-pot, they should perk right back up afterward- and, if it’s during the growing season, add quite a bit of new growth, too.
Be sure that the roots always have access to moisture after re-potting for at least a week. This does not mean watering every day- it simply means that if your spider plant is in leca or in a particularly dry area, you should keep an eye on it to ensure that it gets enough water. Don’t overwater, though, which leads to root rot and other soil issues.
If your spider plant was previously in high light, move it gradually back into the light over the course of a few days to avoid burning. If a couple of leaf tips turn brown, simply snip them off! However, if your spider plant doesn’t perk back up within a week or two, check the soil to make sure it isn’t hydrophobic or infested with pests.
