
If you’re new to orchids, it might seem like once the blooms begin to fall and the stems turn brown, the plant is toast. But that’s simply not the case. In fact, once orchids lose their blooms, they can focus their energy on growing elsewhere- foliage, roots, and aerial roots, to be exact. But how long does it take for an orchid to bloom again?
The answer to this question unfortunately varies greatly depending on the orchid species; even between different moth orchids. It’s hard to say with any certainty when your particular orchid will bloom again, but it can be anywhere from a year to two years. A healthy orchid blooms once per year, and some species of orchids can flower more often still.
However, if your orchid just doesn’t seem to want to rebloom after enough time has passed for it to do so, you might consider looking into the reasons why. Moth orchids have very sensitive roots, and won’t bloom if their roots are compromised. It could also be anumber of environmental factors, such as light being too bright or dim, temperature fluctuations outside of the plant’s preferred range, and even dust accumulation on the leaves.
Whatever the reason, it’s important to address and correct and problem. Once you do, your orchid will be able to focus its energy once again on putting out those beautiful blooms.
How Often Do Moth Orchids Bloom?
Depending on the variety of moth orchid you have, you can expect to see blooms anywhere from once per year to nearly constantly. Some species of moth orchids will bloom twice per year, but the most common type, Phalaenopsis phillipinensis, blooms just one per year for a few weeks before slipping back into dormancy.
If your orchid hasn’t bloomed at least once in the past year, you might need to reevaluate your care methods. Most moth orchids like to be treated difefrently than your typical houseplant, so be sure to check in on it every few weeks to ensure that everything looks healthy.
Why Proper Care Matters
If your orchid looks fairly sad, wrinkled, or otherwise limp and unlively during the time when it’s not actively blooming, it likely won’t want to rebloom. Instead of using all of its energy on reproduction, which happens when flowers are pollinated, the orchid will instead focus most of its energy on trying to stay alive.
On occasion, a moth orchid will make a last-ditch attempt to bloom before its demise in order to pass on its genes just the same as any living organism, but that doesn’t necessarily mean your orchid is healthy if this happens. Fewer or short-lived blooms are a telltale sign that this is what happened if your orchid’s reblooming attempt was rather sad.
So, how can we be sure our orchids are healthy enough to continue reblooming year after year? The anwer is basic maintenance. Repot your orchid once every one to two years or as needed when the soil breaks down, fertilize regularly with orchid-friendly food, and keep water from building up in the bottom of the pot.
Other factors, including temperature and humidity, are often what determine when a moth orchid will rebloom. Just as spring bulbs sprout when the temperature starts to increase, orchids need fluctuations in their temperatures to simulate the changing of seasons- especially if they live indoors, in a well-controlled environment, which brings us to the reblooming process.
How to Inititate Reblooming
This process can look a little different depending on factors like the last time your orchid bloomed, whether it’s healthy, and of course, environmental factors. Some moth orchids can rebloom constantly, while others may only prefer to bloom once every six months to a year. It can help to recognize which species you have, which you can use to gain information about how often to expect your orchid to bloom.
We’ll walk you through steps to take from a non-blooming orchid to a frequent rebloomer in order to help you get your orchid looking its snazziest.
Reblooming an Orchid With Flower Spikes
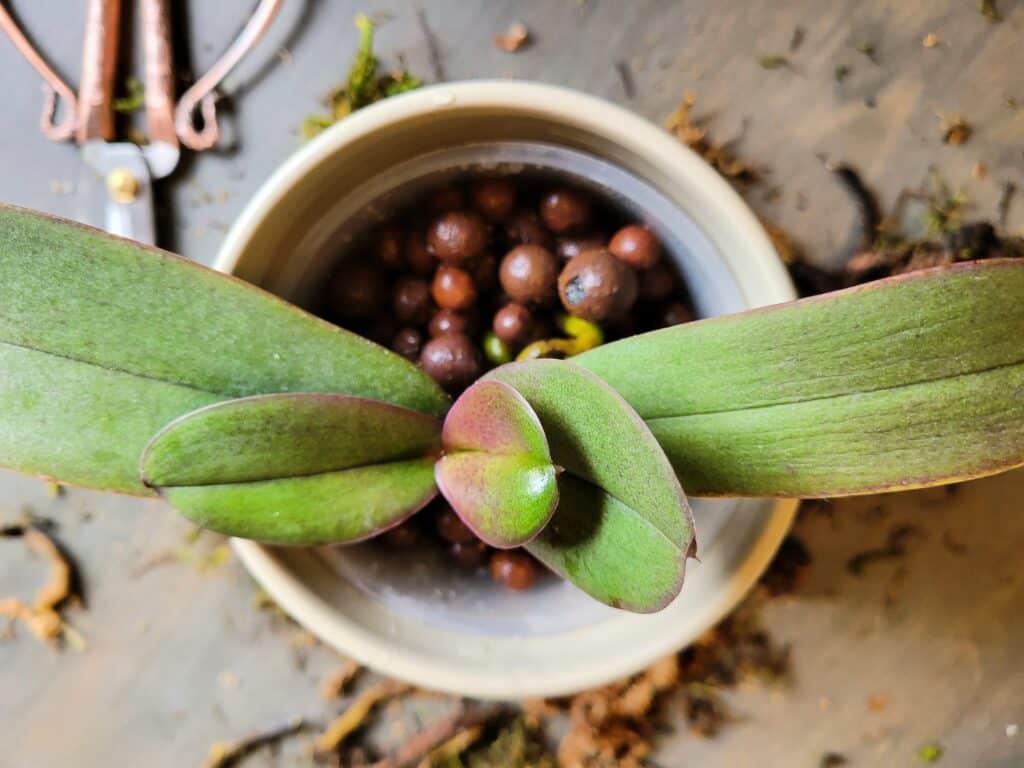
Orchids that have recently bloomed will still have their spikes. These are the “stalks” that produce flower buds, and, eventually, flowers. These spikes can essentially be reused as a basis for new spikes to grow from, since the necessary somatic cells are still present in healthy parts of it.
This means that if your orchid’s blooms recently withered, you can likely get it to bloom again directly thereafter from the same spike. The process itself is simple and easy; it’s the timing that really makes a difference. Here’s how to do it:
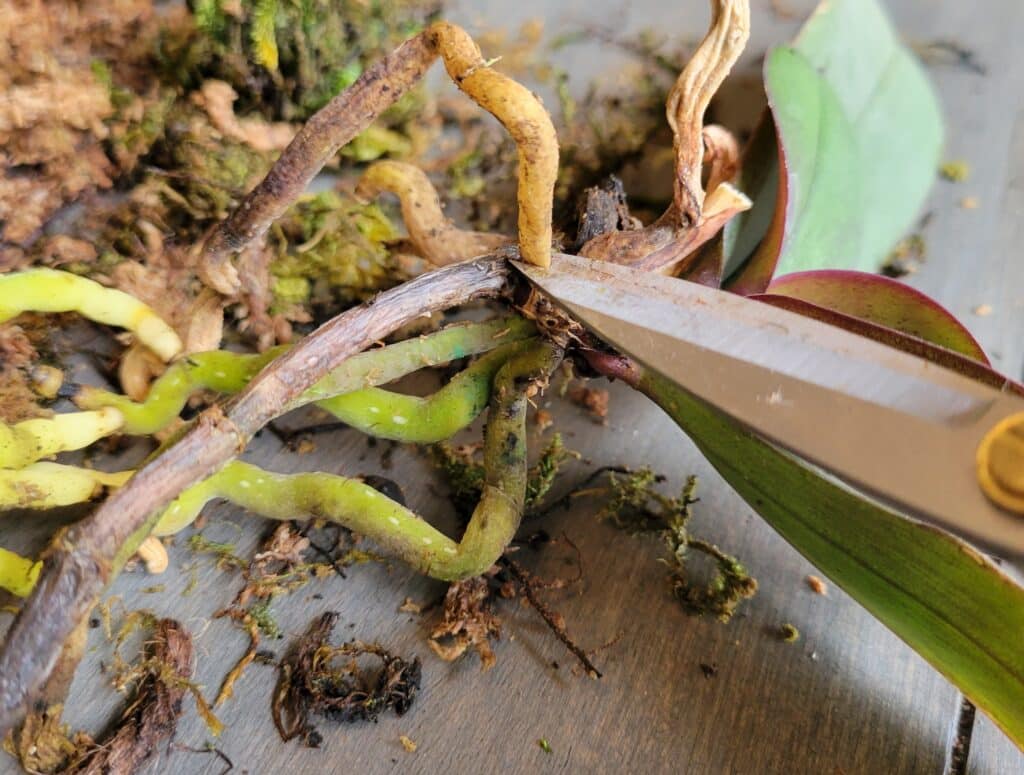
Step 1: Check the spike
Take a close look at the flower spike. Identify where the stem turns from green to brown; this will be your cutting point near the healthiest node. Since brown tissue is essentially dead and can’t be saved, you’ll need to remove it.
Step 2: Cut The flower spike
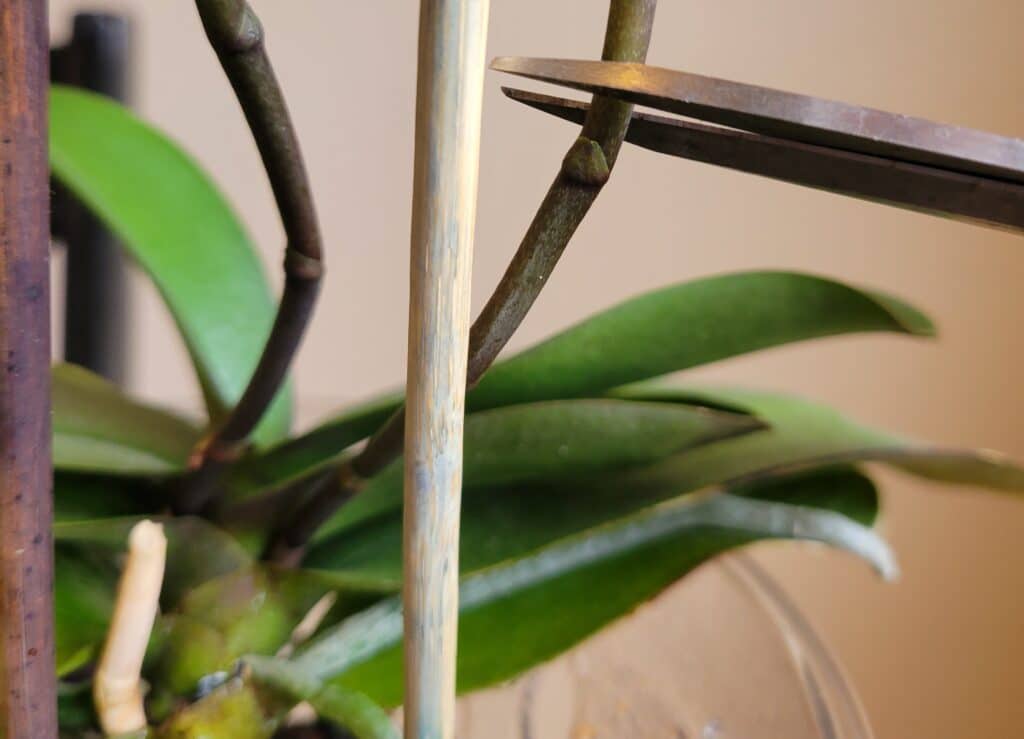
Using a pair of clean, sharp pruning shears or plant scissors, carefully cut just above the highest green node on the spike. There should be no discoloration below this point. To prevent pests or disease, use ground cinnamon or heavily diluted hydrogen peroxide to coat the newly cut wound.
Step 3: Apply keiki paste (optional)
While a perfectly healthy orchid will generally grow a new spike all on its own, a helpful compound often labeled as keiki paste, cloning paste, or cytokinin paste can boost the new growth and even help produce more plentiful blooms. Simply apply a small amount by poking a tiny hole in the last healthy node, then use a cotton swab to fill the hole with your paste.
Step 4: Wait and watch!
You should start to notice new growth within two to four weeks, but it can sometimes take longer. After all, a watched pot never boils, and a closely-monitored orchid will take ages to show any signs of change. If your orchid is in an area that never dips below 70 degrees or so, try moving it temporarily to an area that can drop below 65 degrees, such as near a door or drafty window, until you notice a new spike forming at the cut node.
Once the new spike has grown a few nodes of its own, move the orchid to its original location, or a similar spot that stays on the warmer side. Maintain humidity and fertilizer as usual, and allow the growing medium to dry ever so slightly before watering.
Reblooming a Non-Blooming Orchid
In its dormant state, an orchid can appear as nothing more than a couple of leaves on a stem. While some folks assume that when an orchid is done blooming, it’s done for good, this simply isn’t the case. However, if it’s been longer than the standard amount of time for your particular species to bloom again, you may need to intervene.
Check for environmental factors
Make sure that your orchid experiences a few weeks of slightly colder temperatures than normal if it’s in a place that remains at least 70 degrees fahrenheit year-round. Dropping the nighttime temperature to around 60 degrees, or even moving it to a cooler room at night, can help the orchid prepare for the coming “spring” season that you’ve simulated.
Another common reason orchids won’t rebloom is a lack of humidity. Without it, orchids can experience a phenomenon called “bud drop”, which consists of the flower buds drying out and eventually withering away. Sad, we know, but don’t worry; it’s preventable. Use the pebble tray method or a humidifier to crank up the humidity around your orchid.
It also helps to look at the amount of light your orchid gets during the day. East and South-facing windows can provide plenty of light, but direct sunlight needs to be filtered by a sheer curtain or by placing your moth orchid just out of the sun’s direct rays. If it doesn’t soak up at least six hours of bright, indirect light every day, consider investing in a lamp or grow light with a full-spectrum LED bulb.
Interestingly enough, pests can also fall under the environmental category, and they can prevent an orchid from blooming as well. Scale insects, mealybugs, spider mites, and even some types of mildew or fungus can infiltrate the roots of your orchid, which drains the health of the entire plant. Check under the soil frequently, and you won’t be sorry.
Check under the soil
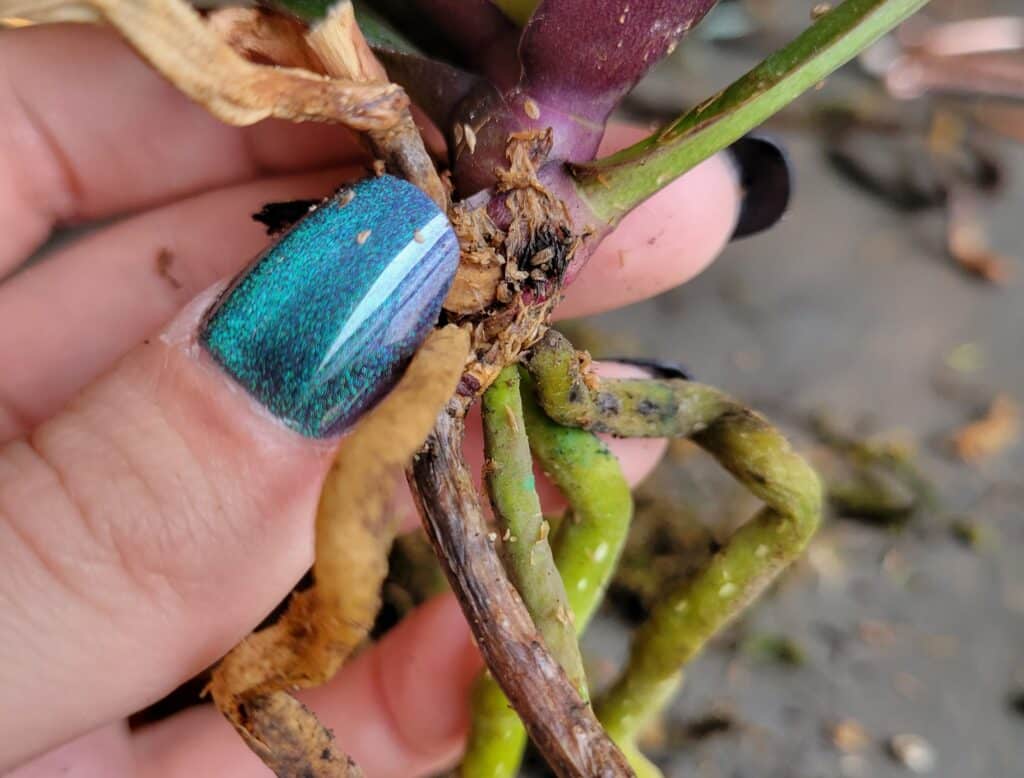
Moth orchids are notoriously prone to root rot, given the thick, fleshy nature of this type of root. Once root rot sets in, though, it can become nearly impossible to completely eradicate.
If you unpot your orchids to find dark, squishy or soft roots, root rot is the culprit. This issue should be treated immediately, since it takes very little time for root rot to completely kill your plant.

Healthy roots will appear white or bright, lime green. You can easily remove dead or rotting roots by snipping them at the base of the root with a pair of clean, sharp shears. Be sure to treat the remaining healthy roots with a 30% dilute of hydrogen peroxide before repotting.
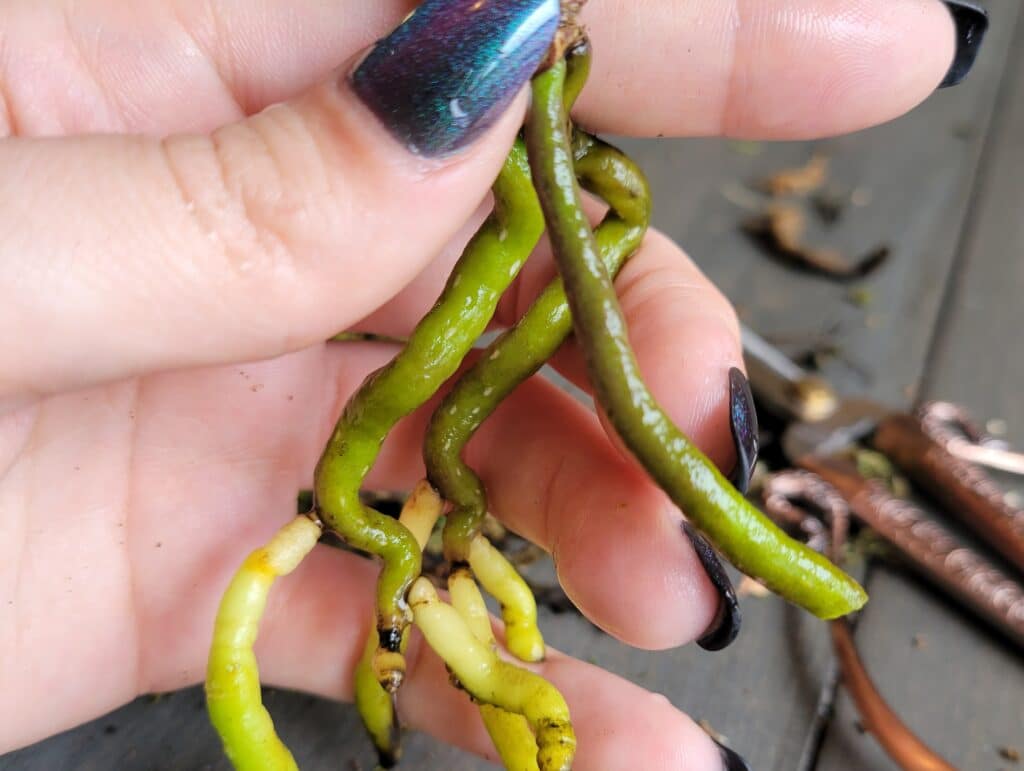
Root rot can happen for a number of reasons, but the most common is poor watering habits. Believe it or not, both underwatering and overwatering are contributors to root rot. A good way to tell there’s a problem with the roots is to watch the leaves for wrinkling, discoloration, and drying.
Fertilize and water regularly
If all else seems to be well, you may need to reconsider your watering and fertilizing schedule. Orchids that don’t receive enough water or fertilizer don’t have the resources to spare on blooming for reproduction. You should fertilize a moth orchid every one to two weeks during the active growing seasons, and about half as much during the dormant seasons.
While overwatering your orchid is bad, underwatering can be worse, especially if the humidity in the room is very low. This can cause a whole bunch of issues, but the big one is root death. Dry roots are dead roots if they aren’t kept at least somewhat damp, so never let the orchid medium dry out completely; instead, wait for the top half of the soil to dry before watering again.
Give your orchid a head start
If after a few weeks, your orchid doesn’t bloom under perfect conditions, you can try giving it a little boost with keiki paste. Although it can take some time for the orchid to prepare for blooming, this method can help pull along-dormant orchid out of dormancy.
Note: an unhealthy orchid, such as one with few healthy roots, may deteriorate further if forced to bloom without enough resources, such as water and food, which are absorbed through the root system.
All you need is some quality paste, a cotton swab, and a clean, sharp needle of any kind. use the needle to poke a small hole near the base of the orchid between two leaves, where a spike would ordinarily emerge. Then, use a cotton swab to apply the paste to the new wound.
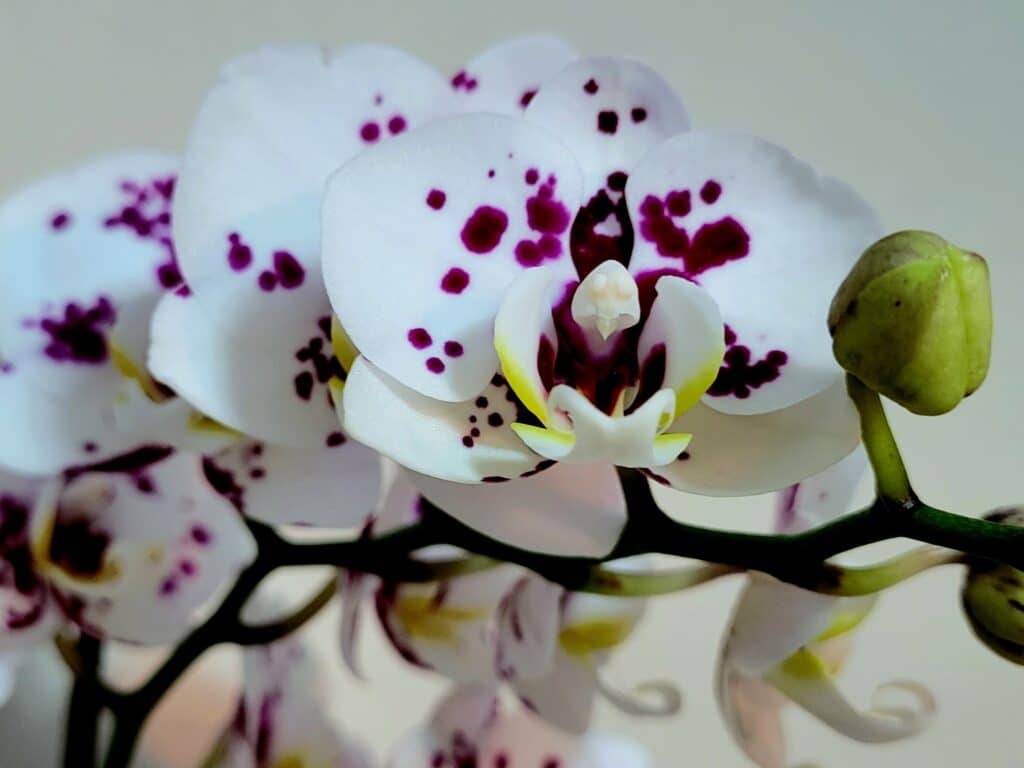
Within a few weeks, a new spike should appear. Take good care of the orchid to ensure that the new spike develops properly, and within two months, you should see those elusive, long-awaited blooms!
