
African violets are the long-lost love of everyone who lived in the latter half of the 20th century. You might remember seeing one on your grandparents’ windowsill, or in public libraries and doctor’s offices anytime from the 1970s to the early 2000s. Of course, now that textured plants have made a comeback, african violets are back in (for now!).
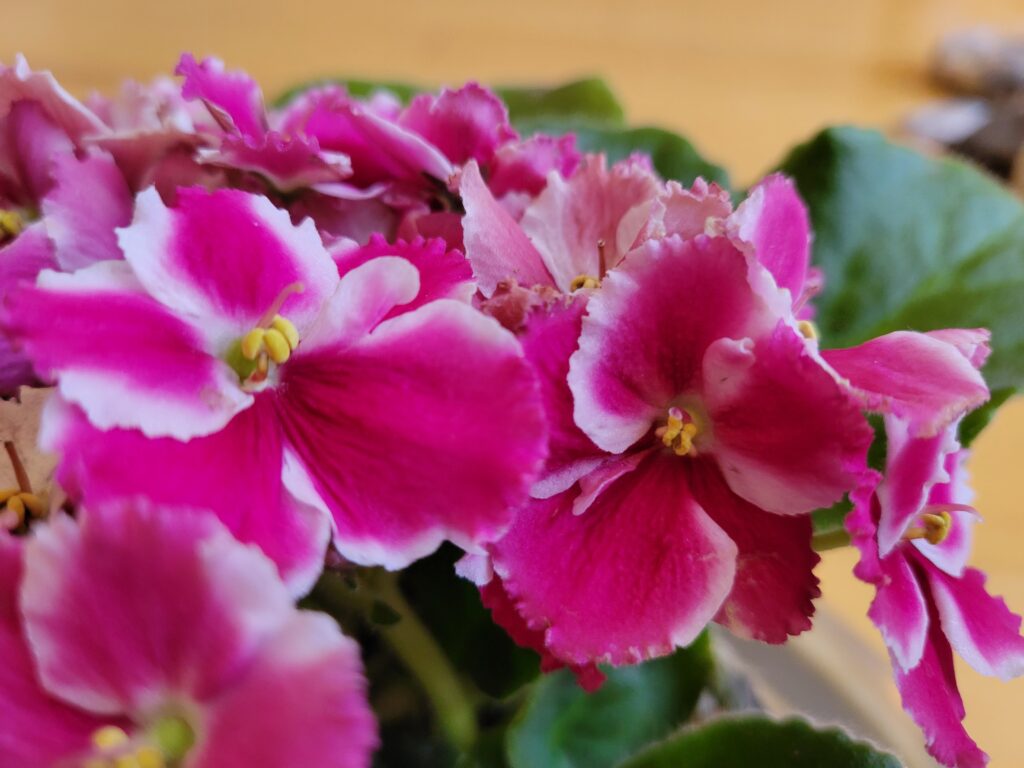
These fuzzy little plants are known for their coin-shaped leaves covered in a layer of soft, fragile spikes that look and feel like velvet. In the midst of these lovely little treasures bloom short stalks of clustered flowers, from single-color pinks, whites and fuschias to bi-color and layered-petal varieties.
Since african violets are so easy to hybridize, there are endless numbers of hybrids available on the market, some with variegated leaves, and others with larger, more profound blooms than their naturally-occurring counterparts.
History & Culture of African Violets
African violets were first discovered by botanists back in the late 1890s, when a German officer found a specimen and sent samples of the plant back to Germany for study. They originate in the East African rainforests, concentrated in areas with significant rainfall such as Tanzania. Interestingly, they didn’t become popular houseplants until the early to mid-1900s.
When they were first introduced into the United States, african violets were labeled as difficult plants due to their light requirements. Since most of the population lived in colder climates like modern day New York, the plants weren’t getting nearly enough light to survive.
However, now that modern society has access to artificial lighting, african violets are extremely popular houseplants, and are very fun to grow and propagate. They’ve won awards, formed dedicated horticultural societies, and even account for a surprising percentage of domestic and international horticultural trade.
Tools for African Violet Propagation
In order to successfully propagate an african violet plant, you should always have a set of basic gardening tools that you likely already have lying around. Fortunately, when you’ve got plants, these things just sort of appear in your toolbox. Here’s a basic list of everything you might need in order to propagate african violets.
Plant shears
The primary component of propagating any plant is a good set of plant shears. They should be sharp, relatively rust-free, and absolutely entirely sanitized. If you don’t have such a pair of shears, you might instead have a fresh razor blade or pair of sharp fabric scissors handy.
No matter what type of blade you use, it should be sharp enough to cut through paper without tearing it. It’s also important to disinfect any sort of blade you’ll be using so as to prevent the spread of communicable plant-borne diseases and pests.
Rooting hormone
While it’s not one hundred percent necessary, rooting hormone really sets things into motion for new cuttings, especially african violet cuttings. It takes african violets a good chunk of time to grow roots from cuttings without rooting hormone, which can be counteracted by simply dipping each cutting into a powdered or liquid rooting hormone.
Rooting hormone is also a sort of fail-safe, given that you also care for your cuttings well. Even when properly cared for, not all cuttings make it to maturity. This is because a plant cannot absorb nutrients or water without roots, which take time to grow. Some cuttings can sustain themselves until roots grow; others just don’t have the “grit”.
Water containers
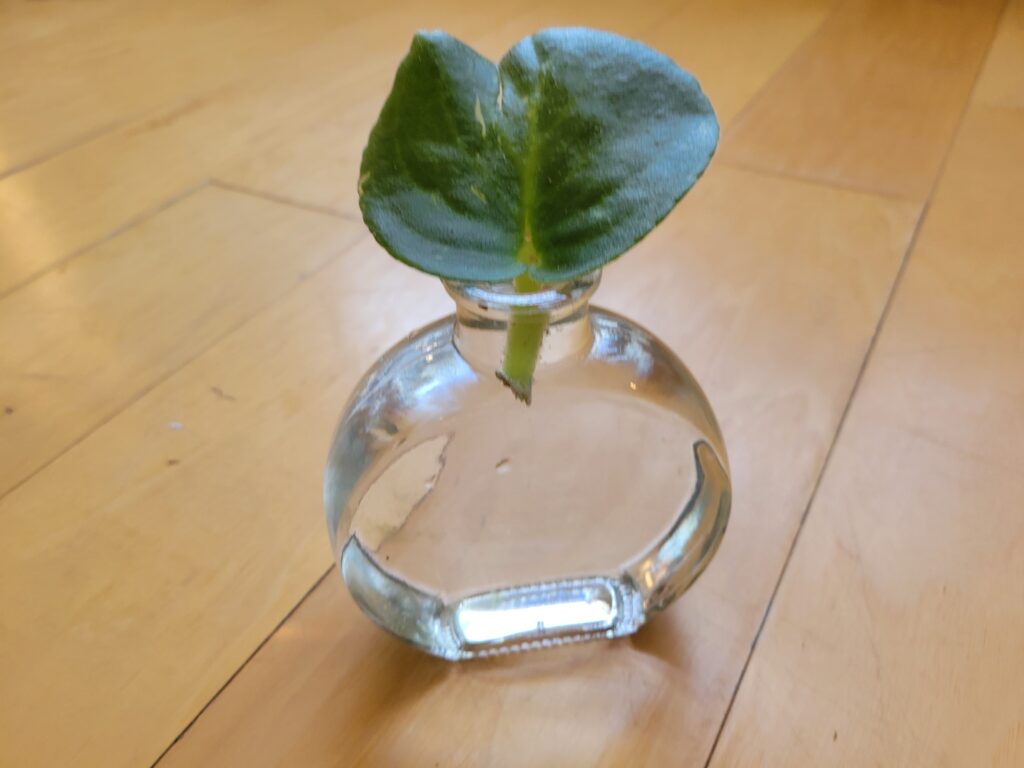
If you’re opting for the water propagation method, then you’ll need something to grow your cuttings in whilst they sprout roots that can be filled with water. Ideally, water containers should be clear glass or plastic, but they don’t necessarily need to be clear; colored glass or translucent plastic will work as well, so long as light can still get in.
These will need to be the right size for growing african violet cuttings. Think about how african violet leaves look; their stems are fairly short. To accommodate this, you’ll need something that allows these leaves to stand up straight without submerging the actual leaf itself.
Plant labels
If you’ve got more than one type of african violet, it may be difficult to tell them apart when they’re not blooming; you can imagine how tough it can be to identify them when there’s nothing but one leaf to go on!
For this reason, it’s a good idea to label each african violet cutting so that you know which one is which. You can also mark information such as cutting dates, repotting dates, and fertilize dates. Once you’ve filled up the space, you can simply clean them off and start again!
Pots & soil
Naturally, you’ll need pots and soil at some point on your african violet propagation journey. For the soil propagation method we’ll get into in detail below, pots are an essential from day one. However, for water propagation, you have a few weeks to pick up some small, 3-4” planters that you can transplant rooted cuttings into.
Generally, plastic pots are the way to go. Not only do they retain moisture well, but they also fit inside more decorative pots just perfectly. Don’t forget about trays, either; african violets need them for watering purposes!
Rubbing alcohol
If you don’t already keep a bottle in your home, now’s the time to start. Rubbing alcohol serves a great many purposes, ranging from sanitization to removing stains. However, it also serves as a wonderful resource for disinfecting plant tools and supplies.
Keeping these things clean by sanitizing them with rubbing alcohol can help prevent the spread of pests such as thrips, mealybugs, spider mites, and even mosaic virus. All of these gangly little pathogens can sneak around on your shears, so clean them between uses, as well.
Types of African Violet Propagation
African violets are fun to work with because they are super versatile and easy to grow. Since they’re so accustomed to tropical regions, they’re also easy to get started from just one leaf or root cluster. They can be both cut and divided.
Root division
In one given african violet pot, you’ll end up with more than just one plant after a while. Sometimes, african violets will reproduce right in their own pots. They can develop several plants from the original just by rooting elsewhere in the pot.
Of course, this does take time. If you’ve got an african violet that has been in its pot for a long time and has developed several “sets” of rosettes; each of these rosettes can be divided into a new plant. However, you can’t go chopping rosettes in half to produce more plants.
In this case, if you do have several rosettes in one pot, you can definitely unpot them and divide them by gently pulling from the base of each plant in the opposite direction. Sometimes, you’ll need to trim a little from the roots to loosen them up, but avoid trimming too much.
Once you’ve got these divisions separated, they can be replanted into their own pots. Root divisions will be a little sensitive to light and water for a couple of weeks, so be sure to shield them from excessive sun and give a little more water than normal until they get settled.
Leaf cuttings
Taking cuttings from an african violet looks much different than root division, from start to finish. Not only are you making more plants from just one plant rather than from several, but there’s a sort of waiting period to see a mature plant from a leaf cutting.
In order to take successful leaf cuttings from your african violet, you’ll need to focus on getting as long of a stem as possible underneath the leaf itself. A longer stem will support a more robust root structure, which is ultimately what we’re looking for.
Essentially, the leaf will need to be cut at an angle. From here, the newly cut stem is dipped into a rooting hormone powder or liquid, then propagated either in water or in soil. Sometimes, soil can be swapped out for porous, moisture-retaining materials like leca, vermiculite, or moss.
Then, it takes several weeks to grow roots. The cuttings will need to be tended regularly in order to thrive and establish roots, but over time, they will grow into beautiful, mature plants that can be propagated themselves!
How to Propagate African Violets
While there are tons of ways to propagate a plant, there are two that are easily obtainable at home using what you likely already have at your disposal. These will be soil propagation and water propagation. The first involves planting cuttings in water temporarily, while the second heads straight into soil right away.
Water Propagation Method
For this method, you’ll need to have ready your shears, rooting hormone, a clean water vessel such as a vase, and rubbing alcohol. It’s also a good idea to have some fresh, clean water available; distilled is best, but purified will do just fine. Try not to root in mineral-rich tap water. With that in mind, let’s get started!
Step 1: Gather your materials.
Before you get carried away, first make sure you have everything you need in one place. Identify a good work station, whether you’ve already got one set up or are just using the kitchen counter. Either way, your workspace should be clean and sanitary. We don’t want germs in the plants!
Take this time to use rubbing alcohol to sanitize your tools, and do a quick swish of the inside of the water vessel you plan on using. Algae and fungi are not welcome guests, but they’ll certainly try to move in on your cuttings. Dry out the water vessel entirely before using with water.
Step 2: Identify your cuts
Before you go nuts with collecting leaves to propagate, first you must decide how to cut them. Depending on how many leaves you plan to take for cuttings, you’ll need to maintain balance throughout the crown. This means planning which leaves to take.
When it comes to leaf cuttings, the idea is to take an even amount from every side if you’re taking more than one cutting. If this is your first time, you might try two or three cuttings in case one of them doesn’t make it. Once you’ve planned out which leaves you want, it’s time to cut them!
Step 3: Making the cuts
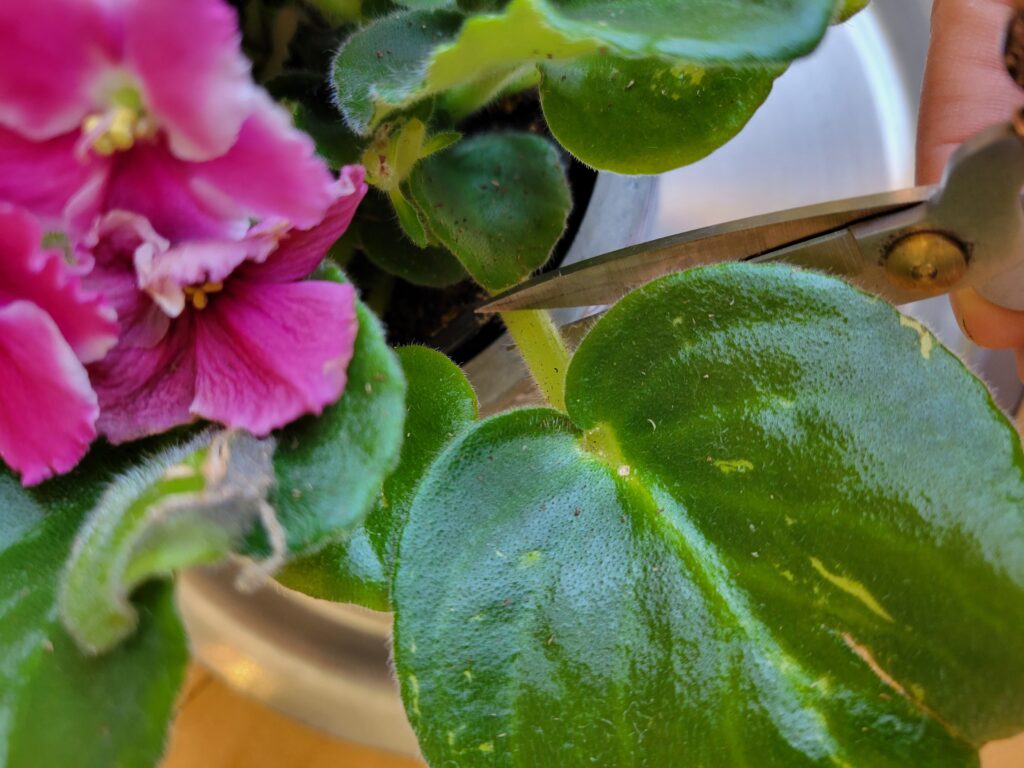
For this step, you’ll need your sharp, clean shears, scissors, or razor blade. Try to find a good spot that leaves enough stem to sit properly in water without the leaf being submerged. At least a centimeter is good, but the more, the better.
Try to cut at a 45 degree angle; if that’s not possible without damaging another leaf, you can always opt for a different angle and trim after. The cuts should be one fell swoop, meaning one quick cut for each leaf cutting to remove it from the original plant.
Step 4: Rooting hormone
Once you have your cuttings all in a row, you can start dipping them in your rooting hormone. If you’re using a powdered rooting hormone, there’s no need to let them sit before sticking them in water; however, for liquid hormones, try to let them sit for at least 30 seconds before putting them in water.
Although rooting hormones may look different, they all serve the same purpose: building a good root structure. Make sure that at least the tip of the stem where it was cut is dipped in the hormone to promote new root growth faster.
Step 5: Into the water
At this point, you should have a water vessel ready with fresh, clean water for your cuttings to reside in until they can grow their own roots. Make sure that only the stems are left submerged in the water, and that the leaves can freely poke up out of the water without becoming soggy or being squished.
Having enough room for roots to grow is another factor. Make sure that at any point, there’s always enough room to pull the roots out of the water without them catching or rubbing against the top of the water vessel. This can damage the roots, and possibly even kill your cutting.
Step 6: Water maintenance
In order for your cuttings to take root, you must maintain their living situation. Since they’re in water, this water needs to be changed out regularly to avoid buildup of toxic chemicals and allow the cuttings to focus on rooting rather than self-defense.
Once you get bacteria in the water, the whole thing needs to be cleaned out and sanitized. Your cuttings may not survive something like an algae explosion, but if there’s just a little bit of tap water-native bacteria in the water, they’ll likely survive. Rinse out the water and replace it with fresh, clean water every other day!
Soil Propagation Method
This method is a little easier than the water propagation method, mainly because it’s easier to water a cutting every few days than to actively refresh water-dependent cuttings every day or two. While it may take longer for cuttings to root, soil propagation is a fairly safe bet for beginners. Make sure you have several small pots full of moist soil nearby!
Step 1: Gather your materials
This is the prep step, where you have the chance to get everything ready to go in one place. That way, there’s no running around in circles looking for rooting powder or a mason jar. If you don’t have a dedicated work space, a clean kitchen counter or table will do.
Take some time to thoroughly wipe down all of your tools and pots with rubbing alcohol. Not only does this prevent the spread of plant-borne infections, it also helps to refresh some of your plant tools and pots. Chip away the old dirt and keep your cuttings healthy all in one go!
Step 2: Plan your cuts
Give yourself a few minutes to decide which leaves and how many you’ll be removing from the original plant. You can mark them with twist ties or string if need be so that you can remember which ones you’re going for when it’s time to give them the snip.
If you’re planning on taking more than a few cuttings, remember that african violets like to be balanced, meaning that they have an equal amount of leaves on each side. If the amount of cuttings you take thins out the original plant, make sure you do it evenly around the outer sides.
Step 3: Making the cuts
The most crucial step: taking the cuttings. It’s all easy going from here. To take your cuttings, simply use your sharp, clean shears or other blade to make a quick 45-degree angled cut at the base of each stem.
Ideally, you’ll want at least a centimeter of stem underneath each leaf, so that they can happily stand up on their own in their pots without being too topheavy. If the leaves are too big to allow for support, you can either snip off the top half of the leaf, or use a small support to help it stand up.
Step 4: Rooting hormone
After you successfully snip all your cuttings, it’s time to give them a dip in the rooting hormone. For powdered rooting hormone, dip into the powder just enough to cover the exposed cut at the bottom of the stem of each leaf. For liquid rooting hormone, dip about 3 mm of stem into the mixture, then let them sit for about 30 seconds.
It’s a good idea to always use rooting hormone of some kind when you do soil propagation for water-sensitive plants like this one. That way, the plant can grow roots faster, which will keep it from wilting or dying off before it’s able to grow new roots.
Step 5: Into the soil
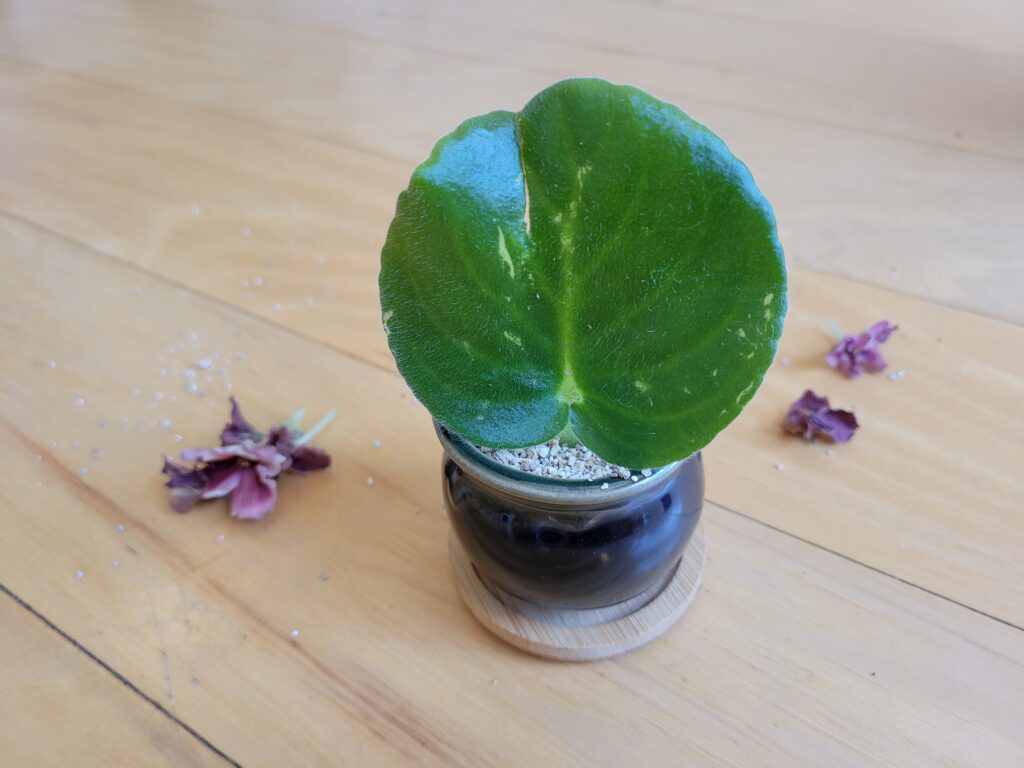
Now, we can segway into the actual planting! Now that your cuttings have been snipped and treated, it’s time to introduce them to their new homes. This is where the pots with moist soil come in. Ideally, one or two cuttings will fit comfortably into a four-inch pot, but only one will fit into anything smaller.
To plant your cuttings, simply press their stems gently into the soil until the bottom of the leaf itself is just touching the top of the soil. It’s okay to get a little soil onto the leaves themselves; they won’t mind. Be sure that your cuttings are able to stand up straight on their own, so that they can continue to grow towards the sun!
Caring for Cuttings
During the first two weeks of development, your cuttings will likely need lots of care from you in order to grow up into full, mature plants. For water propagation, this means keeping the water squeaky clean until roots begin to grow. Changing it out every two days is usually sufficient.
Of course, for soil propagation, the first two weeks will be focused on top watering, rather than the typical bottom-watering method that african violets prefer as they mature.
Since there are no roots yet to soak up water from below, all the water these little guys receive will be through the soil directly surrounding the stem. Without allowing the pots to sit in water that’s drained out, it’s your job to keep the soil moist.
Once the first couple of weeks are out of the way, you can loosen up a bit. Instead of changing water out every other day, you can switch to two or three times per week. With watering soil cuttings, the soil can be allowed to get a little bit more dry between waterings, but never fully dry.
After about four to six weeks, the first roots should be making a notable impact on how much water the cuttings can absorb. In most cases, new growth will begin to appear in about eight weeks from the date the cuttings were taken.
If after eight weeks you’re still not seeing any new growth, your cuttings may need more light. Cuttings should be offered bright, yet indirect light for most of the day. Try to offer full sun indoors with a sheer curtain or by placing them adjacent to a bright window.
What to Expect
Once your african violet cuttings have started to really take off, meaning they’ve developed at least two sets of leaves, it’s time to transplant them into something a little more comfortable. Wait for roots to start peeping out of drainage holes in starter pots to repot.
For water propagated cuttings, the time to plant in soil is when additional leaves begin to grow from the cutting you took. You should see a cluster of small leaves forming at the base of the crown. To prevent these leaves from water damage, you’ll need to repot the plant itself.
The best part of propagating plants at home is the satisfaction of planting your hard-earned cuttings into pots of their own to be independent, mature plants on their own. To give them a good start, plant them into pots that give them a little room to grow.
Since african violets do well in smaller pots, you can simply go a size up from any starter pots that you may have used. These can be placed in decorative containers, but they absolutely must have their own drainage holes that water can travel freely through.
Mature african violets should be handled with care, as their larger stems are incredibly easy to snap as they age. They typically require bright, indirect light, but can tolerate moderate light levels with warmer temperatures.
The most important thing to remember about african violets is that they need to be watered from the bottom once they’re mature; set them in a shallow tray of water for an hour when they need moisture, but never let the soil dry out entirely.
Your african violets should live for many, many years, and can someday be propagated themselves! For extra fun, try hybridizing african violets at home; it’s fun, easy, and a great way to learn about plant genetics.
