
Alocasia is a plant that stuns all on its own. The sheer mystique that surrounds alocasia is what makes it so hard to resist, especially if you love tropical plants.
Most alocasia varieties have very dark green leaves with some lighter colored accents, and some hybrids can even offer deep reds and maroons. Other, larger types typically grown outdoors are a lighter shade of green, with much larger foliage.
These are tubers, which grow from bulbs underneath the soil. They divide each year to make even more luscious foliage. Even better is that they are super easy to propagate.
It’s one thing to have a big, beautiful alocasia plant in your house, but what’s better than one alocasia? Two alocasias! Depending on how big your particular plant is, you could end up with several smaller plants from just one pot.
Of course, when it comes to the exotic, deep colors that alocasia has to offer, there’s nothing better than having more of them. Let’s dive in to exactly how to make this happen, and when it’s best to do so.
History and Culture of Alocasia
Despite it being a fairly newly-recognized plant in the houseplant trends market, alocasia polly has been around for decades. Bred in the 1950s, this plant is a man made hybrid that works wonderfully for indoor decor, as its height rarely tops a foot and a half (or 18 inches).
Other types of alocasia have been cultivated for much longer; alocasia itself is native to Southeast Asia, which is a high-humidity environment with moderate sunlight. The larger types, which are grown outdoors, are the ancestors of the common alocasia houseplants we have today.
While many, many hybrid species have arisen from this genus, alocasia polly is still the most popular to keep as an indoor plant, and for good reason. It’s a very easy plant, and its beauty stands out in any setting.
Rhizomatous Propagation Culture
Most plant fanatics are familiar with the process of propagating plants that grow from bulbs, but noone generally stops to think about why you can’t propagate alocasia and other similar plants using the very popular water method.
The fact of the matter is that, while most other houseplants (especially those that vine) can be propagated in water, bulbs just simply don’t work that way. Here’s a brief description as to why this is.
In plants that can be propagated in water, you find nodes, which are typically at the base of a leaf or other area where a swollen spot on the stem is located. Inside these nodes are a plant’s sex cells; remember, plants only have two kinds of cells, which are sex cells and somatic cells.
Somatic cells, like those in all parts of the alocasia except the bulbs, are for dividing cells to make new plant tissue, and for converting food into energy along with other assorted processes. Sex cells located only in the bulbs are the cells that are capable of producing new plants.
Since alocasia grows from a bulb and doesn’t have any leaf nodes, they can’t be propagated in water without at least part of a root structure. It just doesn’t happen. That being said, propagating them is actually super easy!
When to Propagate Alocasia
Typically, propagating almost any plant should be done just before the dormant Winter months. This rings especially true to rhizomatous plants like alocasia. During the cold months, the plant is focused more on root growth and bulb division than on growing more foliage.
Once the plant has died back or stopped growing for the year, the plant enters a cool-down state where it has the chance to focus more on bulb growth. This is the time to divide the bulbs. Once they’ve been planted in their own pots, they’ll grow into their own beautiful plants.
Both indoor and outdoor alocasia are best divided in the late Fall. Try to aim for when the weather starts to shift to cooler mornings and earlier nightfall. This is when alocasia starts to put more energy into bulking itself up underground.
Once they’re in their own pots, newly divided rhizomes will begin to grow new roots, absorb nutrients from the soil, and prepare for the coming growing season. Alocasia doesn’t need as much water when it’s not trying to put up a set of new leaves, but more on that later!
Other than during the dormant season, you can also repot any time of the year to rescue a root-bound alocasia. These guys don’t like to be crowded. Too many bulbs in one pot with not enough soil leads to malnutrition and stunted growth.
How to Propagate Alocasia
The one way to propagate alocasia is to divide the bulbs. This is a fairly easy process, and it doesn’t require any special tools or equipment; all you need are gloves, a few extra pots, and some high-quality potting soil. Try to go for soil that has perlite for moisture retention.
This method works for all types of alocasia, whether it’s an indoor or outdoor variety. Here is a step-by-step guide to propagating alocasia that will have you enjoying your new alocasia plants in minutes!
Step 1: Gather your materials.
By now, you have a pretty good idea of what you need to get the job done. However, it’s best to have everything you need in one place to make things easier on you. Make sure you have your new pots, your gloves, sufficient potting soil, and a watering can on hand before you begin.
This is good practice for any plant-related activities; repotting, propagating, and even trimming is lots easier if you’re not running around looking for the shears you thought you put away!
Step 2: Unpot your plant.
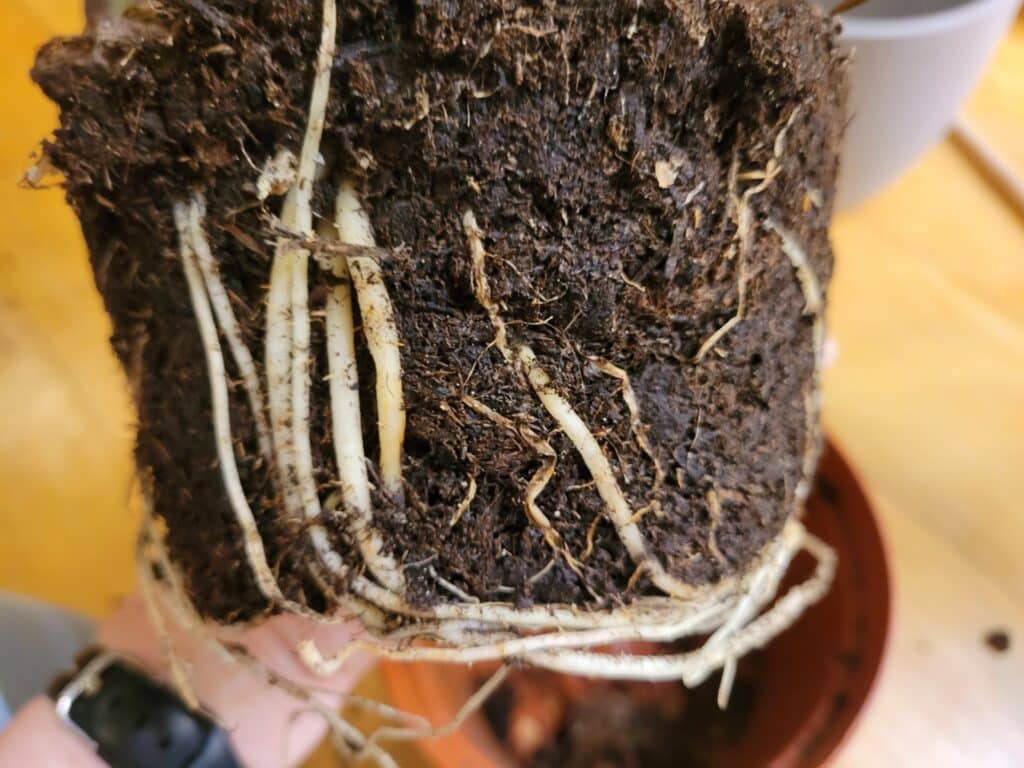
Very gently remove the alocasia from its pot. If the roots are stuck to the bottom of the pot, you can soak the entire thing in water for about two minutes to soften things up. From here, don’t be afraid to tear a few roots that simply won’t let go. The plant can replace a few lost roots, so don’t worry about them!
Break any compacted soil away from the roots in tiny chunks. Doing this under running water can be helpful, especially for getting those trickier bits from the tops of the root clusters. Once you have the majority of the soil removed, you can start dividing.
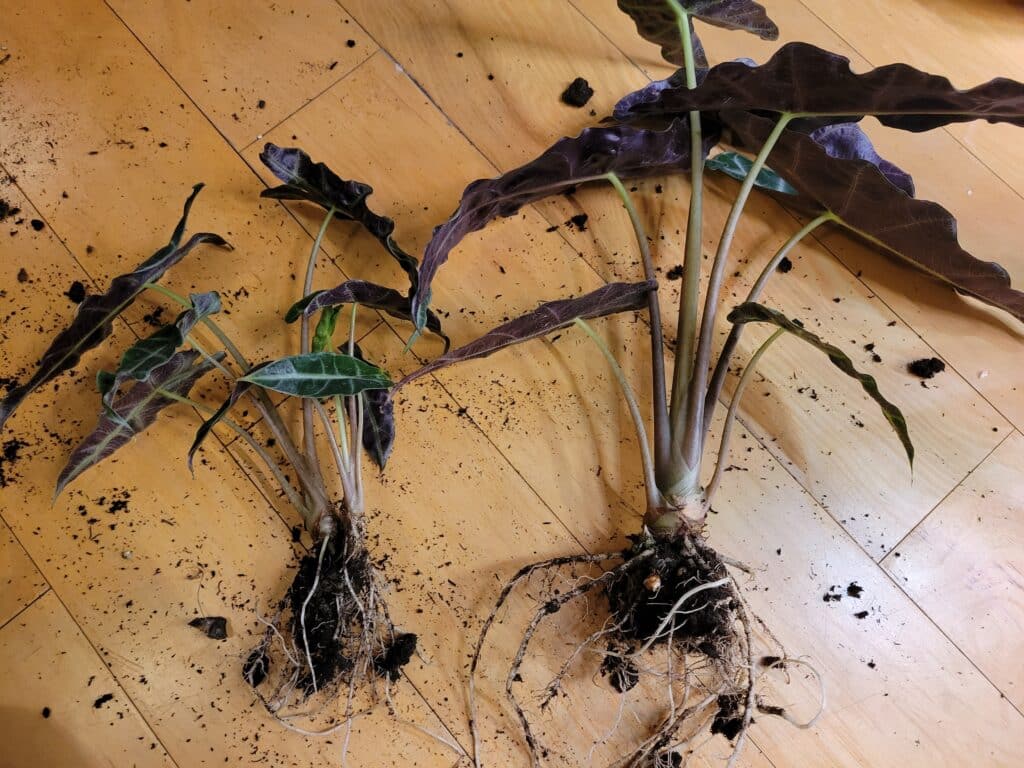
Step 3: Divide the rhizomes.
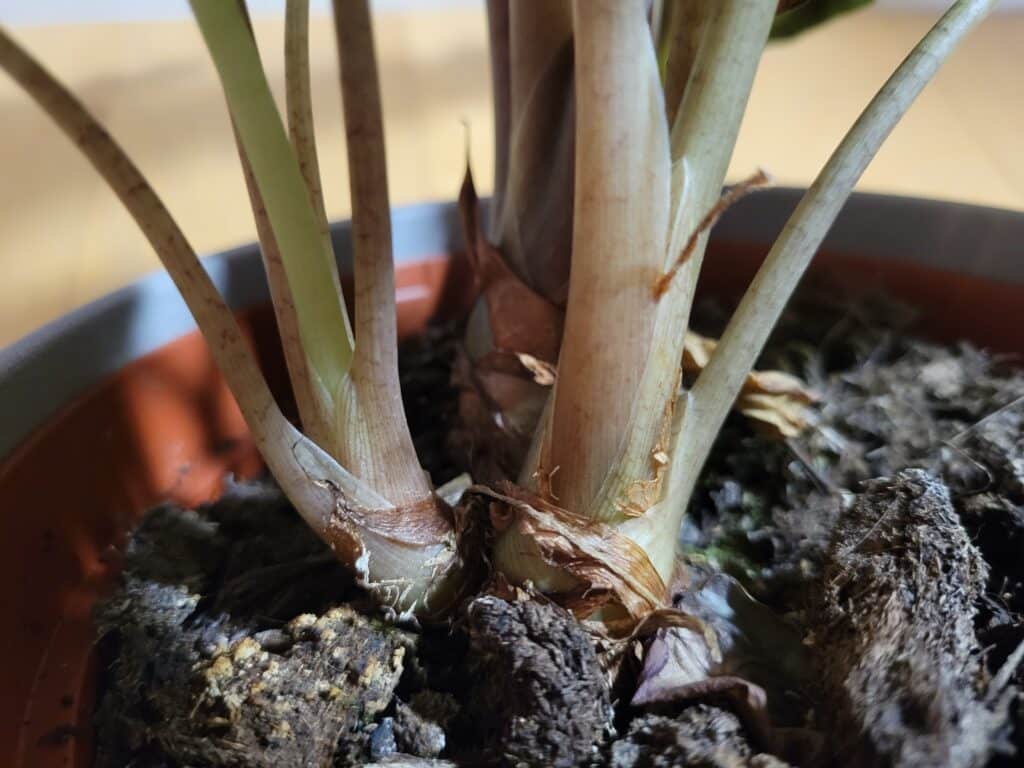
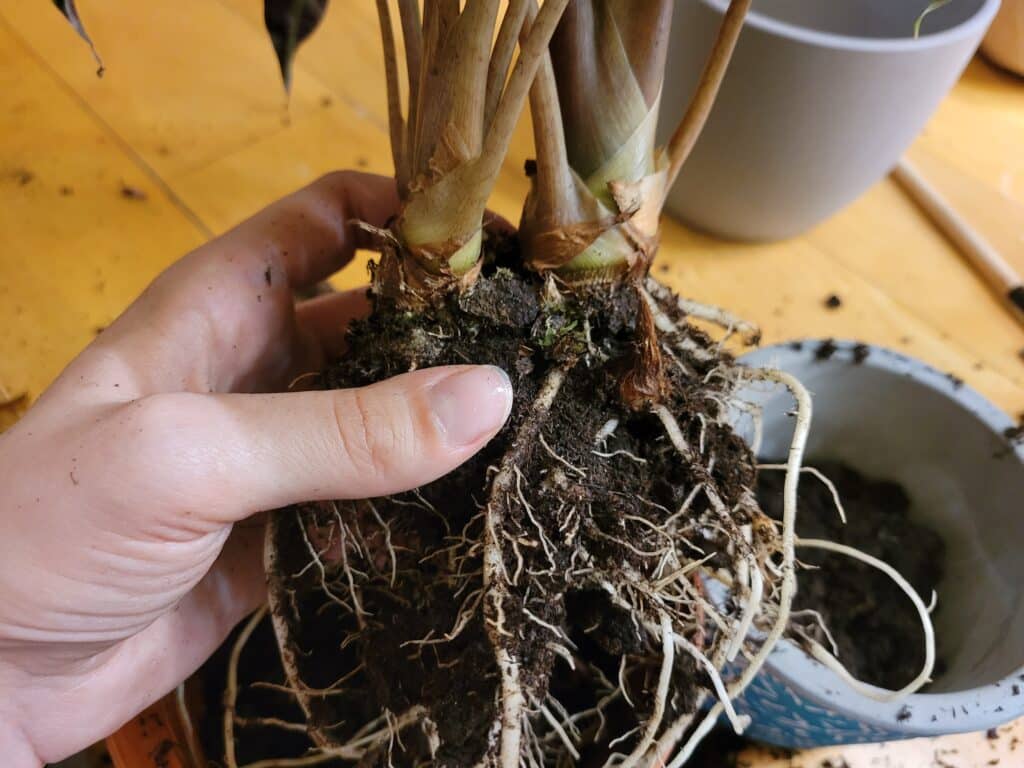
Once most of the soil is out of the roots, you can start to see where each root cluster stems from. The bulbs should be more noticeable; each of them has their own stem cluster growing above the soil, and each has their own rootball.
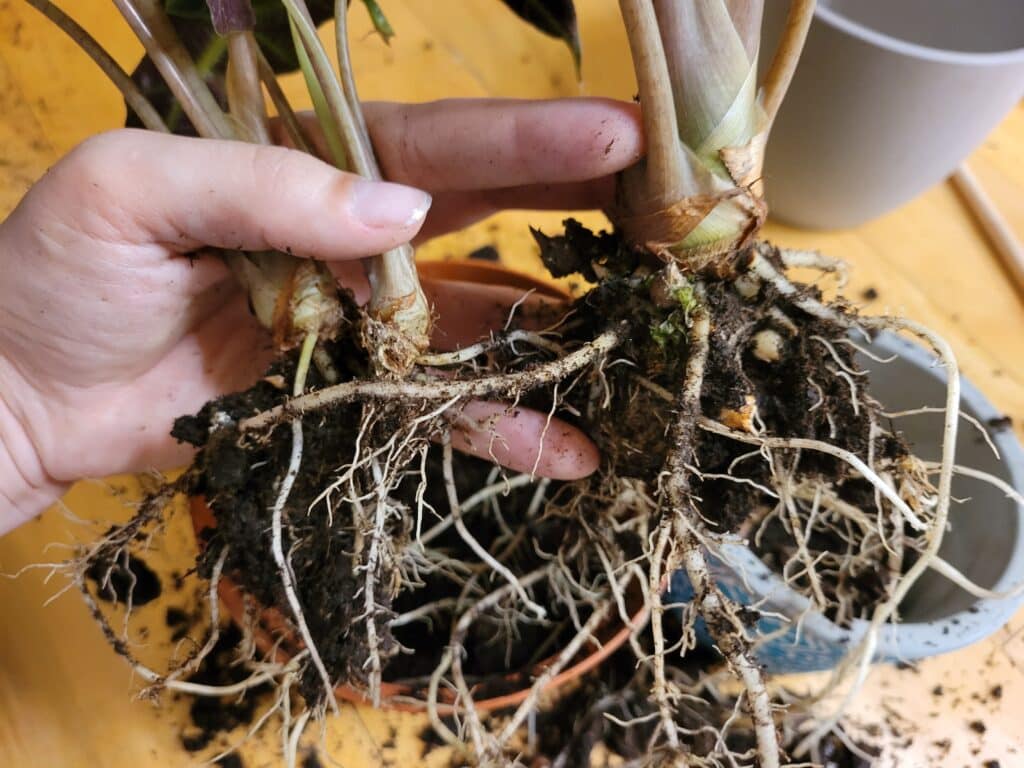
From here, you can start to gently pull the bulbs away from one another. Be as gentle as possible so as to avoid any unnecessary damage to the roots. Try carefully pulling in different directions if you’re finding that there’s not much give between two bulbs.
As a very last resort, you can try to identify the roots that are tangled too far to be loosened and sever them with sharp, clean shears. Roots are the most vulnerable part of a plant, so be sure that the shears are clean and your cuts are quick.
If there are multiple bulbs in one pot, you can remove or keep as many as you like for each pot. Some prefer to leave a few together, while others like to have more smaller-sized plants around. It’s entirely up to you!
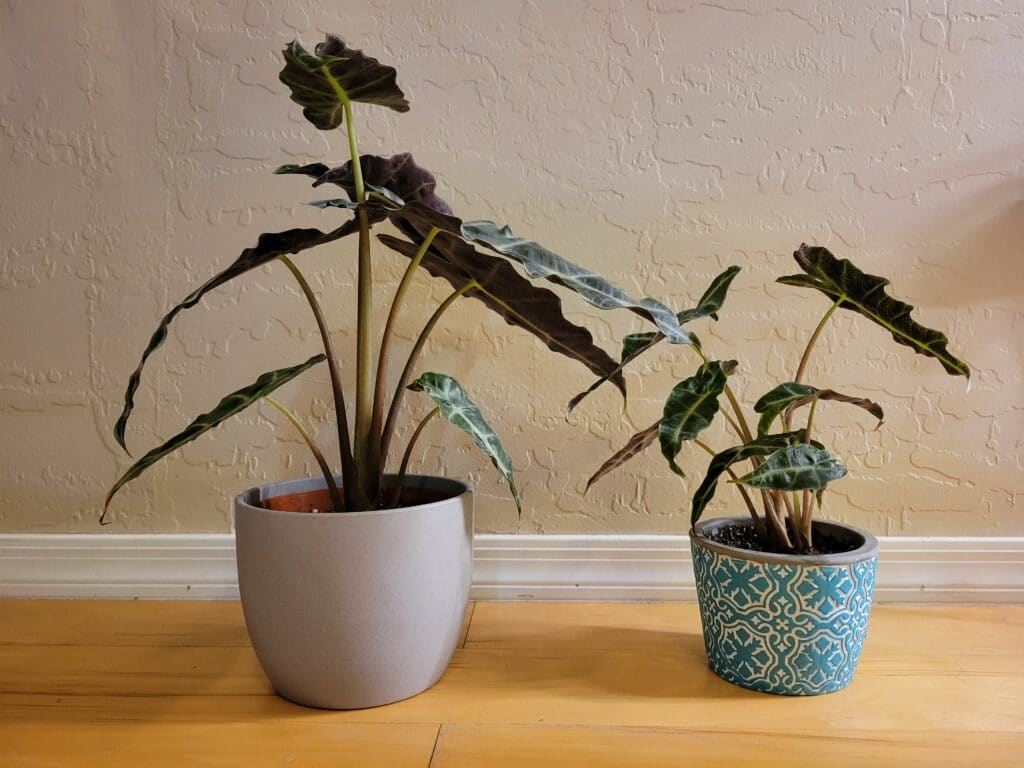
Step 4: Repot the rhizomes.
Now that you have all your newly separated plants, it’s time to show them to their pots. You should have pots that are the appropriate size for each plant; too small, and they’ll be rootbound, but too large will hold excess moisture and cause rot.
Try to find a pot that gives enough room for a single rhizome to have its own inch of space all the way around it. If you have two or three rhizomes, they should each have enough space to be separated from each other and the pot by at least an inch.
Fill each pot ⅓ full with soil, then place your rhizomes in their respective pots and fill them up with soil until there’s about ½ inch of space between the top of the soil and the rim of the pot. Ideally, the rhizomes should be sticking out just enough to see, so that no foliage is ever actually touching the soil itself.
Once everyone is in place, give them a good watering all throughout to ensure that the soil settles in nicely around the roots. The soil will compact and the plants should be held up by the soil alone. Make sure to water enough to saturate all of the soil in the pots, and drain out the excess completely.
Caring for Your Alocasia After Propagation
Now that you have more alocasia plants, you’ll need to make sure they have everything they need to flourish. Since alocasia came from a somewhat gloomy, humid environment, you’ll want to try to replicate these conditions as much as possible.
Before you turn your house into a muggy marsh, though, take a look at these basic care guidelines to help you grow the best alocasia plants possible. It’s easy once you get the hang of it!
Light
In the wild, alocasia are accustomed to growing under trees with large canopies. While these canopies typically blot out lots of light, quite a bit of the sun’s light still shines through; so alocasias like to have bright light, but not direct light.
Like most tropical plants, alocasia likes to be near enough to a bright window to reap the benefits of sunlight, but not in the direct path of the day’s harshest rays. Too much light will burn the leaves of darker types of alocasias such as Alocasia Black Velvet. Try placing in a bright room with filtered light for best growth results.
Water
Like all other tubers, alocasia doesn’t like its bulbs wet for long periods of time. This actually causes lots of problems, such as root rot and bulb loss. When the bulb of an alocasia dies, the plant itself dies. Prevent overwatering by only using pots with good drainage.
On the other hand, alocasia is a tropical plant. Frequent misting helps maintain the humidity levels that alocasias like without dumping too much water into the soil. However, once the top half of the soil dries, it’s time to water again.
With water-picky plants like alocasia, a moisture meter can be your best friend. Use one to measure how much moisture is in the soil before you water; there should be some moisture, but not enough to read as “wet” or near the wetter end of the scale when you water.
Rainforest water is much more pure than what we get from the tap. Alocasias, therefore, are sensitive to minerals and chemicals in tap water; if your is especially heavy to these elements, consider using a filtered pitcher to water your alocasia collection! This helps out big city plants that are on the sensitive side.
Fertilizing
During the growing season, alocasia needs lots of nutrients to produce the foliage we so love. Without them, your plant may end up looking worse for wear and overall pretty wimpy. To avoid this, fertilize with a weak, balanced fertilizer every month during the Spring and Summer.
During the colder months, dial it way back to about once every three months. Alocasia aren’t using all those nutrients when they aren’t growing, so those nutrients build up in the soil and cause soil acidity.
A good way to keep this from happening is to fully rinse the soil every six months or so. To do this, simply water it until water flows out from the bottom for at least five minutes, then allow the pot to drain out entirely. Don’t water again until the top half of the soil is dry, then go back to your normal watering routine.
Troubleshooting Alocasia
Low-light plants like alocasia can be tricky, especially when they’re bulb growers. While typically, alocasias aren’t incredibly fussy, some things can set them off. Whether it’s temperature, light, water, or even pests, there’s always something out there that can cause your alocasia to throw a fit.
Drooping leaves
One of the most common occurrences with alocasias are drooping leaves. This can happen for a multitude of reasons; first and foremost is the possibility of over or under-watering. Check to see that the soil can still hold and drain water effectively. If it stays saturated or doesn’t hold water, it’s time to repot with new soil.
On the other hand, overuse of fertilizer or pests can cause dropping leaves. Check for common pests like spider mites and mealybugs on the undersides of the leaves near the stems; this is where you’ll find pests, if they are present. You can always rinse excess fertilizer out of the pot an alocasia is in.
Browning leaf tips
If the tips of your alocasia’s leaves are turning brown and crispy, it’s trying to tell you that it needs more humidity. A humidity range of 30-40% at minimum is usually enough, but if there’s airflow or warm temperatures in your home, the humidity tends to drop off.
The best way to beat this problem is by using a plant humidifier. If you’ve already got one, you can simply place it about two feet away from the plant and use a low setting to create a nice humid area for it.
If you don’t have a humidifier (or a place to plug one in), a cheaper and easier way to create humidity is by placing a tray full of pebbles and water underneath the pot. This creates a micro-environment that acts as a bubble of humidity around the plant itself.
If you’re a more committed plant owner, you can also try to mist the leaves of the plant twice per day to simulate humidity. The plant can hang onto this moisture for hours, and it will thank you for the extra effort!
Spider mites
The burden of many a gardener, spider mites are continuously a problem for anyone who’s ever bought a plant and brought it home. Have you ever noticed those fine, web-like clusters of little white specks on a plant? That’s them.
You can easily eliminate spider mites by thoroughly rinsing the plant’s foliage twice per week for two weeks. Make sure to maintain humidity levels where your alocasia grows, as well, since spider mites love a dry climate and absolutely cannot stand moisture. All the better, though, as alocasias love humidity.
If these little terrors are still bullying your alocasia, you can try spraying a mixture of one part castille soap to six parts water on the undersides and tops of all the leaves and stems of your plant. This method is used to eradicate lots of other pests, too!
Root rot
The biggest bummer of them all is an alocasia with root rot. It can be incredibly difficult to reverse root rot in rhizomatous plants, and alocasia is no different. If your alocasia ends up with squishy bulbs, you can start by watering half as much as you normally would.
If you’re lucky enough to live in a warm climate, setting them outside in the shade in temperatures over 70 degrees fahrenheit is a great way to reduce the overall moisture inside the pot.
If the issue is that the soil doesn’t dry out very quickly after watering (it takes a week or more before watering again), then it’s time to repot with new soil. Remove as much of the old soil as possible, then repot into a soil mixture with lots of perlite and some bark. Giving the roots that bit of aeration will help them recover from being constantly saturated.
