
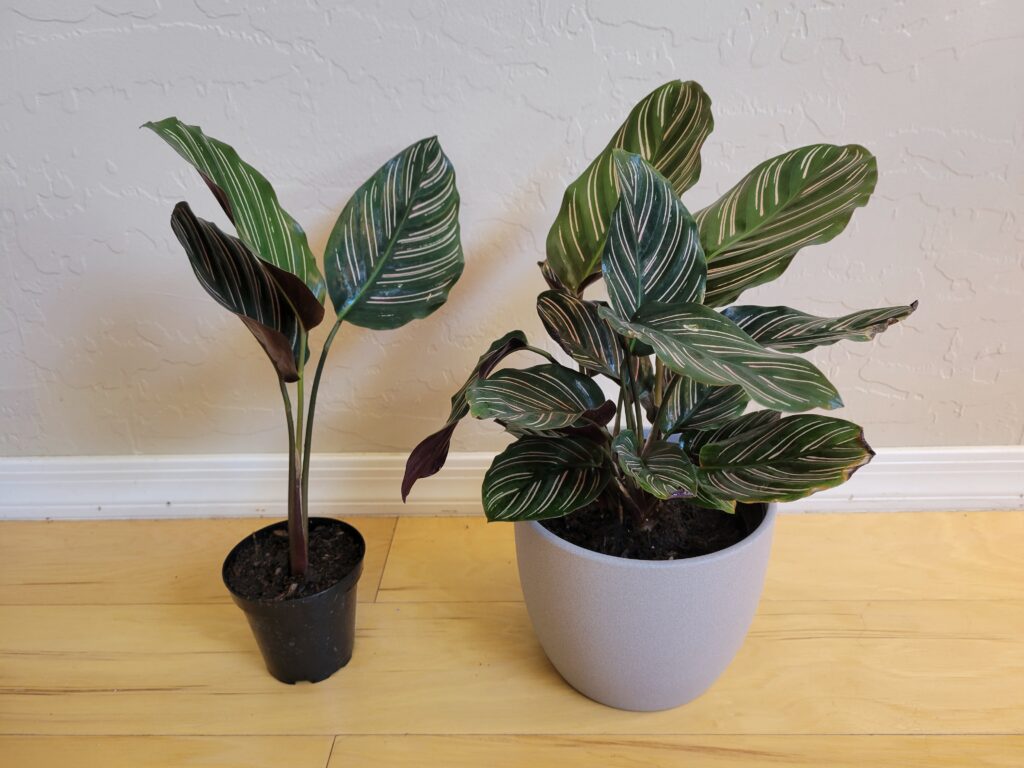
Fanatics are totally justified in their obsession with calathea and all the many varieties this genus has to offer. Calathea collectors will tell you how many calathea they have and how they take care of each one of them, if you let them.
There’s a reason that this plant is loved by so many, though. Aside from the endless varieties in color variation, patterns, and growth habits, calatheas are a fun challenge for anyone who doesn’t have direct sunlight in their house.
If one or five calatheas isn’t enough for you, however, you can always propagate the plants you do have. Propagating calathea plants is fairly simple, since there’s only really one good way to do it at home.
History & Culture of Calatheas
These exotic gems are no new sensation in the plant industry. They were first introduced as houseplants in the late 1900s, but only a handful of the 60 or so species that exist can be commonly found in stores and nurseries.
Now more than ever, new species are emerging on the market, both as results of hybridization by growers and by collectors propagating or mass propagating species that were previously unavailable for purchase in some countries.
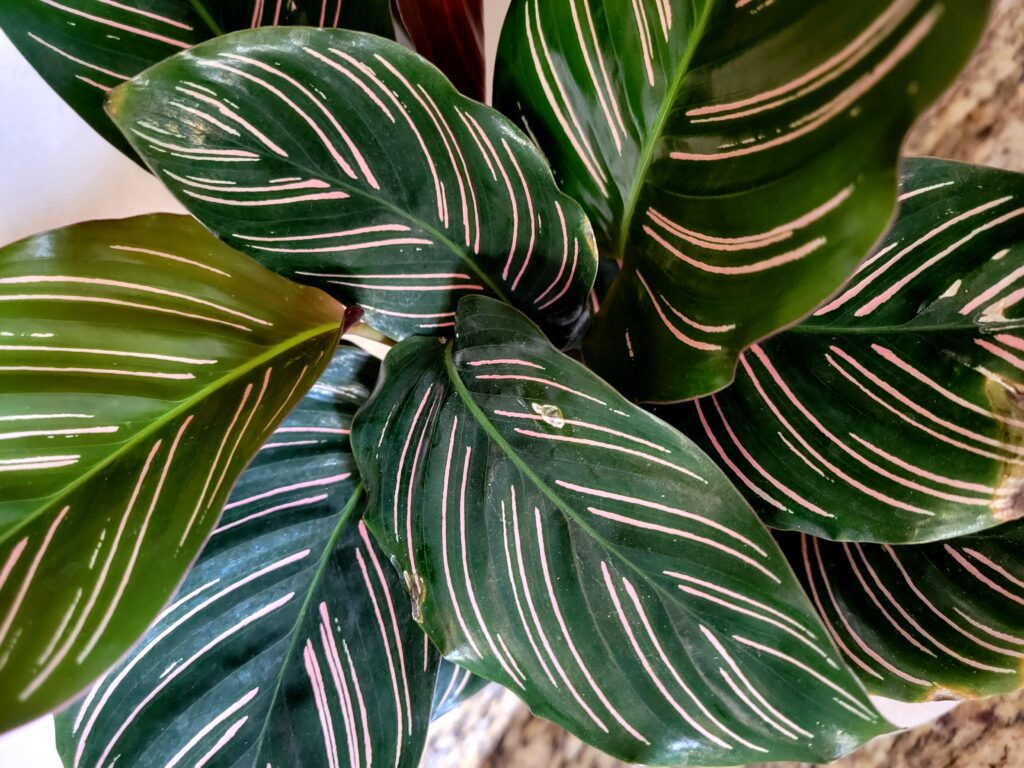
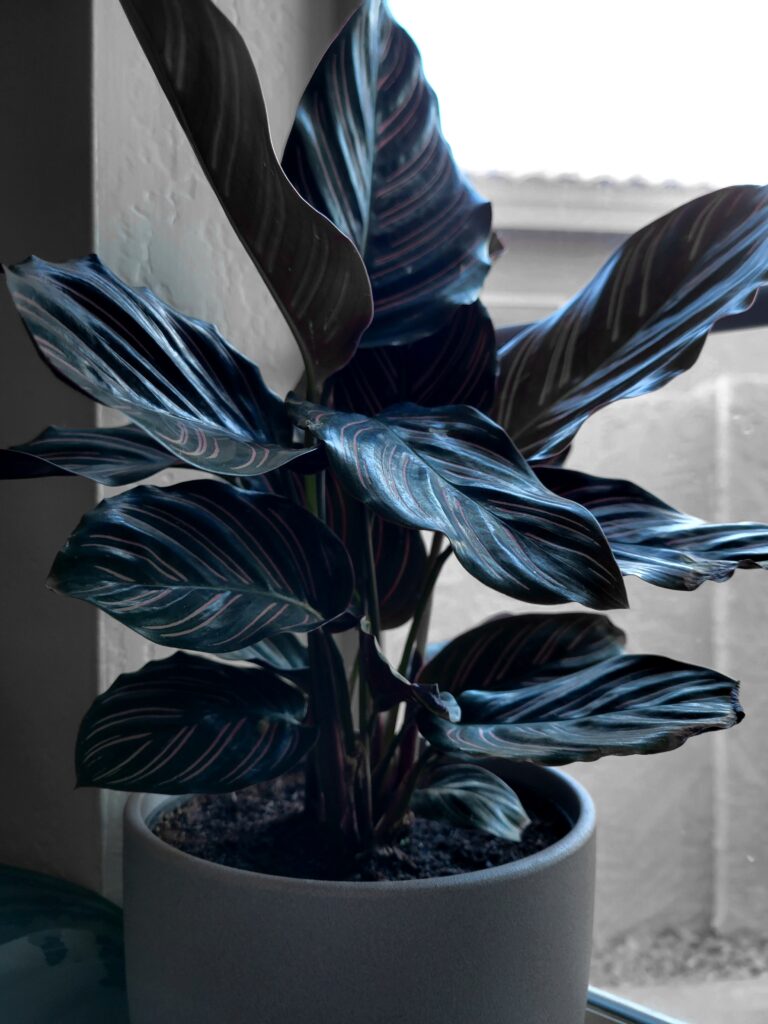
Calathea species can vary dramatically in color and form. The wide variance in phenotypes speaks to the biodiverse nature of the tropical rainforests of the central and southern regions of the American continent.
It’s easy to see why collectors and hobbyists make such a fuss over such a tricky plant, though. These plants actively change the direction that their leaves grow depending on light throughout the day, spreading them wide during the day and closing them up at night.
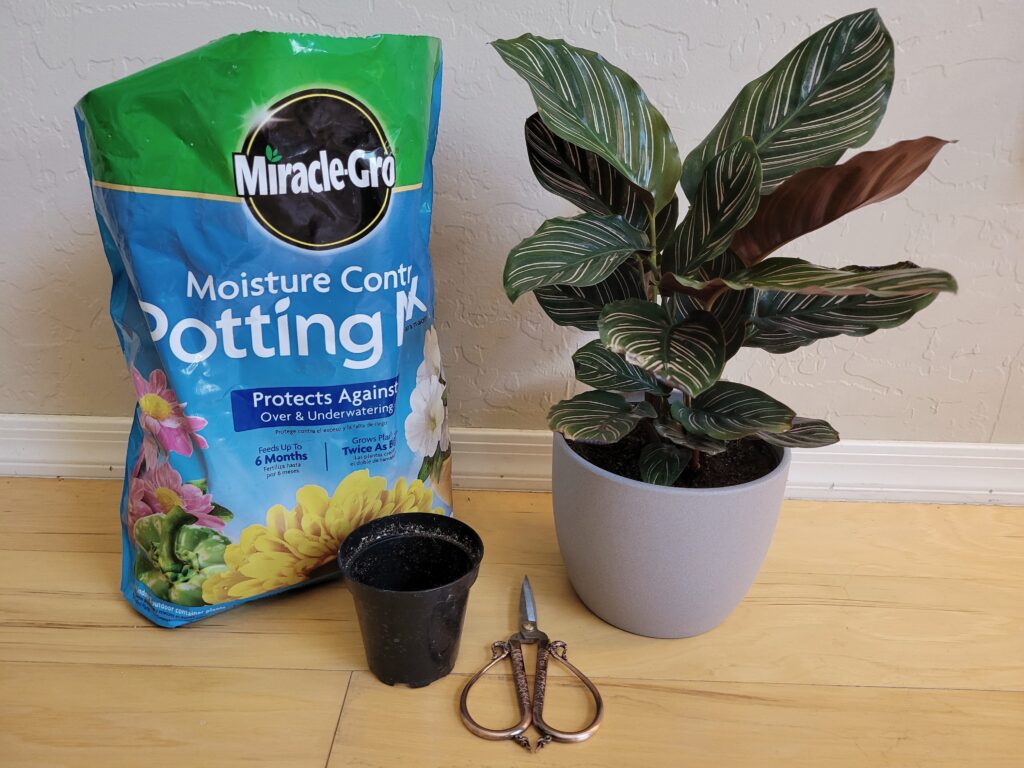
Tools for Calathea Propagation
Calathea can only be propagated in one way in a basic at-home environment. As such, you’ll only need a few things to get you started. However, getting everything together in one place before you start is a good idea, so you have everyhting you need within arm’s reach.
Plant shears
Vital for the process of propagating almost any plant, plant shears or some form of snippers are great to have no matter what type of project yo have going on. They’re there to take off dead foliage, snip away diseased leaves, and help trim back roots.
Plant shears will also be a large part of this propagation project, as youll find that it’s quite a bit easier to keep up on trimming in the center of your calathea when it’s much smaller. You may also find some bruised or damaged stems that need cleaned up.
Watering can
When you’re dealing with bare, exposed roots for any amount of time, there will be watering involved. Most plants that are propagated prefer a nice, steady stream with diffused flow so as not to disturb the sensitive roots that are trying to get settled in.
By using a diffused attachment on your watering can, you can also ensure that all of the soil in the new pots gets to be fully saturated to prevent any roots from dying back after potting. Calathea roots that dry out are essentially dead roots, so take care during the potting process.
Soil
The type of soil you’ll need depends on your calathea’s preferences. Not every species is the same; some prefer a loose, well-draining soil, while others like a more compact mixture to avoid drying out. Try to match the soil mixture that your calathea seems happiest in.
You can also mix your own soil according to your calathea species’ specific preferences. Doing so is not only better long-term for the plant, but also helps to extend the life of the soil you use. As a general rule, all calatheas will require perlite in their soil mixtures.
Pots or planters
Good pots with adequate drainage holes are essential to the life of any calathea. Proper drainage is a major factor of plant health, and without it, most plants become overwatered and succumb to root rot before anyone notices there’s a problem.
Of course, with proper drainage, any pot is suitable for calatheas. They typically like to have a somewhat smaller pot, so try to avoid planting one small start in a medium to large sized pot. Doing so will also cause root rot, so stick with smaller pots at first for smaller starts.
Soap
Before your reuse an old pot, make sure it’s adequately cleaned with warm, soapy water. If a plant died in a pot you plant to reuse, it should be washed in case anby contaminants will remain on the inner surface of the pot.
The same goes for any tools or work surfaces you plan to use for propagating your calathea. They should all be washed, dried, and ready to use! This helps to prevent any plant-borne illnesses from spreading plant to plant on the surfaces that frequently touch multiple plants.
How to Propagate Calathea Plants
When we say there’s one good way to propagate calathea at home, it’s true. Propagating by stem cuttings or even from root cuttings can be described as impossible at best, since calathea plants just don’t have nodes like vining plants do.
It’s possible to propagate calathea by tissue culture, but this process requires a very well-equipped laboratory with plenty of high-tech equipment and chemicals that most of us simply don’t have lying around.
Thus, we land on the best method to propagate calathea plants at home: root division. Root division is essentially done by removing whole plants from each other by cutting apart the base of the plants where they’re connected.
We’ll dive into this process step-by-step, from prepping your workstation to finding the right place to set your new plants. It’s fairly simple and easy, but you’ll most definitely get some dirt on your hands!
Step 1: Gather your materials
First and foremost, make sure that you have everything you need to complete the project from start to finish. Now’s the time to find that trowel that keeps going missing, so you don’t end up running in circles to hunt down anything else you may have forgotten.
It’s also a good time to clean everything. You can use rubbing alcohol or hydrogen peroxide to thoroughly sanitize plant shears or snippers, but if you don’t have either on hand, warm, soapy water will do the trick.
Step 2: Unpot the plant
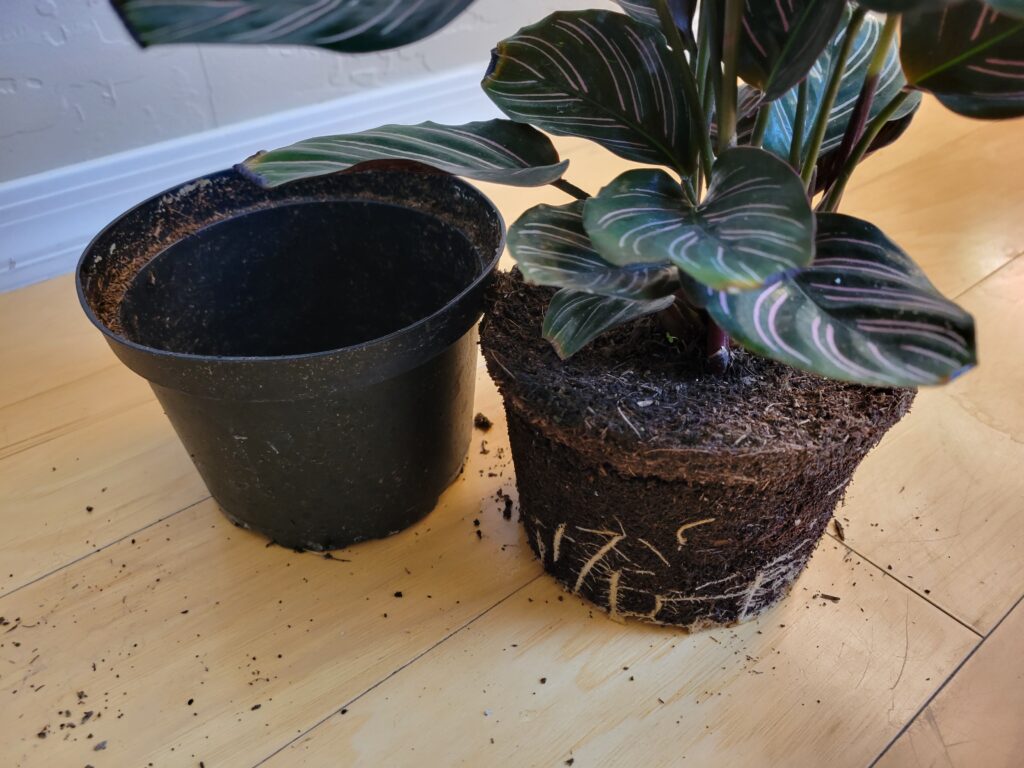
With everything ready to go, gently place your hand around the base of your calathea. If it’s very bushy or overgrown, don’t worry about bending a couple of stems. Tip the pot over on its side in your hand, and use both hands to gently press around the sides of the pot to loosen the roots.
From here, you can feel and see when the plant begins to come loose from the pot. If it’s incredibly pot-bound, you may need to cut away some of the roots that are stuck in drainage holes, or cut the pot away from the roots of the plant, if possible. Never break a shatterable pot to free a plant.
Step 3: Remove the soil
For the most part, much of the soil should be removed from the roots to give you a better idea of where the plant can ultimately be divided. You can use either your fingers or a small rake to shake the soil loose from the roots without damaging them as much as possible.
For very root-bound plants, try using running water over a bucket to free the soil from the roots. The water should ideally wash most of the soil away, leaving you with nothing but roots. If you can, try to hang onto some soil around the base of the plant to prevent the roots from drying entirely.
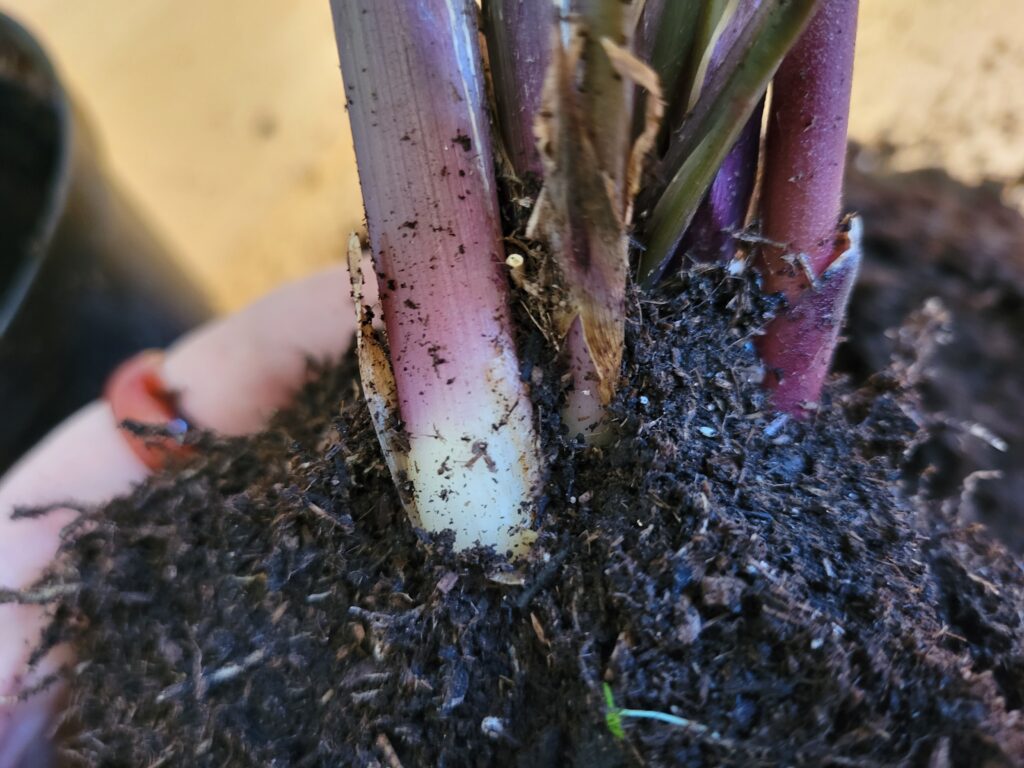
Step 4: Locate your divisions
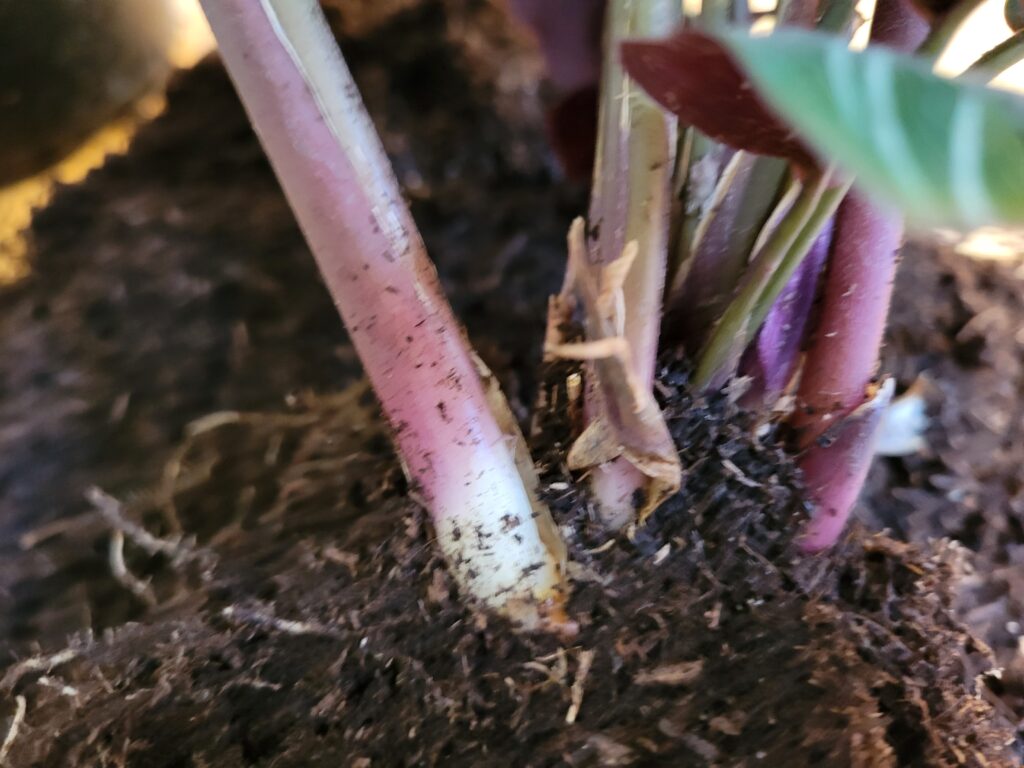
Identify a stem that has at least three healthy leaves on it. This stem will be most successful if it has at least two large tap roots. These roots will then grow their own root systems relatively quickly after the division process.
If you’re after larger starts, you can also try dividing larger parts of your calathea plant. Simply choose a section that looks like it has the ability to separate cleanly from another section. These will often look like clusters of stems.
Step 5: Divide the plants
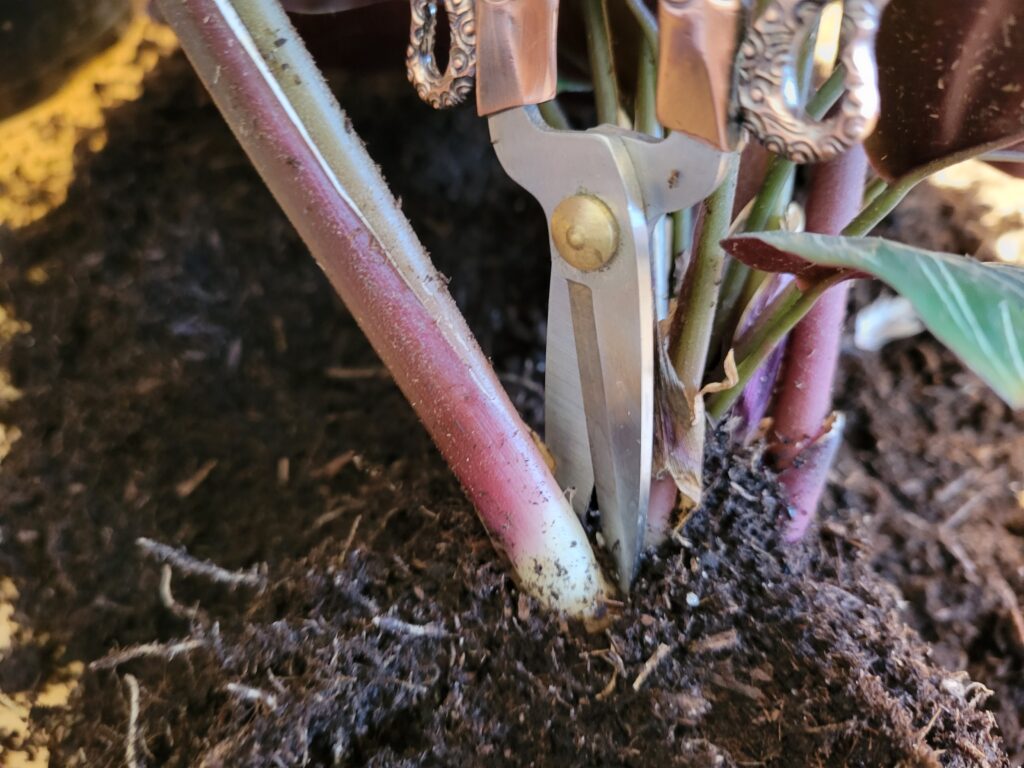
Using your plant shears, a clean razor blade, or another clean, sharp cutting tool, carefully make a small cut partway into the split between the two section or stems you plant to divide. From here, you should be able to gently pull apart the stems, careful not to tear the roots apart.
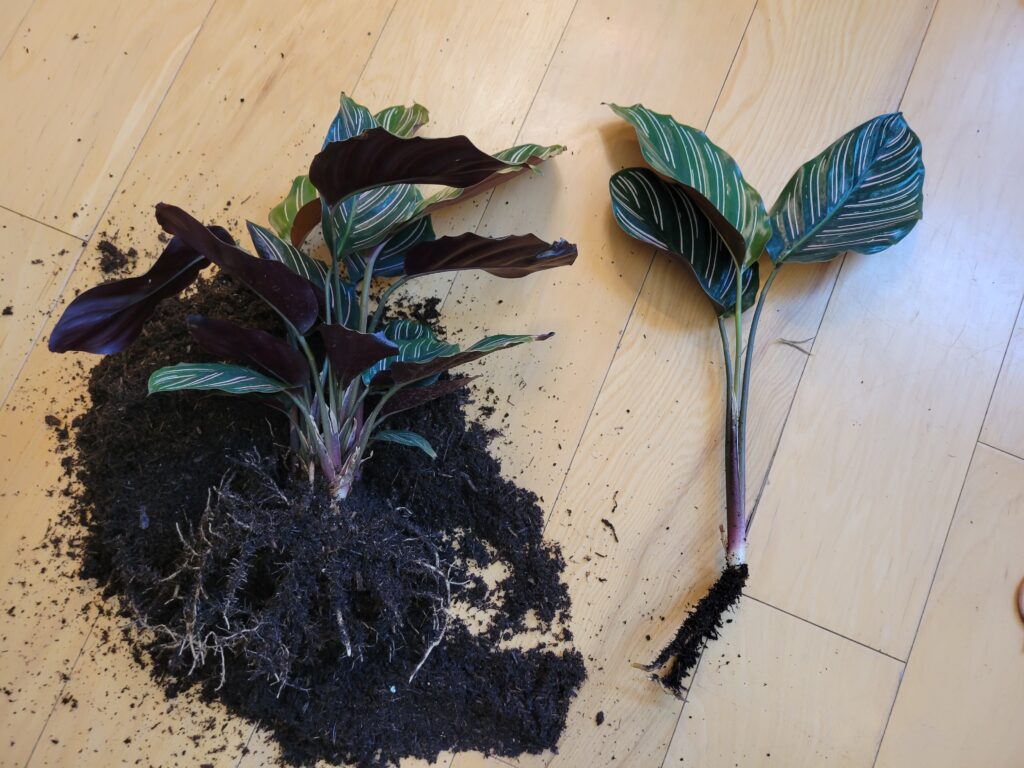
You can try to ease the root systems apart by using opposite circular motions for each hand while holding onto both parts of the plant. The slower you go, the less roots will be damaged. You’ll want as many roots as possible to remain on both the start and the original plant.
Step 6: Potting the plants
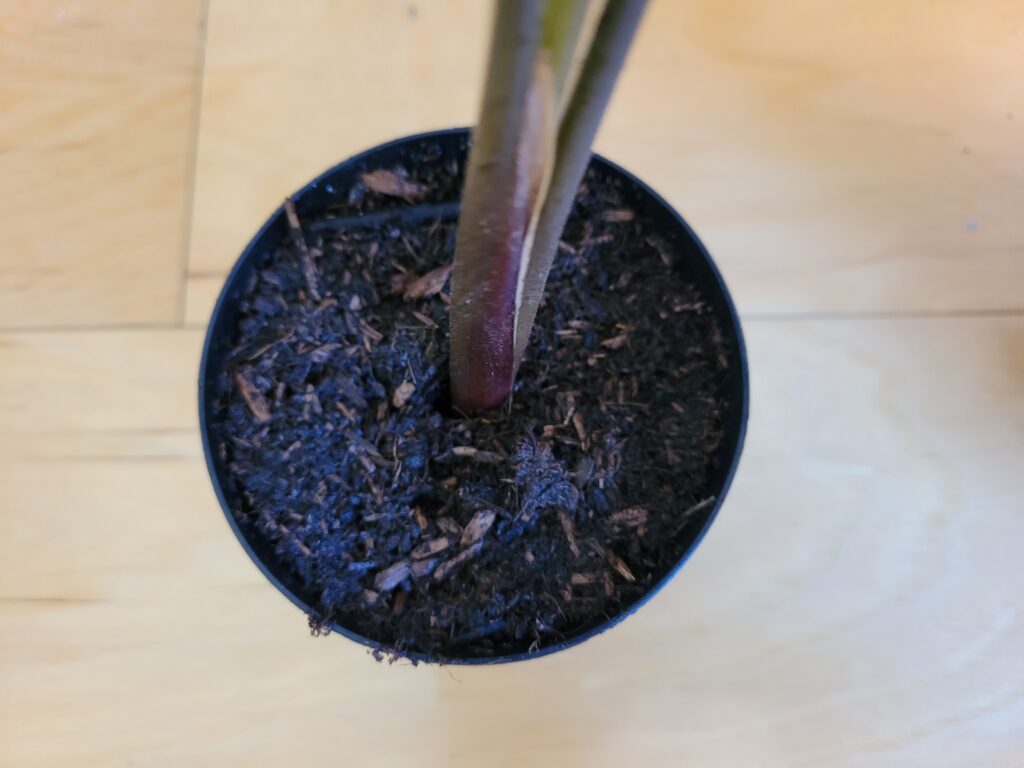
Once you’ve successfully separated your starts from their original plant, you’ll need to pot them straight away in an effort to minimize shock. Calatheas are known to be dramatic, so being unpotted and separated is a lot of stress for one of these plants.
Place the start in the pot so that the roots sit just below the surface of where the soil will be. Using your other hand, fill the pot with soil while holding the start upright in place. Once you’ve finished filling the pot, gently tamp the soil down to help the start stand. Do the same for the original calathea plant.
Step 7: Water your calathea plants
Water each plant profusely until water is flowing steadily through the bottom of each pot. Allow these to drain entirely over a sink or tray, but don’t let the pots sit in water. It’s important to thoroughly soak the soil without allowing any water to build up at the bottom of the pots.
This is only the first watering; consequent waterings should be only as the top inch of the soil dries out, but keep an eye on the soil for the first couple of weeks to ensure that it doesn’t dry out too quickly, as new soil sometimes does.
How to Care for Calathea Divisions
There are some extra care measures that newly divided calathea plants need in order to establish as successful starts and to grow on their own. The main factors of plant growth, such as light, water, temperature, and humidity, will look a little bit different at first.
That being said, once your calathea start seems to be putting on new growth, it can be considered its own, mature plant and treated as such. However, here’s how to take care of them until that point.
Light
Your newly divided calatheas need to be protected a little more from direct rays of sunlight. Bright, direct sunlight can cause a lot of damage to a new plant division, especially if it doesn’t have the strongest root system to start with.
To minimize the potential for sunlight damage, try using a sheer curtain or placing in a window with less sunlight than others to help ease your plant into the photosynthesis process as a new plant. With enough light, your start should stay healthy.
Water
Depending on which species of calathea you happen to have, your calathea may need different watering habits for its first month as its own plant. To err on the side of caution, new divisions should be watered slightly less than mature adult plants.
This is because a single plant with minimal roots will require far less water than a larger plant with substantial roots. The longer the water sits in the soil without being used, the more susceptible new and developing root systems are to rot situations.
To help take the guesswork out of watering, you can always use a moisture meter to determine the moisture content of each pot individually. When the meter begins to read as less moist at an inch under the soil, it’s time to water lightly.
Humidity
No matter what type of calathea you have, this one fact rings true: all calatheas love humidity. The amount of humidity varies from species to species, but if you have at least 40 percent humidity where your calathea is, it should be happy.
If you still notice that its leaves are a bit dull and dry, you can use a standard humidifier or a tray of pebbles and water nearby the plants so that they can grow stronger, more leathery leaves. If calatheas stay dry for too long, they become crispy and drop their leaves.
Troubleshooting Calathea Plants
It’s not uncommon for a calathea to be picky about some aspect of its existence in your space. This challenge is part of what makes calatheas so special, but it can also be a burden. Some calatheas simply can’t be happy without the bare necessities, and its bare necessities can be pretty strict.
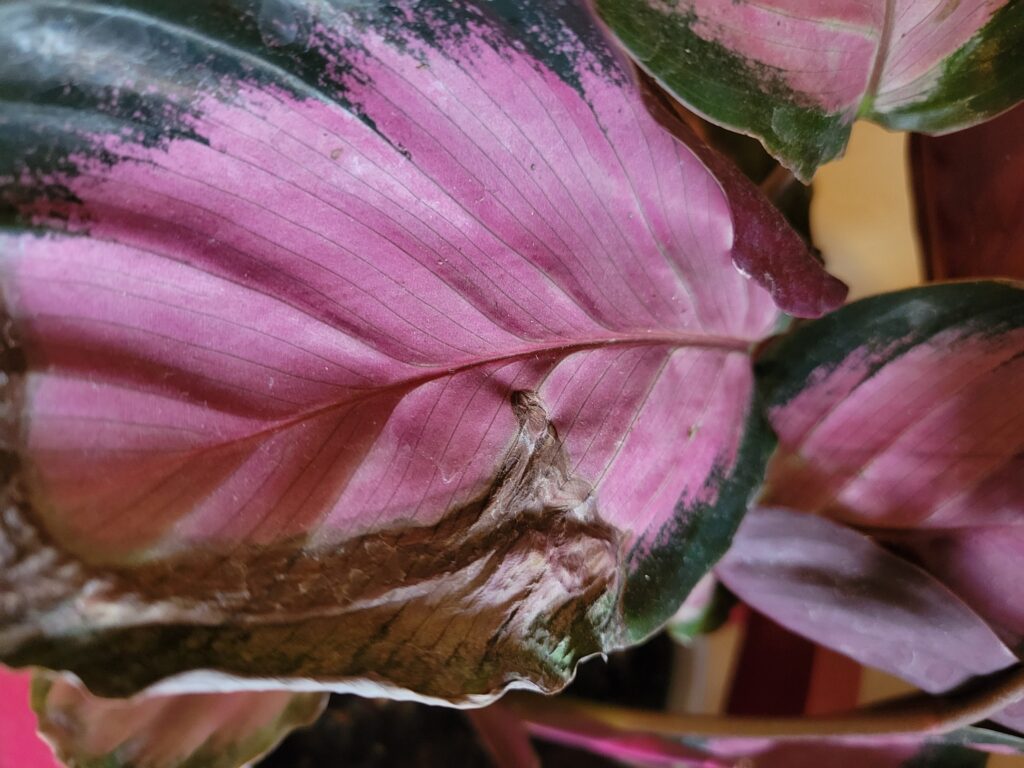
Yellowing leaves
A very common sign of a watering problem, yellowing leaves are there to tell you that in some way, there’s an issue with the way you water or the water you use. The first thing to check for is water quality.
Some calatheas, like Calathea roseopicta, can be extremely picky about the type of water it gets. Water that’s too heavy to mineral content can kill a calathea in weeks, so be sure to use only filtered or distilled water if you have gnarly tap water.
Another common problem is over or under-watering, though underwatering is more prone to crispy leaves than yellow ones. Overwatering will cause root rot, which in turn changes the leaf color to yellow and eventually, brown.
To avoid seeing more of these foreboding shades on your calathea, try letting it dry out for an extra day or two before watering again. Watering needs change throughout the seasons, so look for increased or decreased water use as the seasons fluctuate.
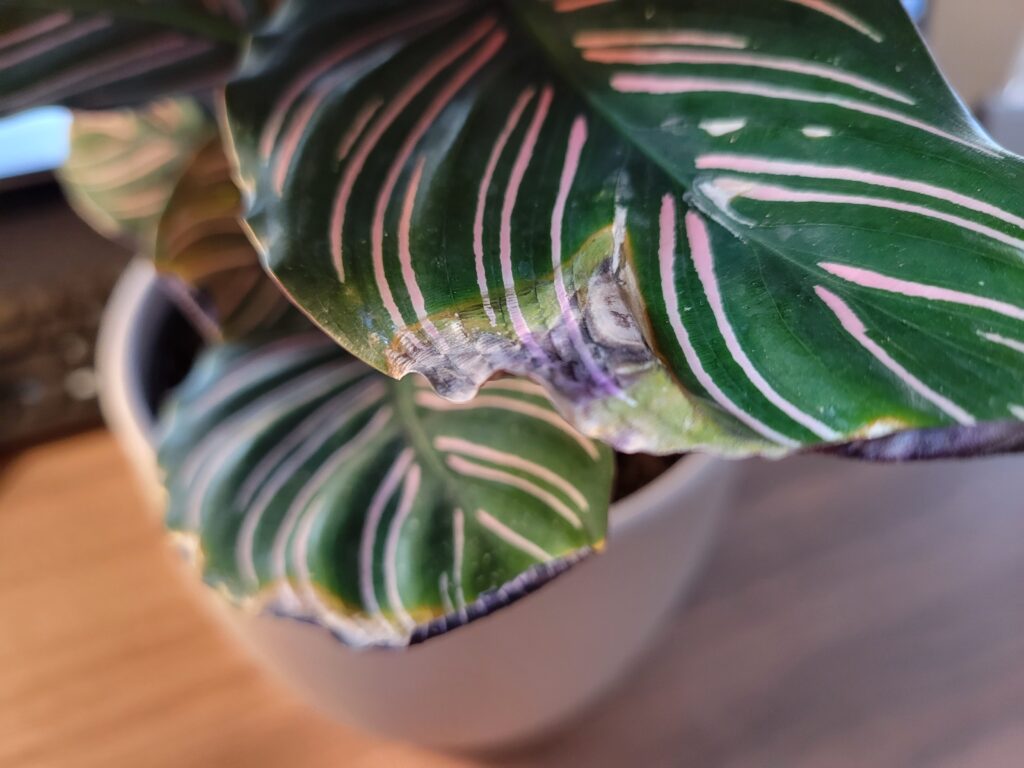
Browning leaf tips
Another very commonly reported calathea issue is browning leaf tips. Again, this is usually about water, but not just watering; it can also be a humidity issue. Aside from water, browning leaf tips could be caused by light. There are just a couple things to note when diagnosing browning leaf tips.
The first, and arguably the most frequent cause of browning leaf tips on calathea is sunlight exposure. Too much sun will inevitably fry leaves; the photo of the roseopicta above is a great example of a calathea that gets about two hours too much sunlight per day.
To remedy this issue, move your plant further away from its primary light source. If there are very bright artificial lights, like LEDs, in the room, the plant could be getting an excess of that on top of the natural sunlight it may get from a nearby window.
The next possibility is always a lack of moisture. Whether it be an underwatering issue or humidity issue, both can be solved: try to set reminders for yourself to water more frequently during the growing season, and water less during the darker, colder months.
If your watering schedule seems to be in good shape, then your issue is most likely humidity. Calathea plants, being native to very humid regions of Central and South America, need a lot of humidity from the air.
To provide humidity, set up a tray underneath your calathea full of pebbles with a nice, even layer so that your plant can sit on top without tipping. Fill the tray to the top with water, just enough to reach the top of the pebbles, but not so much that it could spill over.
Alternatively, plant humidifiers can be found both online and in most big box stores. They’re incredibly easy to use, and will help make all your plants feel more at home. For this to be effective, use it within five feet of the calathea in question.
