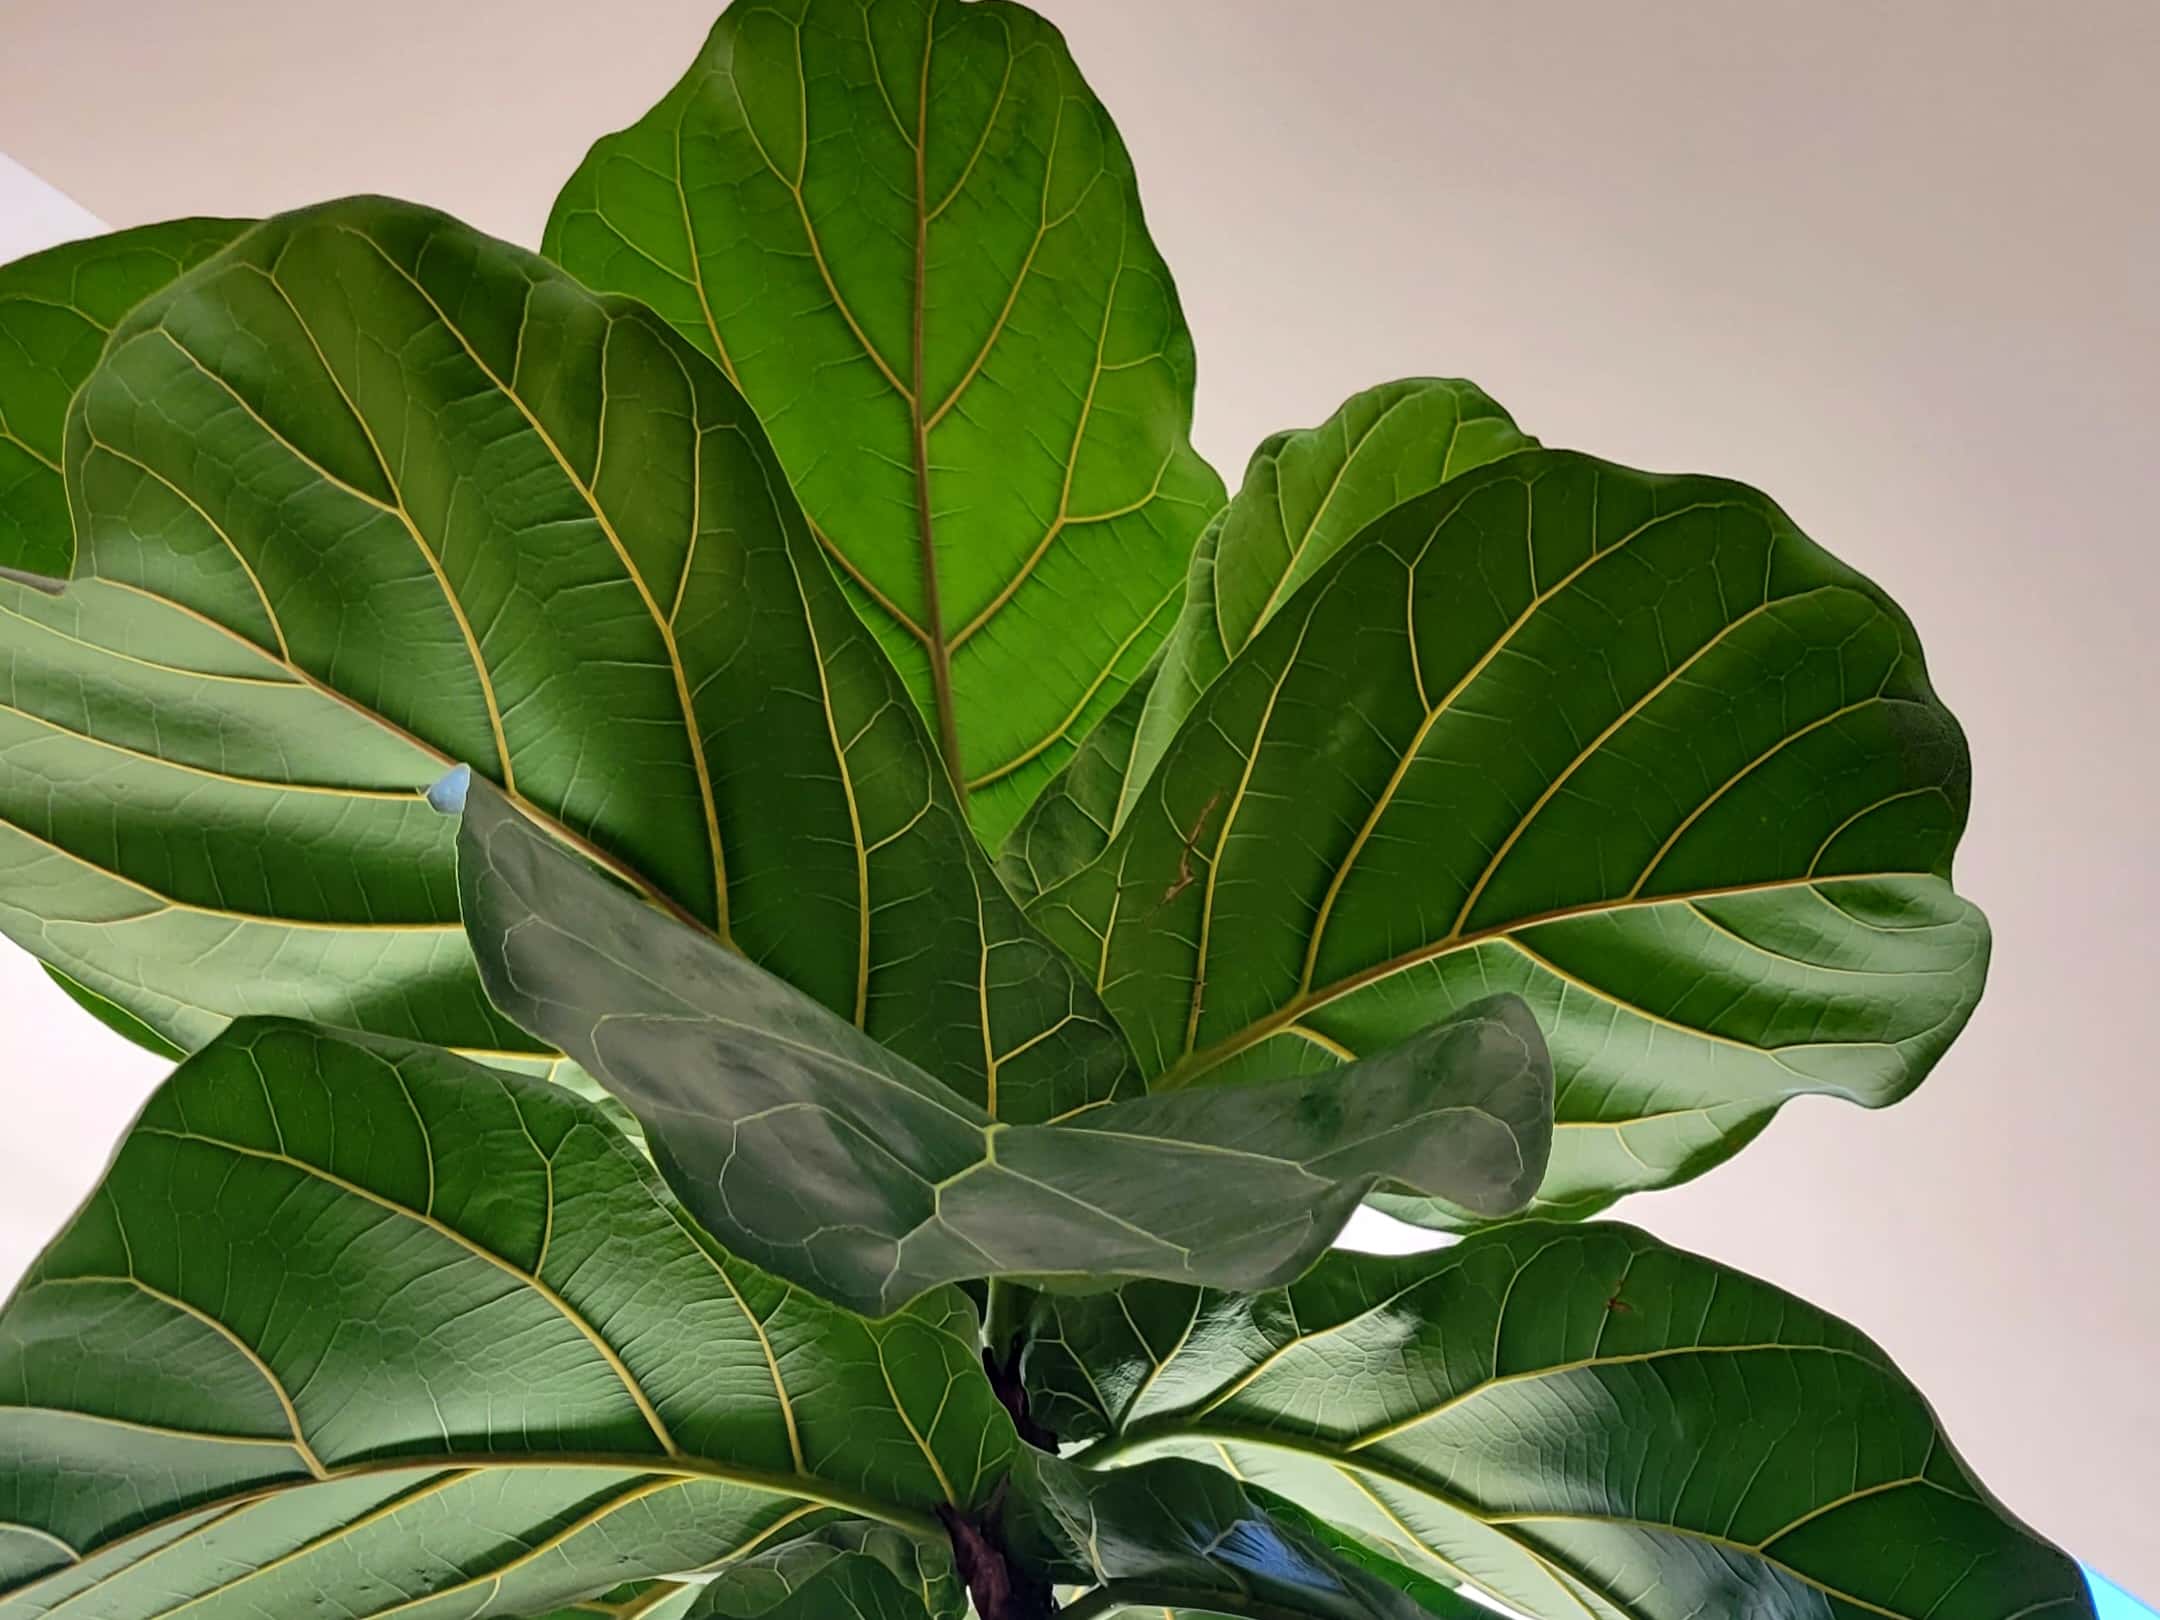
Fiddle leaf figs are tremendously attractive plants. They’re aptly named for their fiddle-shaped leaves, which are a rich, emerald green and grow to be larger than a dinner plate, under the right conditions. It’s no wonder that they’ve managed to hold the interest of people all over the world.
The coveted fiddle leaf fig is a plant that has a particularly long history in horticulture. We see them everywhere; in malls, doctors’ offices, and even salons. While these plants are on the expensive side, they can be propagated at home to make even more plants for free.
Before we jump into the how-tos of propagating this lovely plant, let’s dive into a little bit of history on them. Getting to know a plant is all part of the process of learning how to care for and eventually propagate them!
History & Culture of Fiddle Leaf Figs
Ficus lyrata is a plant with a very unusual background for most common houseplants of today. For many, fiddle leaf figs are an ode to modern taste and style; for others, however, it’s more of a nostalgic plant.
Some say that fiddle leaf figs peaked in popularity around 2010, when online social media and design publications became a daily norm for the majority of the population in the United States. But it wasn’t just the advent of digital photo sharing that drove the fiddle leaf fig to its current heights.
Interior design loves this plant. It can stand alone as its own piece, or it can be carefully woven into a dense urban jungle. Either way, this plant makes a muted statement of sophistication and luxury, and the plant world knows this fact well.
Despite its long and seemingly indefinite spot in the limelight, the fiddle leaf fig came from a rough environment. These trees don’t grow in the ground like they do in pots in our homes out in their natural habitats. The jungles along the West African coastline hide the true story.
No, the fiddle leaf fig is actually an epiphyte. Its seeds are dropped into the tops of canopies by means of nature, where they germinate and grow from the tops of other trees competing for sunlight. Some call it rude, but it is rather intuitive when push comes to shove.
From here, fiddle leaf figs actually root into and vine down their host trees. In most cases, the host tree eventually dies, having been choked out for both sunlight and water, but these pushy plants still persist.
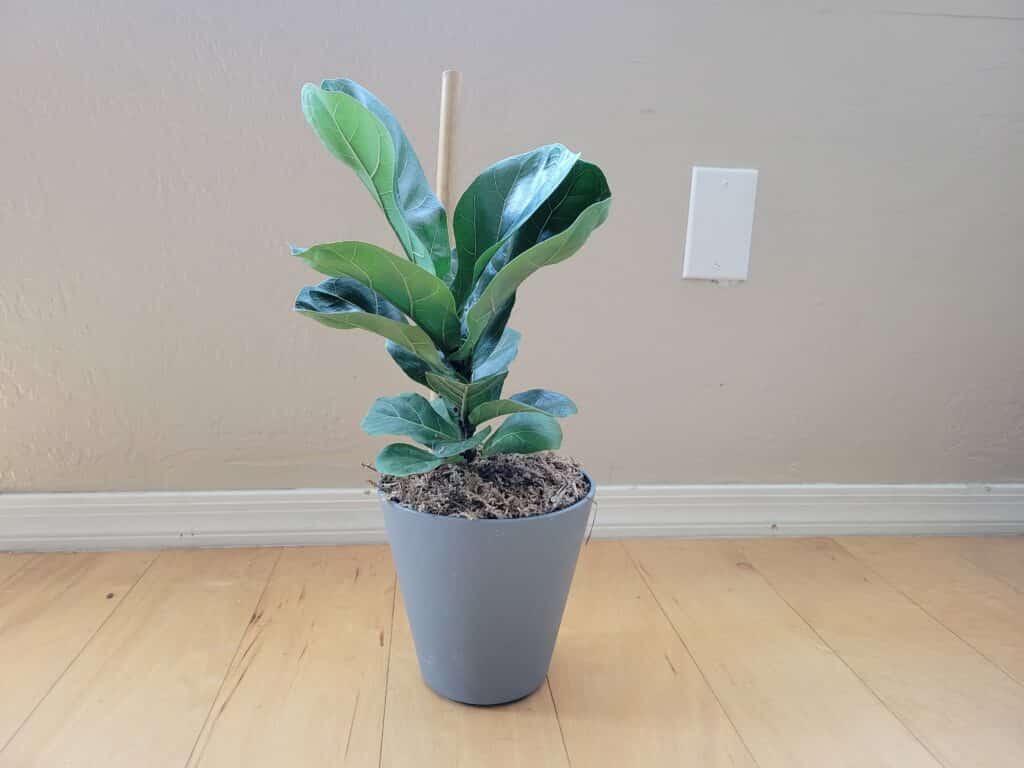
For our purposes, growing in soil in a nice-sized pot suits the fiddle leaf fig just fine. They’ve got no competition, but they aren’t in their element, which can make them a little finicky when it comes to care and propagation. We’ll take a deeper dive into the nitty gritty details of fiddle leaf fig propagation.
Fiddle Leaf Fig Propagation Supplies & Materials
If propagating plants were as easy as pinching off a leaf and calling it good, we’d all be drowning in plants. Unfortunately, that’s just not the case. We need some basic tools and supplies to help cuttings grow into big, beautiful plants. Here’s what you’ll need.
Plant shears
Plant shears are a necessity for anyone who owns a houseplant. They’re great for pruning, removing pest-riddled foliage, and trimming back unruly roots. For this application, though, we’ll be using them to propagate fiddle leaf fig plants.
Perhaps more important than having shears is having clean shears. If your shears are rusted and covered in plant matter, consider using clean scissors or a new razor blade, instead. This way, you limit the chances of infecting your cuttings with bacteria, viruses, or even fungi from other plants you may have used them on. Pathogens can hang on a long time!
Rooting hormone
Since fiddle leaf figs can be rather finicky when propagated, it’s best to use rooting hormone. This stuff can help increase the chances of success for stem cuttings, especially if you have a cutting that didn’t come from your plant!
Essentially, rooting hormone works by sending a signal to reproductive cells that it’s time to start building roots. When this signal comes early enough, a cutting can successfully grow into a plant of its own. Without it, fiddle leaf fig cuttings may never root, or will take much longer to.
Water containers
The type of vessel you use to root your fiddle leaf fig cuttings in can be the difference between success and failure. As long as the vessel is clear, easy to clean, and can hold a fiddle leaf fig cutting upright, it will work!
Some prefer to use propagation stations. If you choose this route, be sure that the tubes are wide enough to accommodate the width of the fig stem you’re cutting as a start. Measure the width of the tube, and ensure that it’s at least twice as wide as the stem.
Rubbing alcohol or hydrogen peroxide
These things bring us back around to plant-borne pathogens, the number one cause of failed cuttings in fiddle leaf figs. Pathogens such as scale insects, mealybugs, spider mites, fungi, bacteria, and mildews can all hitch a ride on your tools and hands.
To be sure that you’re working with pathogen-free tools, disinfect everything beforehand with rubbing alcohol or hydrogen peroxide and allow them to dry before using. Similarly, don’t forget to wash your hands before you propagate; those are germ sanctuaries, too!
Well-draining soil
Fiddle leaf figs are natural epiphytes; therefore, they’re not accustomed to sitting in nutrient-rich, water-retaining soil like some of your other plants may be. The soil you use once your cuttings are rooted will need to be similar to orchid soil, but with a little more density.
Great fiddle leaf fig soil has a mixture of potting soil, bark, and perlite; this mixture allows the soil to drain well, but not so fast that your fiddle leaf fig dries out quickly. This type of soil is also great for the prevention of overwatering, which is a common issue with these plants.
Leaf Cuttings vs. Stem Cuttings
The fact of the matter is that stem cuttings are the only way to produce a fully rooted plant at the end of the day. While leaf cuttings may root and look nice in a container, they lack the reproductive cells that are required to produce new growth.
In essence, stem cuttings contain nodes; these are spots where leaves diverge, and where the necessary cells to put on new axillary buds, and eventually leaves, are located. Without these cells, you’ll have nothing but a rooted leaf, which will eventually die.
Sadly, this is the truth for many plants. However, there are plants that can produce new plants from leaves, such as succulents. In their habitat, it’s do or die; and so, they do. But when you come across a woody plant like this one, it’s best to use full nodes.
How to Propagate Fiddle Leaf Fig
While there are a number of ways to propagate the fiddle leaf fig, ranging from high-tech laboratory setups to potting shed levels, we chose the most tried-and-true method to propagate a fiddle leaf fig: in water.
The success rate of propagating fiddle leaf figs in soil is historically low, given that most of the time, the cuttings end up rotting. Therefore, clean, fresh water is the best way to go. Keep in mind that propagating from a stem cutting is the only way to produce an actual plant.
Without further ado, here are the steps to take in order to successfully propagate a fiddle leaf fig cutting from start to finish in your own home!
Step 1: Gather your materials
Before you start clipping starts from your plant, gather up all of the above materials you’ll need to propagate them. Be sure to have your shears, water vase, fresh, clean water, and rooting hormone.
This is also a great time to make sure that everything is nice and sanitized. Clean your working surface (where you’ll be doing the propagating), as well as your tools and water container. Dr everything completely before you start.
Step 2: Plan your cuttings
Whether you plan on propagating one cutting or half a dozen, choosing the right nodes is important. You can choose to make cuttings from one to three nodes in length, but more nodes means more leaves.
More leaves means that the cutting will have to work extra to make up for the energy the leaves need; if you take a cutting with more than two nodes, be prepared to cut the leaves in half to conserve energy and focus the plant on forming roots.
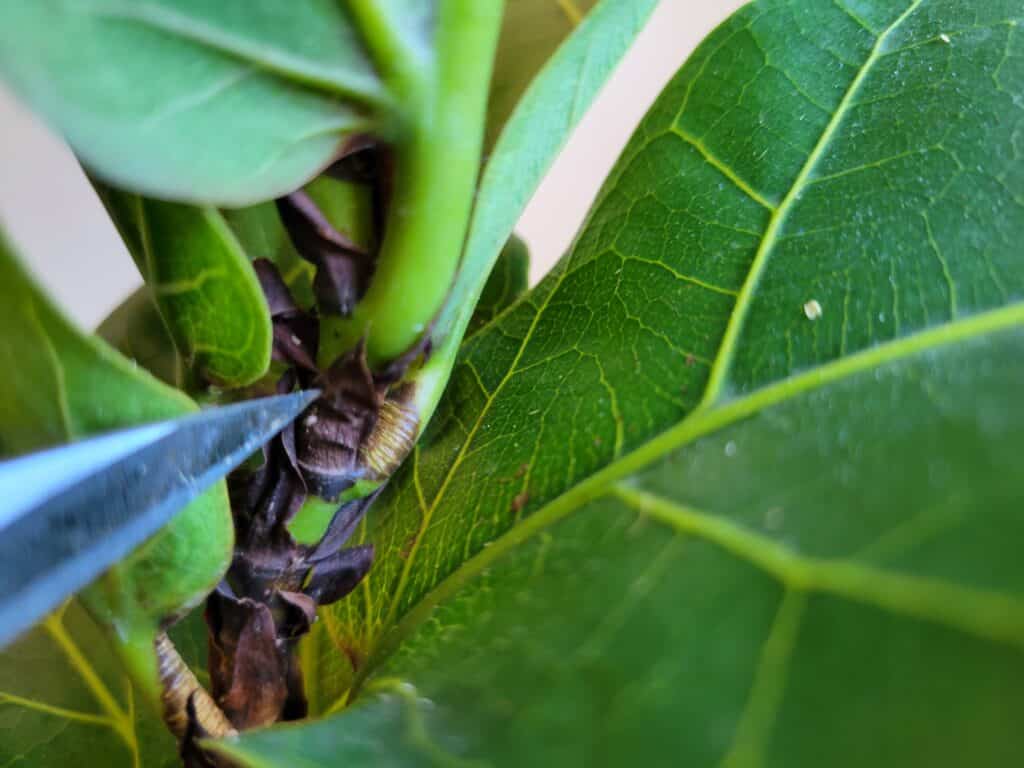
Step 3: Making the cuts
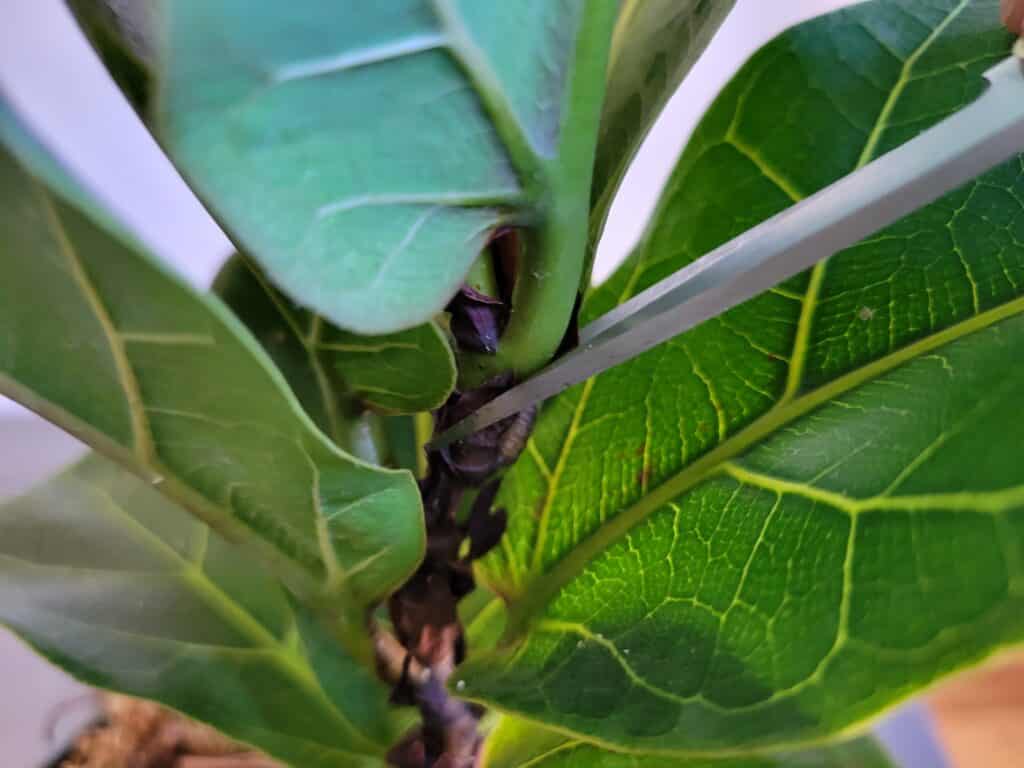
In one swift movement, cut the stem just below the node you want to root at an angle. By cutting at an angle, you create more surface area for roots to form; fiddle leaf figs can really use this advantage, since they’re notoriously difficult to root.
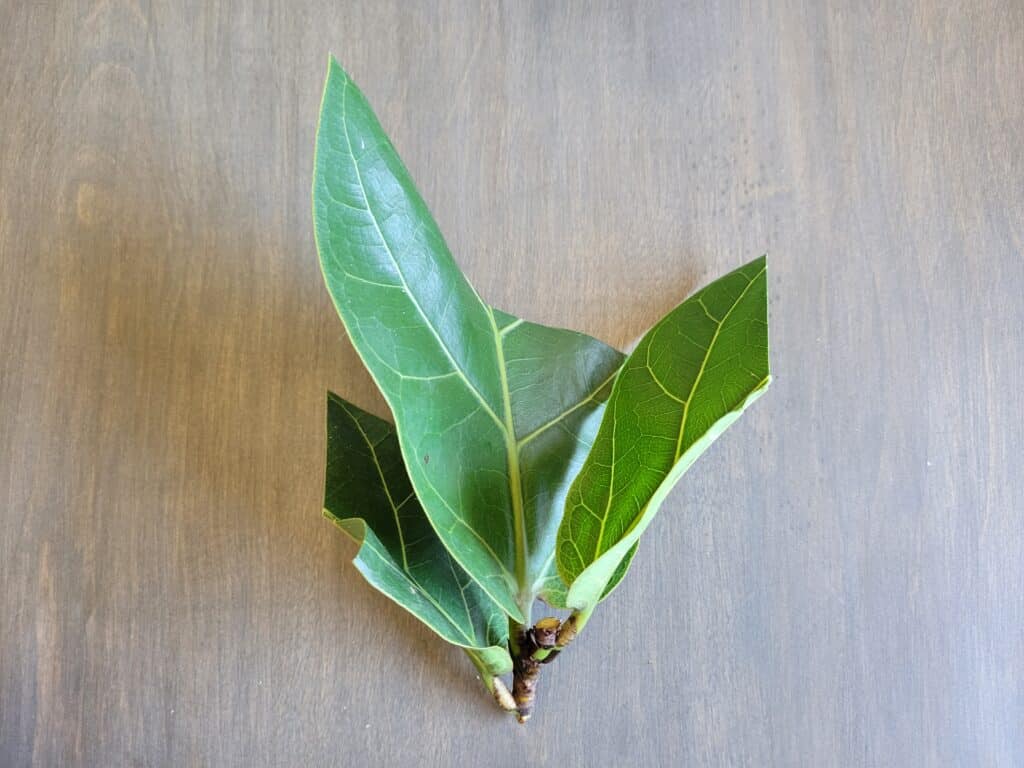
You can take more than one cutting from a stem if there are enough nodes to keep going. Opt for about 2-3 nodes in each cutting. For cuttings with large leaves, cut the leaves in half; leaves that are smaller than a hand can stay.
Step 4: Rooting hormone
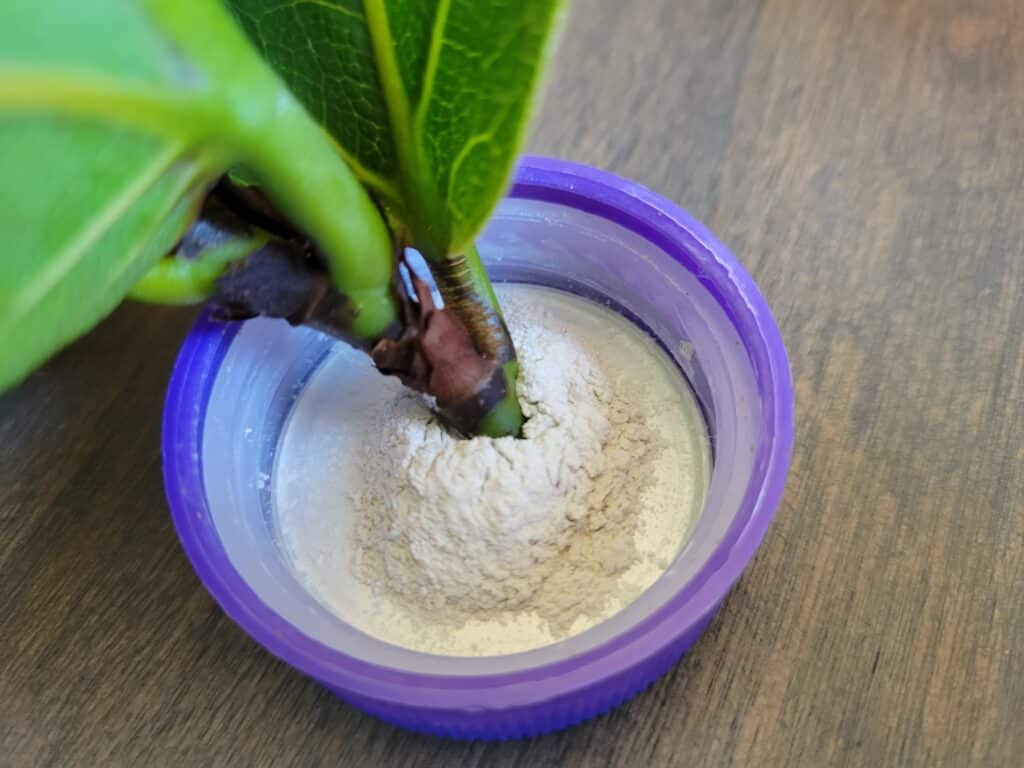
Without rooting hormone, it would likely take months to root a fiddle leaf fig cutting. Rooting hormone not only helps to speed up this process, but it also helps the cuttings build strong roots with a solid structure.
To treat cutting with rooting hormone, simply dip them into the powder or liquid just enough to cover the end you want to root. Leave them for a few minutes to let the rooting hormone adhere to the fresh wound.
Step 5: Into the water
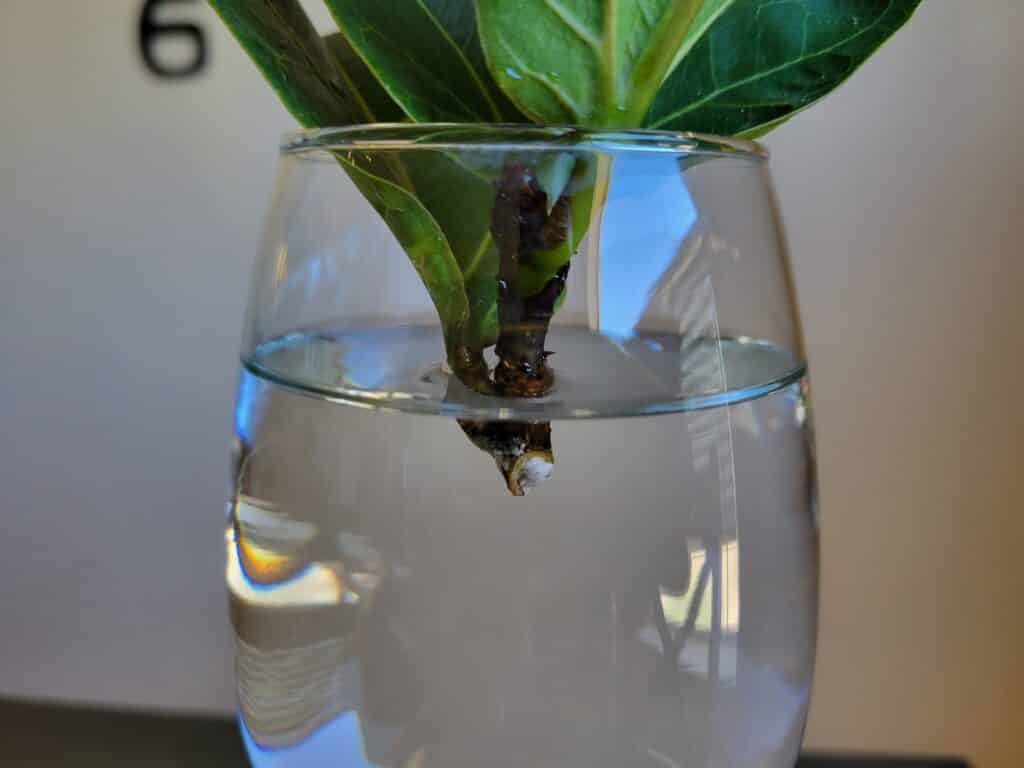
Now that your cuttings have had sufficient time to absorb some rooting hormone, they’ll need to be placed in their temporary new homes. Fill the water vessel with fresh, clean, room temperature water until it’s about two inches from the top of the container.
Then, gently place your cuttings into the water. Try to situate them so that they can stand up on their own; there may be some rearranging involved, but don’t worry too much if they don’t stand up perfectly straight.
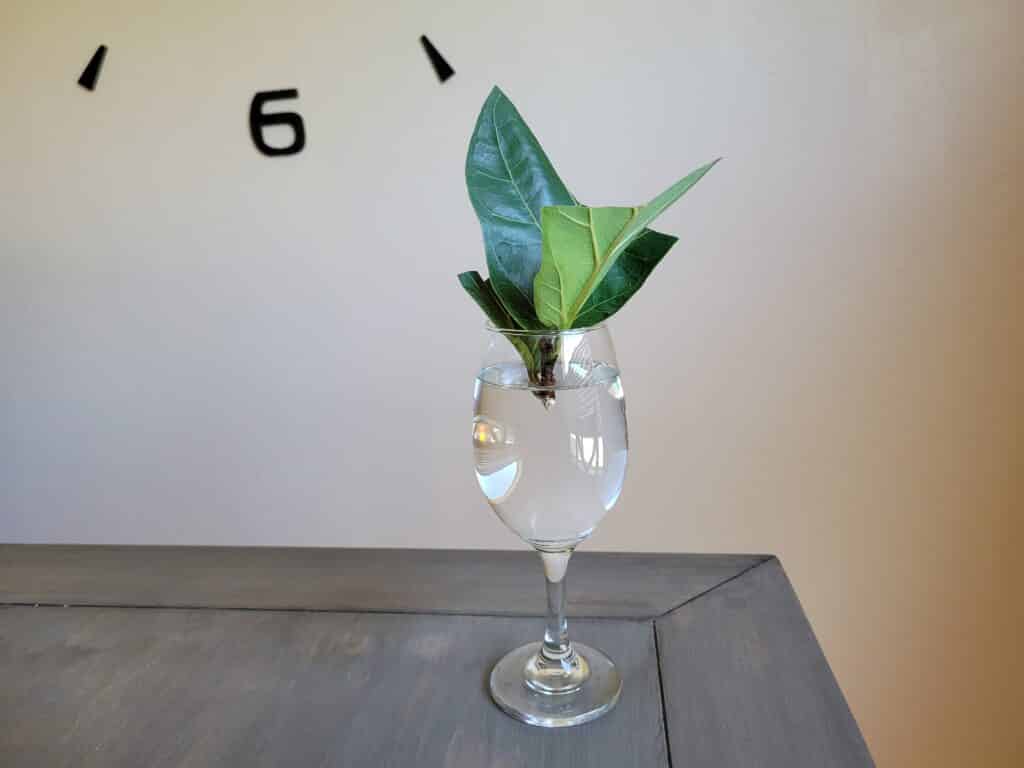
Step 6: Water maintenance
In order for roots to have a clean environment to form in, their water will need to be replaced regularly. At least twice per week, remove the cuttings and place them in a wet paper towel. Do not let new roots dry out; your cuttings may not survive it.
Then, clean out their water vessels, ensuring that no algae or bacteria are growing in the water. This is part of keeping your cuttings healthy, and they won’t grow in dirty water. Be sure to set reminders for yourself if you have a hard time remembering!
Caring for Fiddle Leaf Fig Cuttings
Aside from keeping an eye on the water, there are a few other factors to watch out for. For instance, giving your cuttings sufficient light is a big part of their root growth. Without enough light, the plant cannot photosynthesize, and therefore can’t grow roots.
To be sure your cuttings are getting enough light, try to give them the brightest light possible without directly exposing them to sunlight. It may sound a little odd, but try placing your cuttings near but not in a bright, sunny window.
If you already have an ideal place that your grown fiddle leaf fig plant prefers, the work’s already done for you. Simply place your cuttings near the original plant, and they’ll do just fine. You will likely notice if your cuttings are getting too much light; the leaves will develop brown spots.
The warmer the temperature in your home, the better. To an extent. Fiddle leaf figs like to stay warm, and they definitely don’t like to be under about 55 degrees fahrenheit. For cuttings to root, try to keep temperatures between 70 and 80 degrees fahrenheit.
Over the course of the next few weeks, your cuttings should start putting out new roots, or at least thinking about it. Look for bulging spots at the base where you made the cut. Dark or discolored ends are a sign that your cutting didn’t make it.
However, if you notice some white lumpy spots, there are roots on the way! Most roots will emerge within days of developing at the cut site, and once they do grow, they get bigger fairly quickly. Wait about three to four weeks after the first roots emerge to consider planting.
Fiddle leaf fig cuttings should have a large enough root system to support themselves in moist soil. Make sure there are several roots growing, with at least some of them longer than three inches. Transferring to soil is stressful, so be sure that they’re ready when you are.
How to Plant Fiddle Leaf Fig Cuttings
Once your fiddle leaf fig cuttings have developed enough roots to sustain themselves in soil, you can plant them! It’s as easy as planting any other plant, but the size of the pot and the type of soil you use will make a big difference in the development of new growth.
Fiddle leaf fig cuttings should be planted in relatively small pots, no larger than four inches in diameter. Since these plants grow to be quite large, it’s not a great idea to plant them in pots together; they will eventually compete with each other, causing all sorts of problems.
To plant a fiddle leaf fig cutting, start by filling your pot a third of the way full with soil that is well-draining, ideally made from orchid bark, potting soil, and lots of perlite. Try to consider how growing on the bark of another tree can be replicated in a pot.
Place your cutting in the pot so that the bottom leaf is just above where the soil line will be by adding or removing soil. Once the cutting is situated, fill in the rest of the pot with the same soil. Some fiddle leaf fig cutting will grow quickly, so be prepared to stake new shoots if they lean.
Water the soil in very well, and allow any excess water to drain freely from the bottom of the pot. Never allow water to sit in the soil; this makes for a root rot situation faster than you’ll notice, and it’s often too late by the time you do notice.
Be sure to water frequently enough to keep the soil somewhat moist, but never allow it to dry. If your plant is near a fan or a warm window, check the dampness of the soil more often. Moisture meters are great for this type of soil!
These plants don’t like to be moved, and will have a bit of a tantrum if they’re moved from a place they’re happy in. If your fiddle leaf figs show no signs of damage and are growing well, let them! Moving them can cause leaf drop, which is a side effect of stress in fiddle leaf figs.
Troubleshooting Fiddle Leaf Figs
Sometimes, plants have a mind of their own. It’s said that fiddle leaf figs are “emotional” and “fussy” plants, which might be true, but they certainly can be appeased. The best way to keep your fiddle leaf fig healthy is to pay it attention.
These plants are known for their tricky nature, but it’s okay, because once you find the right way to care for them, they’ll grow into big, beautiful plants. Here are a few of the most common issues with fiddle leaf figs and how to deal with them.
Brown spots
If you notice brown spots on your fiddle leaf fig, they could be caused by a number of things. The first is sunburn. If your fiddle leaf fig is in a spot where it receives direct sunlight, brown spots will form on the edges and near the center or the leaves. These will be medium to large-sized.
To remedy sunburn, move your plant just out of the direct path of sunlight that hits it. By making a small move, your plant is unlikely to become stressed and lose leaves, but you can still remedy the sunburn issue.
Smaller, more frequent brown spots are a sign of leaf spot, which is a common, yet still bothersome issue. Leaf spot can be caused by a variety of bacteria, fungi, or even nematodes, though the latter are less common indoors.
Remove heavily affected leaves and treat the rest using indoor-safe, biodegradable foliage treatment. You can also treat the leaves with a mixture of 1 part neem oil, 2 parts castile soap, and 6 parts water and spray outside daily in a shady location. Allow to dry for one hour before bringing back inside.
Leaf drop
When most experienced fiddle leaf fig owners hear the words leaf drop, they all ask the same question: “when did you move it, and how far away from where it was?” This is because fiddle leaf figs are notorious for dropping leaves if they’re moved.
The best way to take care of this issue is by moving your plant slowly, if you must. For example, if you want to move it from one end of a large room to another, you’ll need to do this over the course of weeks or months to avoid stressing the plant. It’s worth keeping the leaves!
Another common cause of leaf drop is underwatering. Without enough moisture to sustain their large leaves, fiddle leaf figs struggle to hang onto their leaves, and will drop those nearest the soil to preserve their ability to absorb sunlight using higher leaves.
If your plant is underwatered, don’t overwater to compensate; this will absolutely kill your fiddle leaf fig. Instead, begin watering normally on a regular schedule to avoid underwatering. You can add vermiculite to the soil to help retain some moisture.
Alternatively, try using a humidifier near your fiddle leaf fig. Don’t let the mist settle on the leaves, but have it close enough that it does touch the plant somewhat. Proper humidity will prevent fast drying, as will the use of self-watering pots with large reservoirs.
Crisp leaf edges
The primary reason that fiddle leaf figs end up with crispy-burnt leaf edges is a lack of humidity. These plants are native to tropical jungles, where water is plentiful in the air; it’s why they can survive there without living in soil.
The easiest way to fix this issue is to use a humidifier once a day, but you can also try placing smaller pots on top of trays filled with pebbles and water to create a sort of humidity bubble for each plant.
Another option is to spray or mist your fiddle leaf fig daily with a hand mister or basic spray bottle with a fine mist setting. Doing so will help your plant feel like there’s more humidity in their space, and they’ll be less prone to crispy leaves.
Never try to add humidity by overwatering. Leaving standing water in the pot will lead to root rot, which is exceptionally difficult to reverse in fiddle leaf figs. The key is to maintain at least 40% humidity within a small radius of your plant.
Small leaves
Considering that most fiddle leaf figs produce leaves that can grow longer than 12 inches in length, it’s a little odd to see them with tiny leaves. Unless you own a dwarf variety that was bred to stay smaller, your leaves should be a fairly impressive size.
The two main reasons for this issue are a lack of sunlight, and a lack of fertilizer. The first is a bit trickier to fix. Carefully inch your plant towards a brighter area day by day in your space, so that it receives enough sunlight to grow bigger leaves. No photosynthesis, no growth!
Be sure to fertilize your fiddle leaf fig regularly during the growing season with half-diluted fertilizer, about every month or so. Dial the food way back to every three months in the colder seasons, when there’s no active growth.
If you fertilize regularly, the type of fertilizer you use may be to blame. Be sure to use a fertilizer formulated for epiphytic plants, such as bromeliads, philodendrons, and anthuriums. These will more closely resemble the nutrients that fiddle leaf figs would get a hold of in the jungle.
