
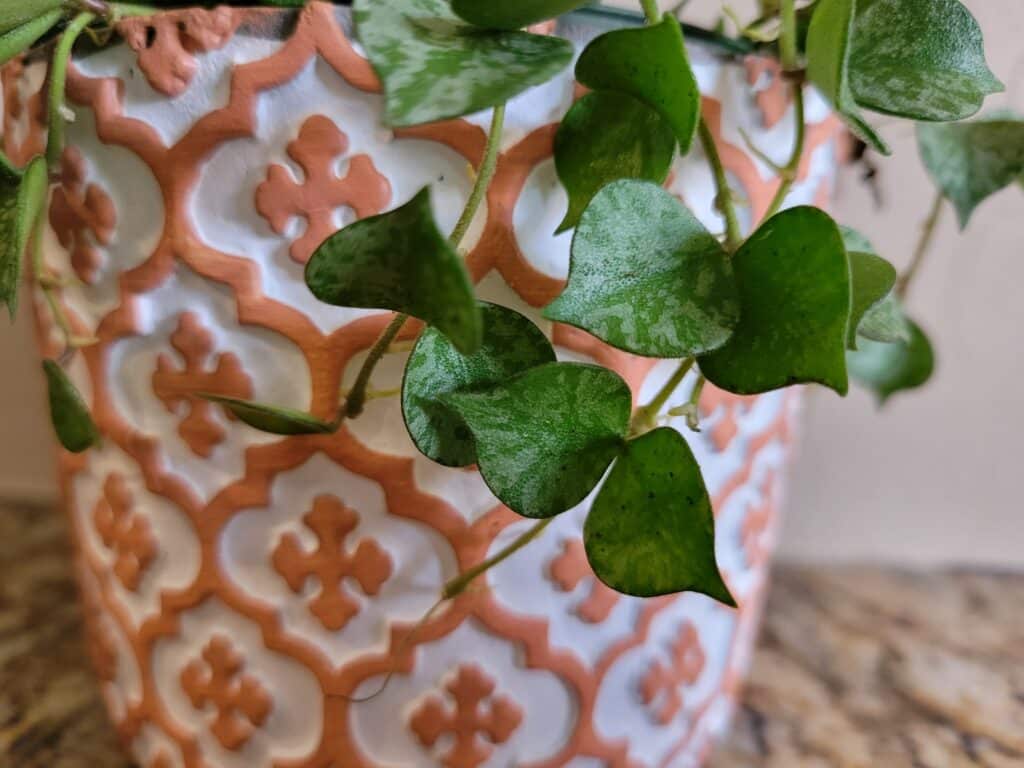
It’s a wonderful thing to find a plant that cascades in a perfect way like hoya curtisii does. Yes, folks, this hoya is certainly one of the more unique species of vining plant that grows happily inside houses and offices, which makes it such a treat to keep as a houseplant. It looks fairly similar to a typical run-of-the-mill hoya, except with dainty, decorative, dime-sized leaves.
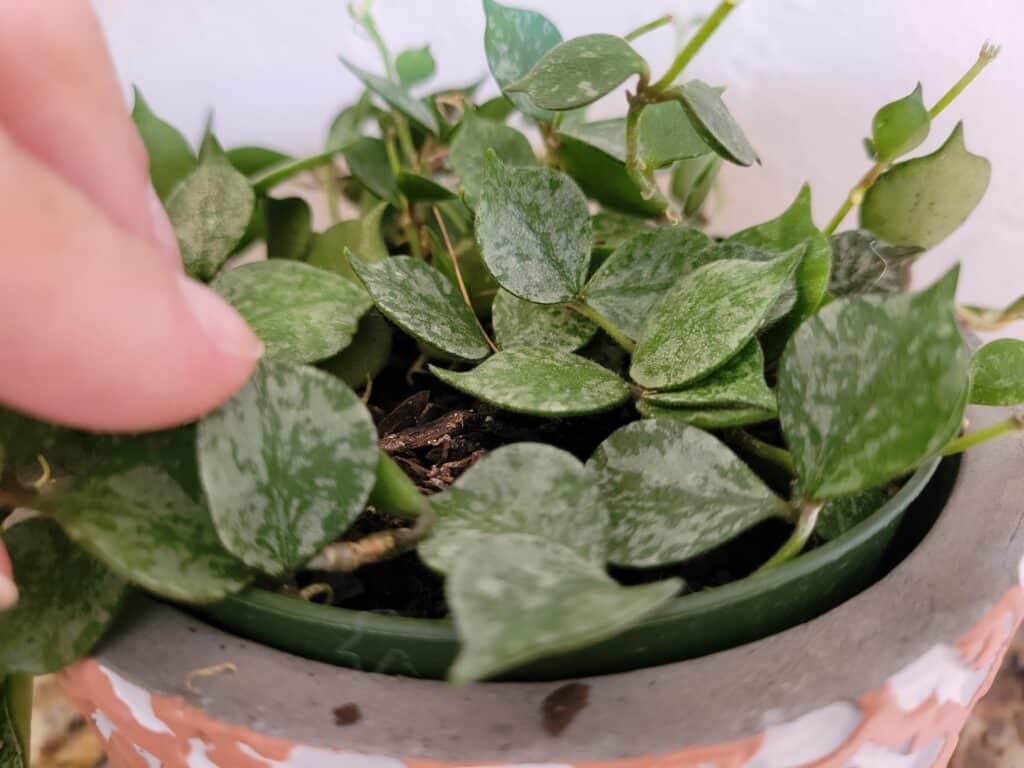
The vining properties of this plant are fairly similar to those of other hoya species, especially those with prominent aerial root patterns. The more aerial roots your hoya curtisii has, the more likely it is to be a great candidate for propagation.
Fortunately, it’s easy to make more hoya curtisii plants out of just a small piece of vine from the original plant. Of course, you can always simply purchase more plants, but what’s better than getting more of the plant you love for free? Hardly anything!
We’ll talk about the background of hoya curtisii, how to propagate it multiple ways, and of course, how to care for it as a young plant and as an adult. This is a plant that’s super easy to enjoy with the right knowledge.
Suggested read: The Complete Hoya Curtisii Care Guide
History & Culture of Hoya Curtisii
This plant is about as tropical as it gets. It’s native to countries with wet, warm weather like Malaysia, Thailand, Borneo, and the Philippines, but can grow outdoors anywhere where there’s a similar tropical climate that doesn’t get cold or dry.
Believe it or not, hoya curtisii is actually a succulent plant. It even blooms small clusters of lightly fragranced flowers that can smell like tropical fruits of all sorts. It grows as an epiphytic climber, which attaches to other plants like trees in order to stay upright and grow towards the light.
The vines of this plant each grow their own aerial roots, which are used to secure the vines to other surfaces like tree bark. At every set of leaves is a node, where there are cells that can turn into roots when propagated.
It’s unclear exactly when this plant made its debut in nurseries and plant shops, but it’s none too soon. Hoya curtisii was once considered a specialty species of hoya, but now it’s just as easy to find as a pothos plant.
Interestingly, hoya curtisii doesn’t have a huge range of cultivars. Either it’s just the perfect plant and doesn’t need to be changed, or it’s a pain to hybridize; either way, we’re happy with any hoya curtisii we can get!
Tools for Hoya Curtisii Propagation
Moving on to talk about the propagation process, we’ll first need to make sure that you have or can get everything you need to make it happen. Hoya propagation is really simple and easy, but there are a few things that you might want or need in order to increase chances of success.
Some of the basic tools you’ll need are the same ones you likely use for pruning your plants, repotting them, and even watering them in general. Other things might be less obvious, but you’re still likely to have them laying around somewhere!
Plant shears
If it were possible to propagate a plant with only one tool, it would be plant shears. They have to be sharp, rust-free, and free of germs, soil, and really anything else that might build up on the blades over time from normal use.
If you don’t have anything that matches this description, fret not; you can swap out any number of sharp, clean objects like a razor blade, sharpened kitchen scissors, and maybe even nose hair trimmers, if you’re feeling confident.
Rooting hormone
It’s easy to propagate hoya curtisii without too many fancy add-ons, but one thing you should definitely try to use is rooting hormone. It comes in a powder form for easy indoor use without spills or messes, and it’s relatively inexpensive.
Rooting hormone helps hoya plants establish roots far more quickly than they normally would without it. It just needs to come into contact with the cut stem to be absorbed into the plant’s primitive circulatory system, where it sends a signal to start rooting like crazy!
Moss
Propagating epiphytic plants is always fun to do in moss. Not only does moss look amazing in literally any setting, but it also makes for a fantastic bedding for new cuttings that need a moist and safe place to grow roots.
Any moss you use should be sterilized, preserved moss. Anything from your yard or a questionable source could potentially be harboring lots of different types of plant-borne pathogens, which cuttings want no part of during their vulnerable phases.
Containers
At some point, you’ll need containers that are short and wide enough to let air move freely in and out. These are necessary for moss and water propagated hoya curtisii cuttings, as the vines can be somewhat difficult to grow in taller containers.
Whether they’re glass or plastic, any containers used to root cuttings should be clear and translucent to at least some degree. Frosted glass works fine, as well. The idea is to let sunlight into the innermost parts of the plant.
Pots & Soil
Pots and soil will be essential no matter what method you choose to do, and all cuttings will eventually need to be planted in them once they mature. Choosing the right pots and soil to get them started will give them a much-needed advantage straight away.
Pots should be very small, no larger than three inches in diameter, for new plants from cuttings. They should have plenty of drainage holes as well. Soil will need to be well-draining, specifically since hoya curtisii doesn’t like soggy toes.
Rubbing alcohol or hydrogen peroxide
Imperative to the entire operation, rubbing alcohol is the best choice for sanitizing any tools that will be used as well as cleaning out containers that may need a good once-over before use. If you don’t have or can’t stand the smell of rubbing alcohol, go for hydrogen peroxide.
Both of these common household chemicals are particularly useful in helping to prevent the spread of plant-born diseases that can easily hitch a ride on shears and plant stakes, labels and trowels. Cleaning these items will help protect your new cuttings from microbial dangers.
Types of Hoya Curtisii Propagation
Being an easy-going epiphytic plant, hoya curtisii can be propagated in quite a few different ways. It’s really up to you to decide which you think is best for your plant given your environment and skill set, but it can be fun to venture out of your comfort zone and try something new.
If you’ve ever propagated a plant before, then you probably get the gist of how it happens: a piece of plant is removed, and that piece of plant grows into its own plant, which can one day be propagated itself. This happens all the time in the wild, but we’re replicating that here.
But there is a little more to it than that. The process is incredibly complex on the inside of the plant, but we can only see a fraction of what’s actually happening to plants at any given time. Therefore, we need to dig a little deeper to discuss how propagation works.
We’ll cover the steps and the basic science behind each method to give you a better idea of what you need to know in order to successfully propagate your own hoya curtisii. Here are just a few of the most common methods at home.
Water Propagation Method
If you have lots of mold or mildew in your space, drop this method altogether. Water propagation is not great for climates that have slime molds, but if this is no issue for you, then give it a go! This method involves leaving your cuttings in water for quite some time in order to root.
Water is most essential when a plant has no roots. Since roots are primarily what absorb water for use in photosynthesis, the plant has to make due with the aerial roots that it has until terrestrial, or the underground roots, are developed.
This can be a very interesting propagation method, especially if you want to see the roots grow in real time. You can observe the progression of new roots each day, and you don’t have to worry about a pot full of contaminated soil. Here’s how this method works.
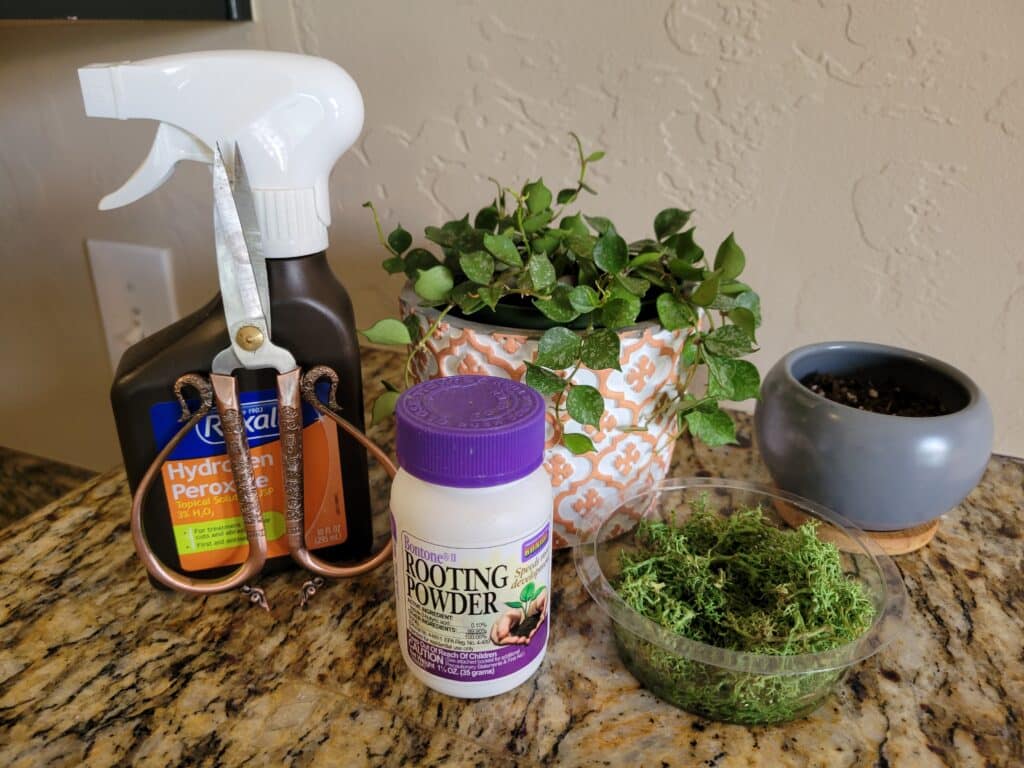
Step 1: Gather your materials
Before you start this project, first make sure you don’t end up running in circles looking for everything you need with cuttings in your hand. It’s kind of a personal preference for most, but generally speaking, it makes the whole process just so much easier.
It’s also a good idea to take a cotton ball or paper towel and use a small amount of rubbing alcohol or hydrogen peroxide to clean your shears and any other tools that will be touching your cuttings, including water containers. Dry thoroughly before using.
Step 2: Plan your cuttings
Now that you have everything put together and ready to go, it’s time to get to work. Check for eligible spots on the vines of your hoya curtisii that are about two to four inches long for best results; try not to go for anything six inches or longer.
The ends of vines are best for cuttings, but you can always use one entire vine and trim it into several good pieces that can be used as cuttings. So long as there are at least two leaves and one node on each stem cutting, there should be roots!
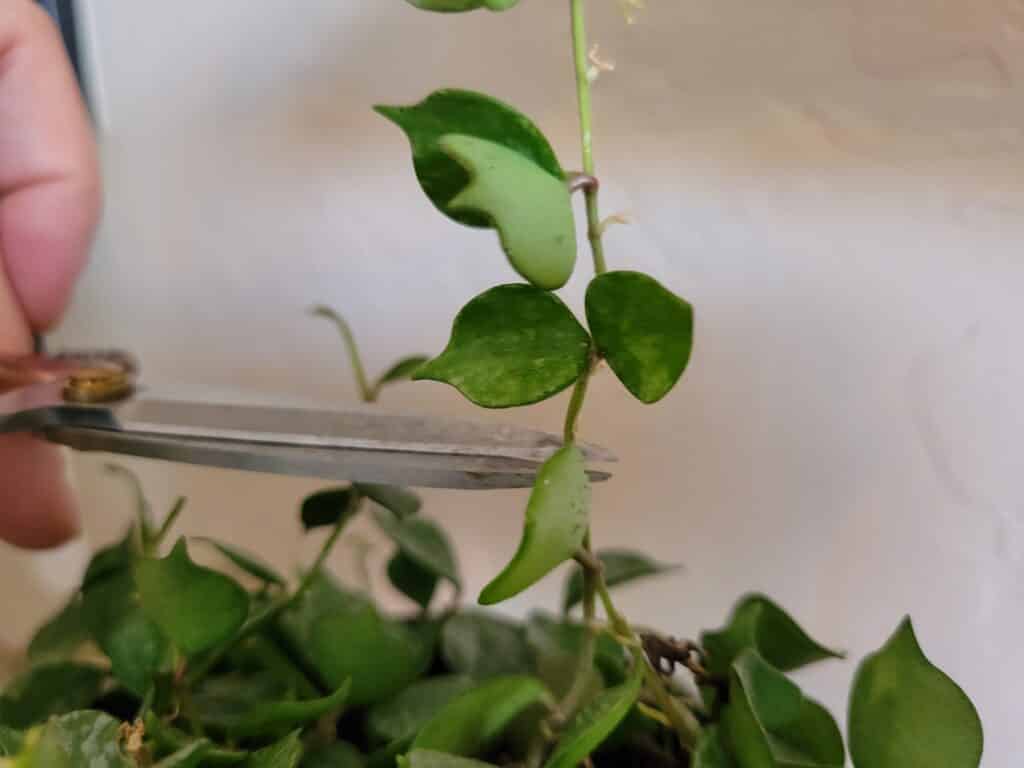
Step 3: Make the cuts
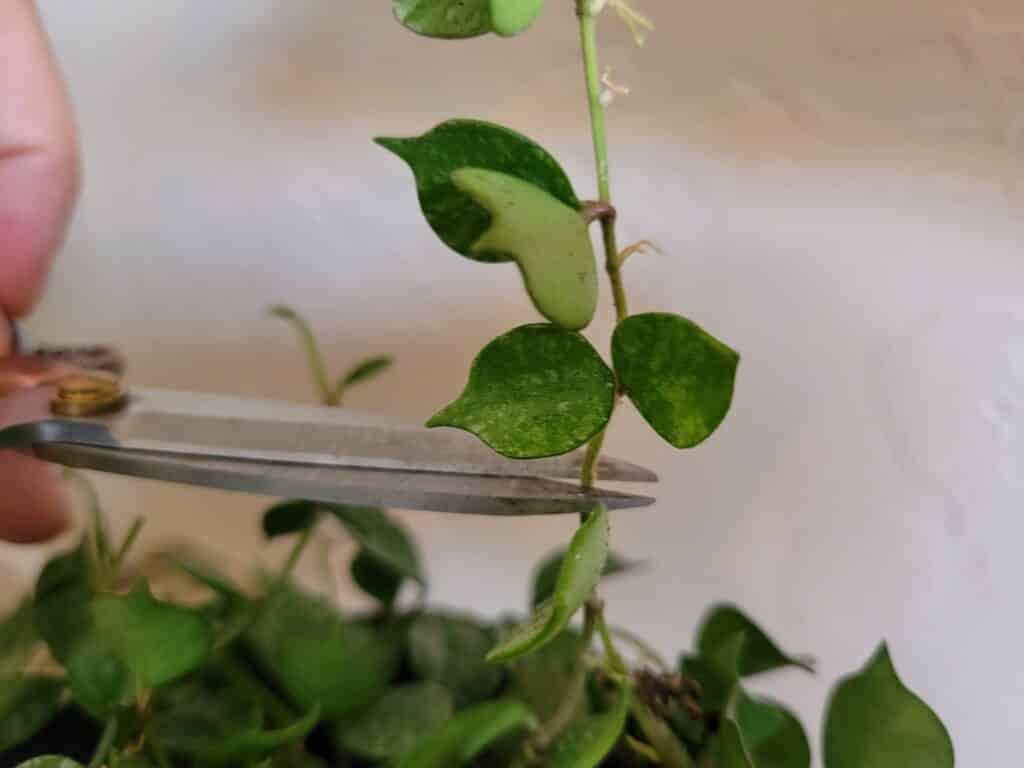
Once you have a good idea of which vines to cut and where, you can begin to collect your cuttings. Do so by cutting in one quick motion just below a node so that a small piece of stem is still at the end of the cutting.
Each cutting should be cut this way on both ends if they’re not end cuts. Cutting near a node signals to the node that it’s time to sink or swim, and those nodes will (hopefully) choose to swim and begin making new roots.
Step 4: Rooting hormone
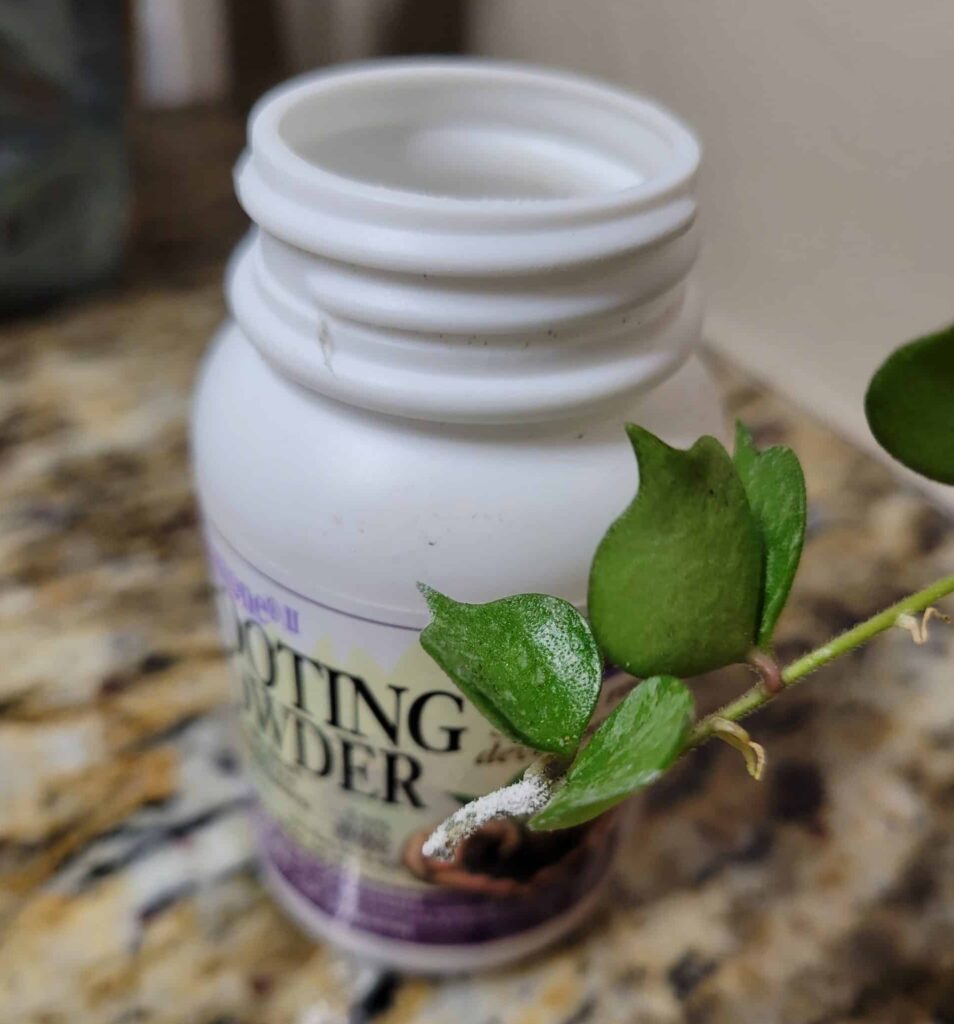
Here’s where the rooting hormone powder comes into play. Rather than try to coat all of the roots on each stem cutting, you can just dip one end of the cutting far enough into the powder to reach the first node. That’s it!
This quick and simple step increases your chances of getting roots by quite a lot, especially if you’re not exactly a seasoned expert. Whatever the case may be, this may as well be powdered luck, because your cuttings will be much better off with it than without it!
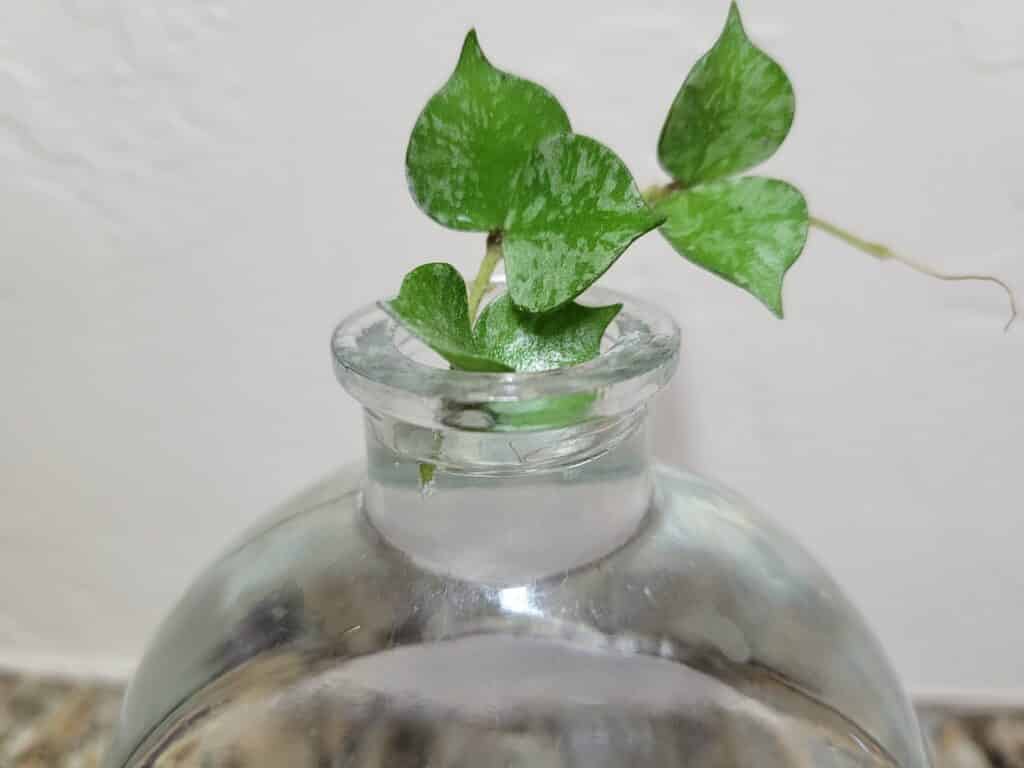
Step 5: Into the water
At this stage, you can begin placing your cuttings into water. Very carefully lower each stem into the water just enough for the lowest node on the stem to be submerged. You can choose to remove the leaves at the node that will be underwater, but typically, this isn’t necessary for this plant.
Hoya curtisii will begin to sprout roots about two weeks after the cuttings were taken. These roots will be most prominent at the node that was dipped in rooting hormone, but there will be other roots growing from nearby nodes, as well.
Step 6: Water maintenance
The best way to ensure that your hoya cuttings take root is to frequently change out the water they’re trying to root in. This water has the potential to become an algae factory, so changing it out every few days can keep it nice and clean.
Changing out the water also means preventing the buildup of hard water minerals that tend to lurk in tap water. These can become toxic to new plant cuttings in concentrated quantities, so be sure to give the jar a good rinse whenever you change out the water.
Moss Propagation Method
Who doesn’t love moss? It’s versatile, beautiful, and so incredibly abundant. It can be found at craft stores, plant shops, and nurseries. To find the best moss, look for preserved reindeer moss that hasn’t been dyed.
Avoid using high-acid mosses like sphagnum moss that can burn sensitive new roots. We want to create a welcoming, warm environment for new roots to grow in, and to do that we need moss that can hold water.
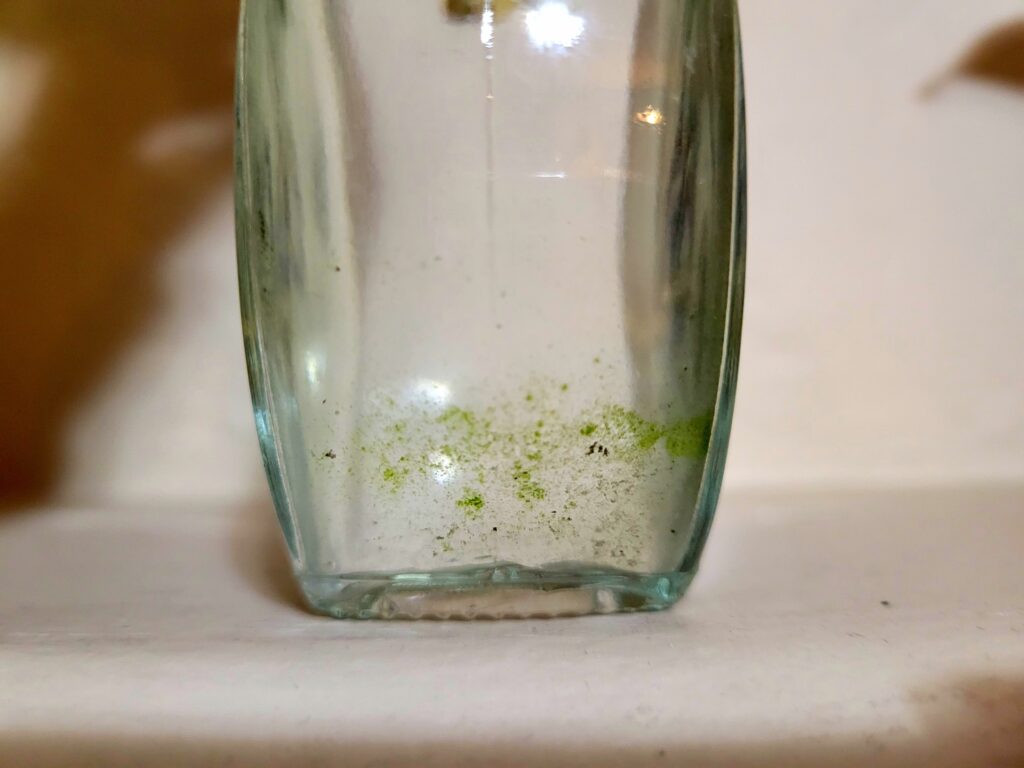
Be sure that the moss you’re using is microbe-free. If you leave a small pinch of it in a glass with a very small amount of water overnight and there’s light spots on it in the morning, it can’t be used for plants.
Step 1: Gather your materials
It’s generally a good idea to have everything together in one easy to access spot, so that you can complete the whole process from start to finish without having to run around! You can make a checklist to be sure you’ve got everything you need before you start.
You can also get all of your tools and supplies cleaned with either rubbing alcohol or hydrogen peroxide. It’s important to remove any debris and potential germs that might be lurking on plant shears or dusty containers.
Step 2: Plan your cuttings
Take a minute or two to really look at and study your hoya curtisii plant. Look at how each vine is formed, and which have the most abundant aerial roots. Vines that are longer and more mature are going to do better as cuttings.
Each cutting should be ideally two to four inches long, but any longer than that can cause rot when the cutting can’t produce roots fast enough to support a growing vine. Cuttings should have a minimum of two leaves and one node, but a few more of each are ideal.
Step 3: Make the cuts
Get your shears ready, because it’s time to take some cuttings! You have some options depending on how many cuttings you plan on taking. If you just want to try one out at first, that’s great; you can also choose to do several cuttings at once.
Either way, snip about three inches off the end of the first vine you plan on using, cutting in one swift motion right above a node (where leaves intersect) along the stem. You can either use the same vine to take more cuttings this way, or just move onto the next vine.
Step 4: Rooting hormone
Now that you’ve got all of your cuttings separated from the original plant, you can treat them with rooting hormone powder to give them a better chance at growing rotos and surviving as plantlets.
Simply dip one cut end of each cutting into the rooting hormone powder until the first node is covered in powder. It’s okay if you get more or less on there; hoya curtisii cuttings aren’t picky, and most of the excess falls off anyway.
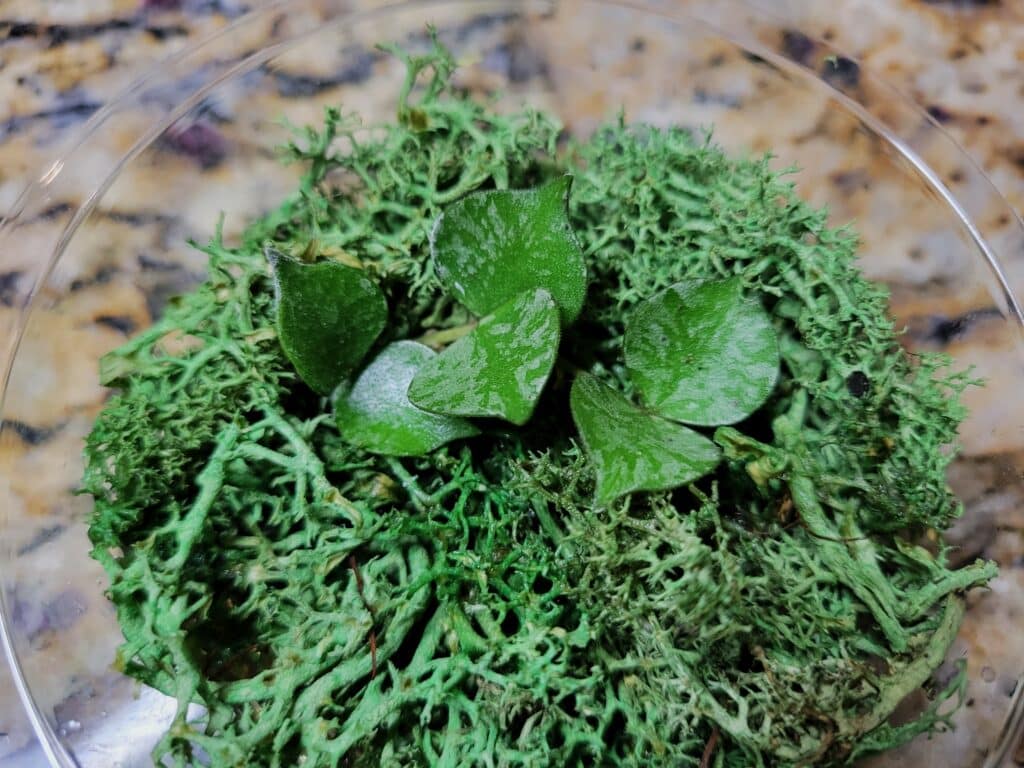
Step 5: Into the moss
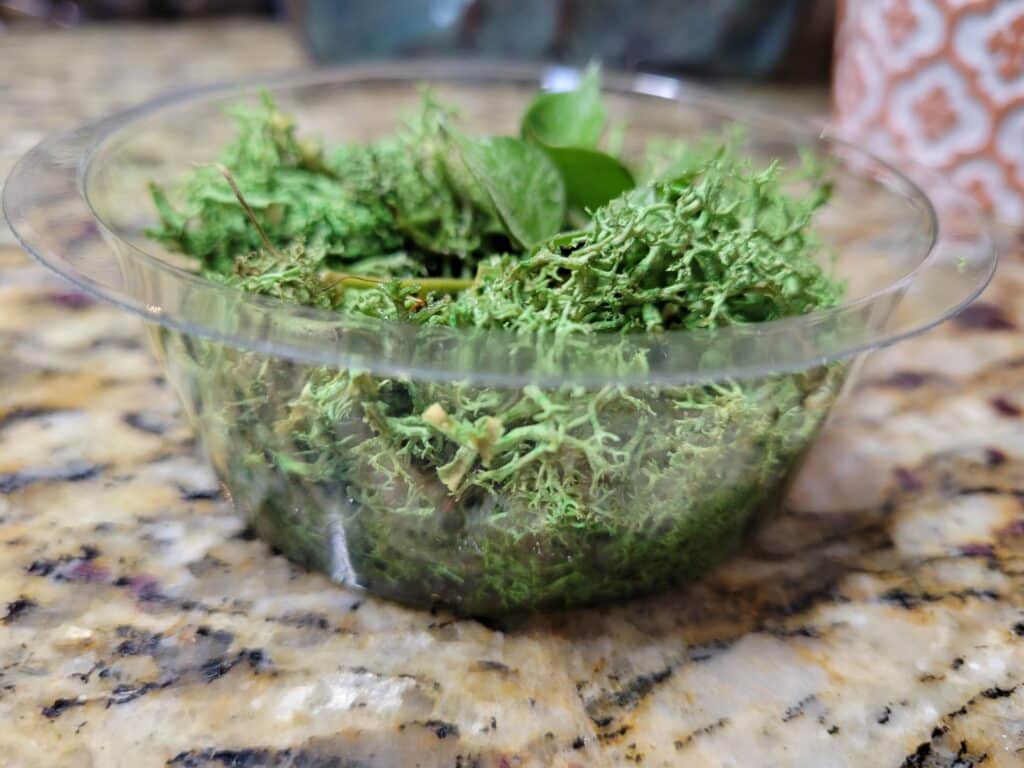
Now you must get your cuttings situated in their new moss beds. You should have a clear container with some moist moss in the bottom ready for cuttings. Simply place each cutting into the moss in a way that keeps the stems moist, but the leaves free to soak up sunlight.
The idea is that this bed of moss will provide all the water and humidity the cuttings need to develop roots, which can eventually be planted in soil. Moss simulates the natural habitat of hoya curtisii, creating a sort of tiny tropical rainforest environment.
Step 6: Daily misting
Speaking of tropical rainforests, the moss can’t pull off the illusion all by itself. In order to create a consistent humid environment for roots to grow in, you should mist your cuttings with water daily until all of the moss is saturated.
Alternatively, you can use lukewarm or room temperature water to saturate the moss every day. If you can’t commit to misting, try using a humidifier to recreate the humid environment these plants love to live in.
Soil Propagation Method
It’s trickier, no doubt. But soil propagation can be one of the simplest ways to make more hoya curtisii plants. The real downside to this method is that it can be easy to let the soil dry out too much. Once it dries, your cuttings are in really bad condition.
However, if you happen to be someone who can take very good care of a plant and pay lots of attention to it, then your odds are pretty favorable. The soil method is really simple, doesn’t require a lot of work, and is easy to maintain.
The only disclaimer here is that watering is non-negotiable. If your cuttings’ soil dries out, all of the roots and their precious growth progress are gone, and there’s really no saving them from that. If you’re comfortable with that, here’s how to do it!
Step 1: Gather your materials
If you’re the type of person who can never find anything, this step is for you. Gather all your good plant stuff in one spot, and make sure that you have everything you need to do the project from start to finish.
Hoya curtisii are susceptible to plant-borne pathogens that spread by attaching themselves to the surfaces of pots, plant shears, plastic trays, and even soil. Use rubbing alcohol or hydrogen peroxide to clean shears, pots, and any other plastic or metal tools you may use.
Step 2: Plan your cuttings
Before you start chopping wildly at your precious hoya, try to imagine which vines you think the plant can live without. The plant itself will certainly survive if you take lots of cuttings, but it’s best to maintain a balance around the plant when trimming.
This way, there’s no fuller or sparser side of the plant, and it can go on growing on every side to look full and lush from all angles. Try to choose mature vines that have an abundance of aerial roots to support the stems once they’re cut.
Step 3: Make the cuts
There’s no wrong way to take your cuttings, so long as they’re the right length. With your shears, make one swift cut just above a node about three inches up from the tip of a vine. That’s all there is to it.
From here, you can either continue to cut the same vine into three inch sections the same way, or you can choose to take cuttings from other vines, too. The decision is yours, but remember to keep things balanced in the pot.
Step 4: Rooting hormone
Now, each cutting will need to be treated with rooting hormone powder in order to kickstart the rooting process. This helps to send a signal to the cells inside each node that will tell them to start producing roots rather than length.
To do this, simply dip one side of each cutting into the rooting hormone powder until the first node is entirely covered in powder. There’s no need to remove any leaves, since root nodes already exist at these sites naturally.
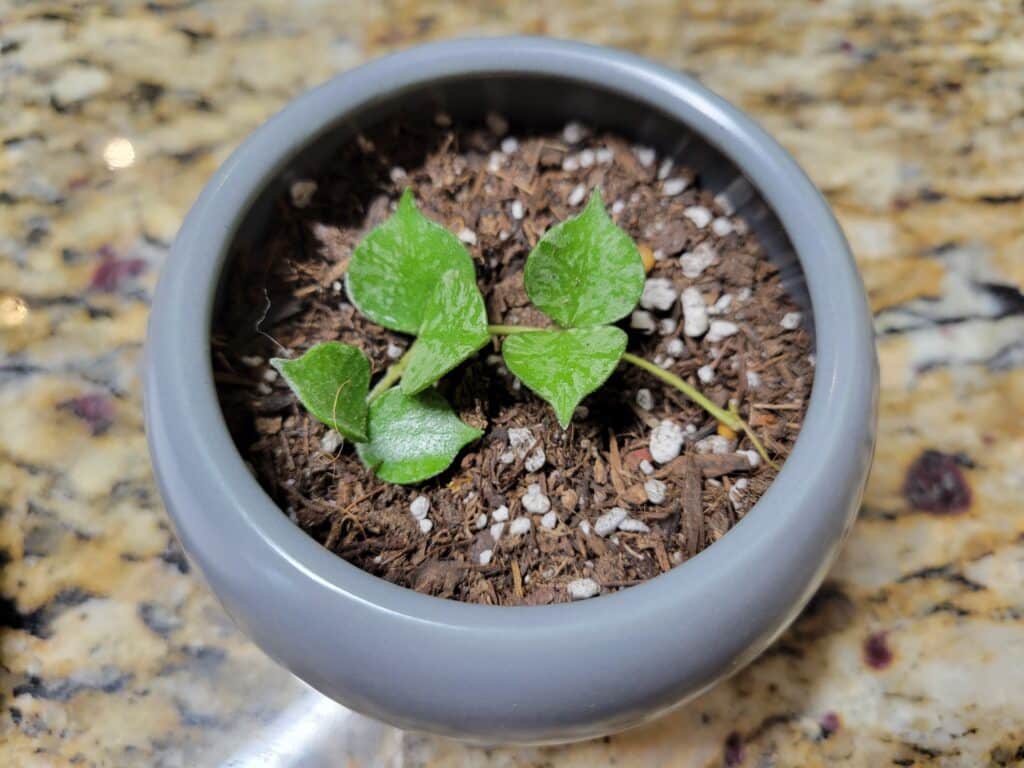
Step 5: Into the soil
To plant your cuttings in soil, first prepare several three inch pots with moist, but not waterlogged, soil. The idea is to bury the aerial roots in soil, while the stems sit on top of the soil surface.
You can use a small brush or your fingers to gently push the nodes into the soil so that they’re all nesting in moist soil. Once you have your cuttings planted, mist them gently with a spray bottle or use a watering can with a diffuser to spread out a gentle stream of water.
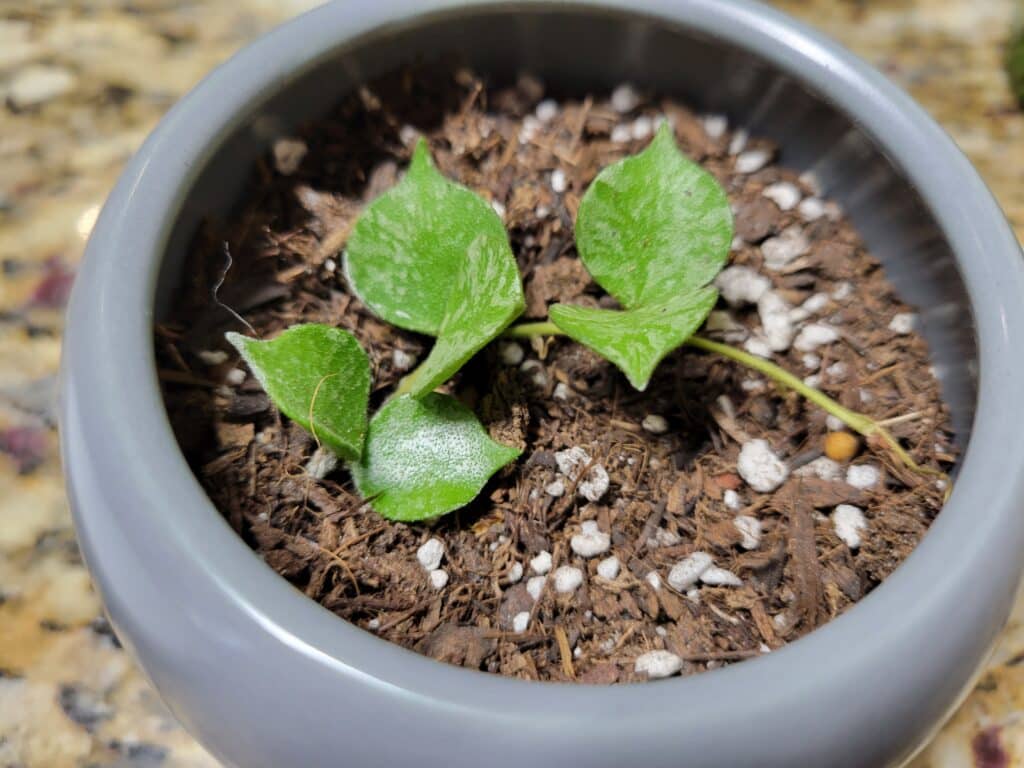
Step 6: Watering
The most important part of propagating hoya curtisii in soil is watering. Make sure that the soil remains moist for the first four to six weeks, until you can see roots beginning to grow into the soil.
Once you start to see new growth coming from the stems of your cuttings, the hoya cuttings have begun forming their new root systems. From here, you can dial back watering to only water once the top inch of soil in the pot is dry.
How to Layer Hoya Curtisii Vines
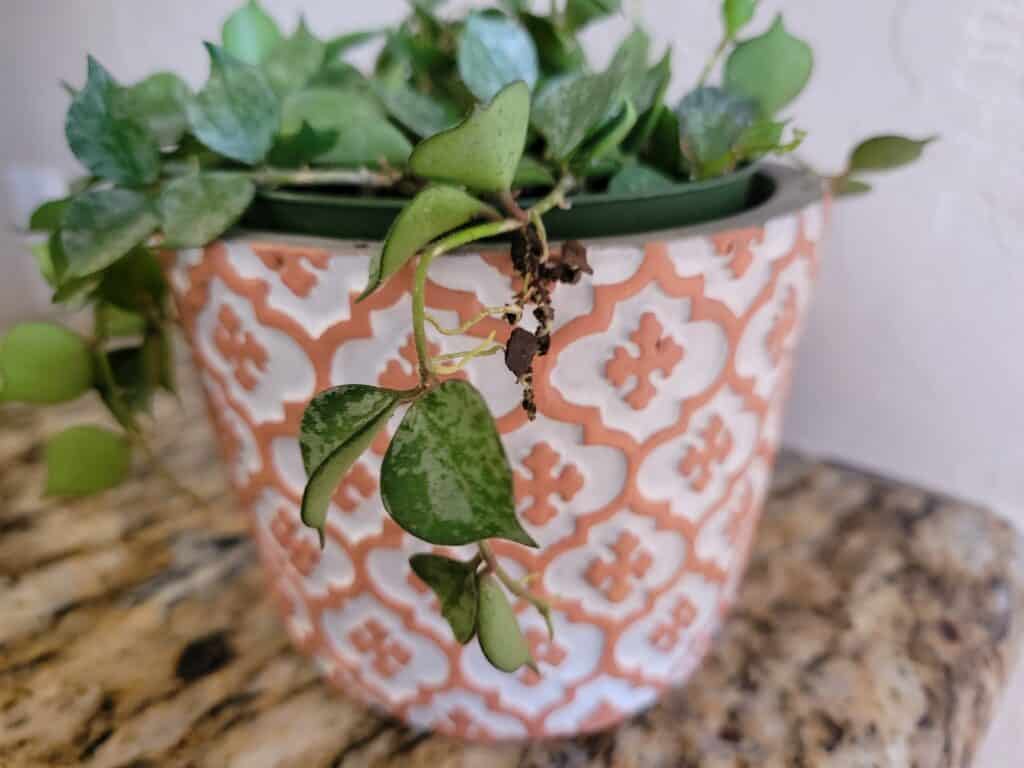
If you’d prefer not to have to care for cuttings, you can always try layering hoya curtisii vines to create more plants right in the same pot. Instead of cutting starts off the plant right away, this method involves planting sections of vines while they’re still attached to the original plant.
This way, the vines can begin to root in the soil without being cut off from the nutrient flow and photosynthesis of the original plant. All you need to do is plant one or more of the vines of your plant into the soil.
It doesn’t matter how long each cutting is when you plant an end of it to root. Since there’s no deficit of nutrients or water, there’s no need to conserve energy. If you have a ten inch vine, you can plant it at about the seven inch mark by pressing the stem down into the soil and covering it.
Water as usual, but try not to disturb this vine at all. The key to proper root growth is allowing the vine to stay buried underneath the soil in that one section, where at least one node is underneath the soil surface.
After the first six weeks, you should be able to pull the cutting up from the soil and make a quick cut at the base of the original plant to release the vine you planted. You’ll start out with a rooted cutting that looks fuller than most other propagation methods can yield!
How to Care for Hoya Curtisii Cuttings
For the next six to eight weeks, your hoya curtisii cuttings will be especially vulnerable to all the normal plant problems that mature plants can handle without much fuss. If they become dehydrated, light deprived, or even too cold, your cuttings may not make it.
On the bright side, hoya curtisii cuttings can be easy to care for if you can remember to check on them once in a while. Keep them well hydrated by watering and misting them frequently, but never let the soil remain soggy for too long if you propagate in soil.
These cuttings should have plenty of bright, indirect light each day. Try to provide at least eight hours of bright light per day, but use a sheer curtain for southern or eastern exposure windows. Too much light can burn sensitive little leaves and exposed roots.
Try to keep your hoya cuttings within a fairly reasonable temperature range of 60 to 80 degrees fahrenheit. Most homes and offices fall somewhere in this range, so it should be fairly easy. Avoid placing cuttings near air vents and drafty windows.
How to Plant Hoya Curtisii Cuttings
Your cuttings should have developed a strong root system within the first two months or so of their propagation journey. Depending on how you chose to propagate them, their roots may look different. Here’s how to plant cuttings that were propagated outside of soil, in soil.
Planting Hoya Curtisii Cuttings from Water
Cuttings should have a fairly robust set of roots by now, and they’ll be visible through the water. If the roots have grown and are much bigger than they first were, that’s a sign they’re ready to be planted. Look for new growth from the vines before you plant.
All you need to do is prepare a three to four inch pot with moist, well-draining soil, and plant any roots that were submerged in water underneath the soil surface. Water them in well so that the soil settles around the roots, and then carefully lay the vine overtop of the soil.
Planting Hoya Curtisii Cuttings from Moss
First, you should know that it’s okay if you can’t remove all the moss from the roots of your cuttings! This is normal; it will eventually break down into the soil and become part of the growing medium.
Plant any moss or roots that were inside moss underneath the soil surface in a three to four inch pot. Carefully lay the vines overtop of the soil evenly, then water everything in to create a finished plant!
