Jade is one of those plants that’s cool enough to talk about and small enough to keep nearly anywhere in a space with sunlight. Most first-time succulent growers will go for a jade over haworthia or aloe, especially due to their resilience and ability to keep growing year after year without constant repotting and trimming.
This diverse species is known for its gorgeous succulent leaves on sturdy stalks that can range in color depending on where you are and what type of care it receives. If you’re lucky, one of these plants can last over thirty years with enough sunlight, routine maintenance and occasional watering. It’s so easy to keep a jade plant alive and thriving that a jade may outlive the rest of your houseplants!
Tools for Propagation
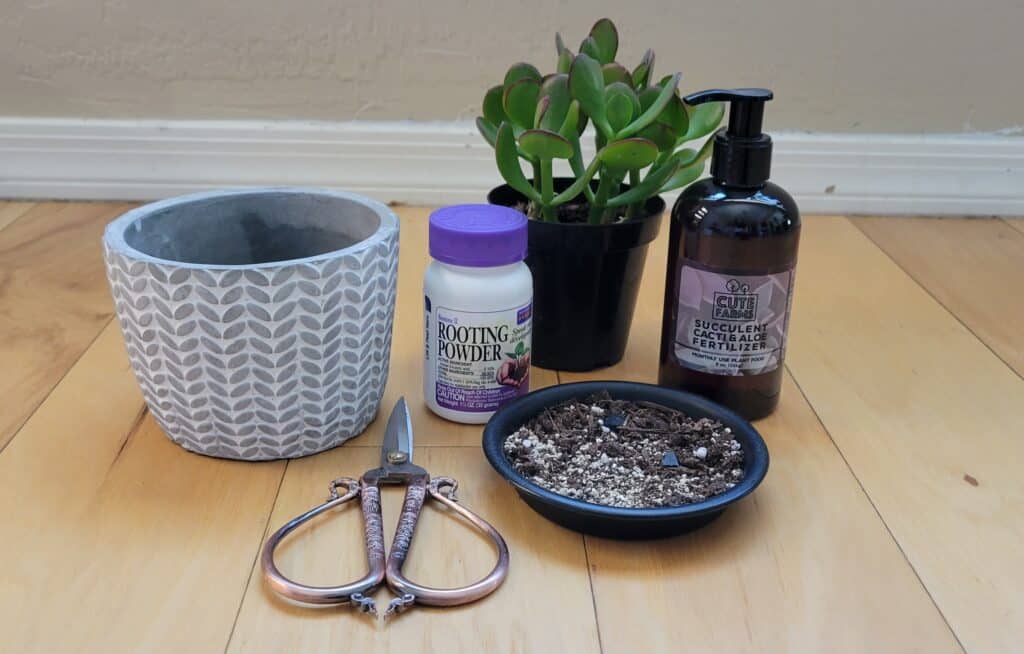
You’ll need a basic list of supplies for any propagation project, but it’s likely you’ll have all if not most of them lying around already. Using the right tools is important when propagating with succulents, especially when propagating from a small cutting, which happens to be the case with jade plants.
Of course, you’ll want to make sure you have everything you need ready to go before you start propagating, but we’ll cover this in more detail later on. Here’s a list of essentials you need or may want to have for propagating jade:
- Shears. Any pair of sharp shears or a sharp blade will make cuttings much easier to remove from the original plant. Avoid using anything dull, as these will simply crush the point on the stem where you’re cutting instead of taking it clean off.
- Growing medium. With jade plants, soil is best to use for propagation. Any soil labeled for seed starting or succulents and cacti will do well, so long as it has ample amounts of peat (sphagnum moss) and perlite in it.
- Pots and propagation trays. While your trays can be anything from a salad plate to an empty strawberry carton, your pots should be proper, plastic ones with drainage holes at the bottom. Jade needs to dry out more than other plants, so this is important.
- Rooting hormone. While not totally necessary with jade plants, rooting hormone really helps to kick the rooting process into gear. This hormone is easy to find at most home and garden stores, and is pretty inexpensive considering how often you’ll use it.
- Rubbing alcohol. This stuff is just nice to have around if you have plants. It can be used to sterilize your tools, pots, and help to remove pesky insects from infested plants. In this instance, you’ll need to create a sterile workspace and clean your tools!
- Plants! You can’t make propagated plants without plants to begin with, so you’ll need a mature jade plant to start with. Mature jade isn’t very big, but it should have several sets of “leaves” on each stem before you go chopping.
- Plant tags. If you have more than one jade plant, it’s wise to label the cuttings you take, so that you know which plant they came from, when they were cut, and when it’s time to repot them. We like to write repotting dates on them as well.
Types of Cuttings
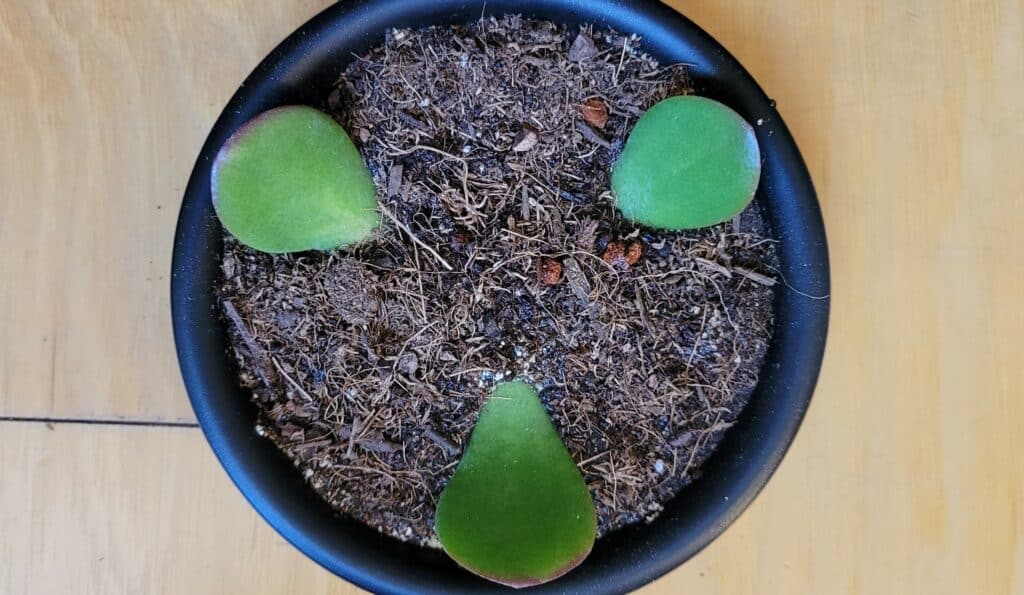
Jade plants can be propagated in multiple ways and for a few different reasons. You may have a jade plant that’s getting “leggy”, which indicates that it isn’t getting enough light, or it may be trying to find fresher soil to grow in. In this case, you’ll want to propagate the top portion of the plant first, then take cuttings from the leaves of the plant.
However, if your jade plant is looking great, but you just want more copies of the same plant, then taking leaf cuttings is the way to go. You can simply remove the leaves of the jade plant to create more plants from those.
Types of Propagation
Jade plants can be propagated in a multitude of different ways, but as with all other plants in the kingdom, they prefer some methods over others. While vines and tropical plants like to be propagated in water, jade is a succulent and therefore is more susceptible to rot, so soil propagation is best. Whichever method you choose is up to you, but save the tougher methods unless you’re more experienced in succulents propagation.
Here are the two jade plant propagation methods that we will be covering:
- Soil propagation
- Water propagation
Soil Propagation Method
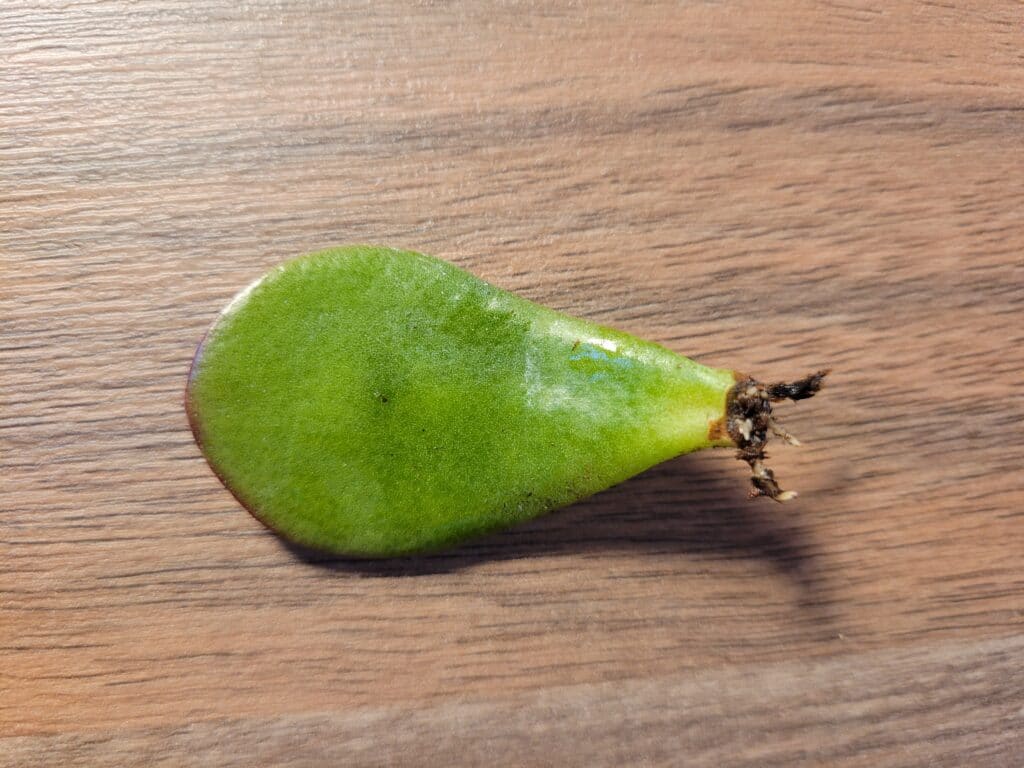
For this method, you’ll need the essential supplies: shears, soil, trays, and some rooting hormone. Any soil will work for a jade plant, as they’re not particularly picky about the medium they grow in (imagine the condition of the dry desert soil they’re native to).
Just make sure that whichever soil you choose is broken up very finely and doesn’t contain any large chunks that can get in the way of new roots searching for water. The soil you’re using should be at least a centimeter deep, and should be well-saturated without any standing water in it; just enough to make the soil a bit muddy.
For top cuttings, however, you’ll need a small pot with the same saturated soil in it ready to go.
Step 1: Gather materials
Before you start propagating, it’s best to get everything you’ll need in one place, ready to go. This way, you won’t be running around frantically trying to find the rooting hormone you swear you put somewhere else, and you won’t have to keep sanitizing everything before you use it.
Once you have all your supplies in one place, give them all a good wipe-down with the rubbing alcohol (trays included) and get ready to take some cuttings. Keep the alcohol away from your new cuttings, however, as they won’t appreciate any accidental splashes from it while they’re stressed.
Step 2: Locate your cuts
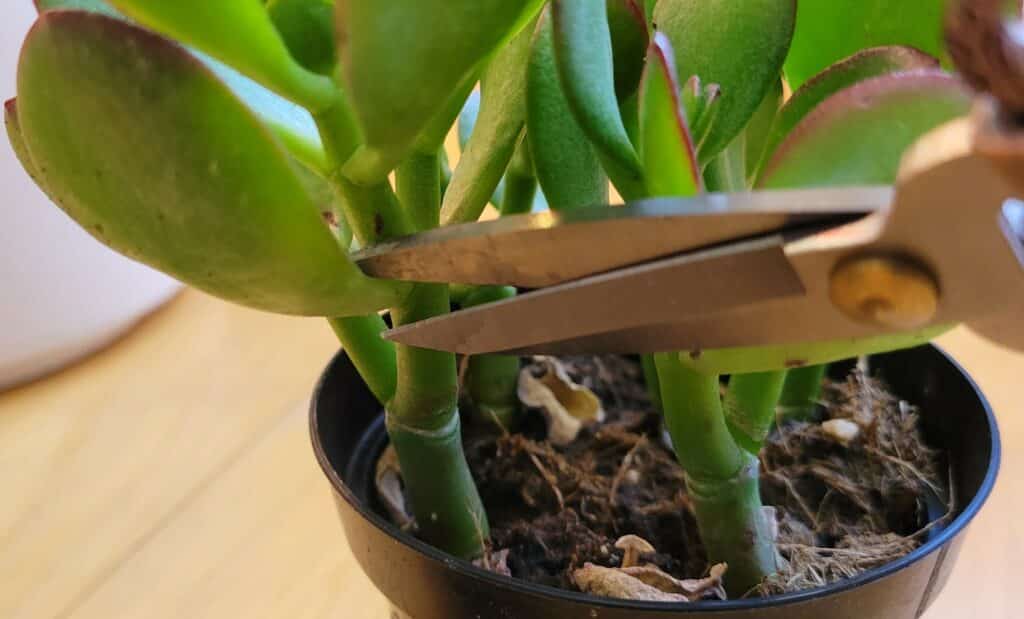
Propagating a jade plant is sometimes easier than propagating a tropical houseplant, but it can also be a little trickier. The succulent leaves of this plant tend to fall off under very little pressure, so it’s easy to accidentally take off more than you intend. In this case, if you knock too many leaves off of the stem, you’ll be left with a plant that doesn’t have enough leaves to photosynthesize.
Be careful to choose only the bottom-most leaves of the plant, and take no more than 20 percent of the leaves off of each stem, depending on how many cuttings you intend to take. Avoid the tiny, developing leaves at the very bottom, as those won’t have enough nutrients to sustain themselves alone.
Step 3: Make the cuts
To get healthy, happy leaf cuttings from a jade plant, you want to cut right up against the base of the leaf where it meets the stem. While most plants prefer an angled cut, jade doesn’t need them. Instead, cut at a vertical angle so that it looks as if you’ve made a clean cut between the leaf and stem.
Try not to damage the stem of the plant at all while you’re doing this; it’s better to take some tissue off the leaf than the stem of the original plant. If you’re taking cuttings from the top of the plant, first take off the top three sets of leaves by cutting just below the fourth set.
Remove that fourth set so that only the nodes remain, then you can remove additional leaves from below. Stem cuttings don’t work well with jade, so avoid using middle sections of stem.
Step 4: Rooting hormone
Each cutting you take should be dipped into the rooting hormone right after you cut it away from the original plant. Just enough to cover the cut is sufficient; anything above that point will be unnecessary, so try to just cover the one spot where you cut. This same rule applies if you cut just a leaf or the top of the plant’s stem. Once you’ve dipped in the powder, wait a few seconds before completing the next step.
Step 5: Into the soil
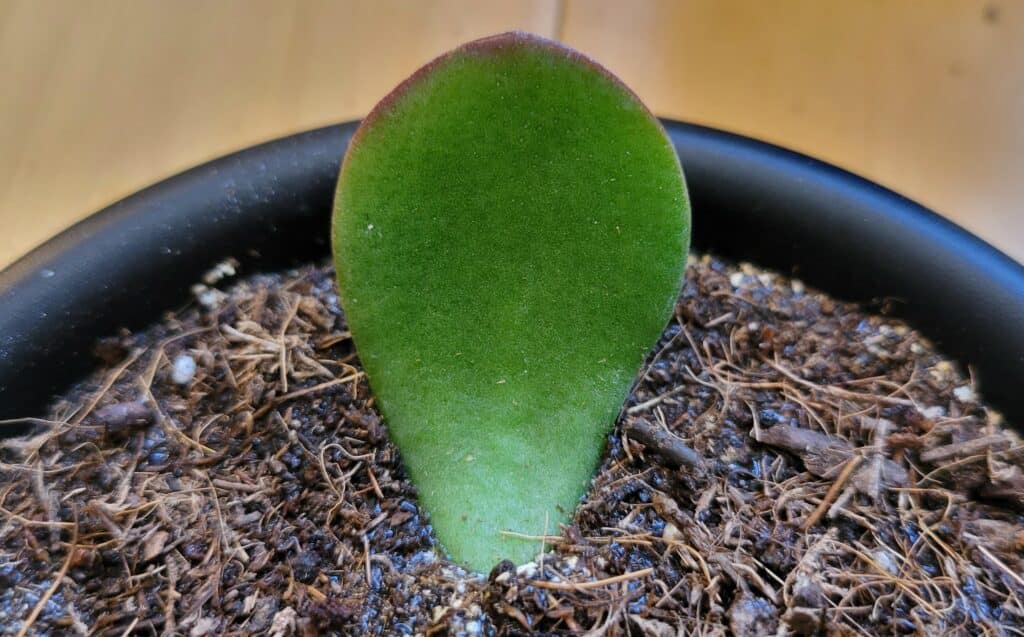
If you’ve taken a cutting from the top of the plant, you’ll need to plant this directly into a small pot of very damp soil. Push the stem into the soil until the soil is just below the third set of leaves, then add some additional water and let it drain out to help pack the soil around the cut stem. If all you cut were leaves, then these can go directly into the tray of soil.
For this, simply press the leaf’s cut into the damp soil enough to cover the cut and hold up each leaf. This will help to encourage new growth from the cut, where you’ll start to see a brand new plant growing within a few weeks!
Step 6: Water regularly
Once you’ve got your cuttings set up and ready to go, they need to be maintained pretty regularly. Your new starts will need regular watering, which is easiest with a spray bottle for trays or with a watering can that has a narrow spout for small pots.
Make sure the soil doesn’t dry out entirely before your starts are ready to be repotted; once the roots begin to grow more, they’ll need water more frequently. It’s a good idea to keep a spray bottle or watering can nearby to help you remember to water each day!
Water Propagation Method
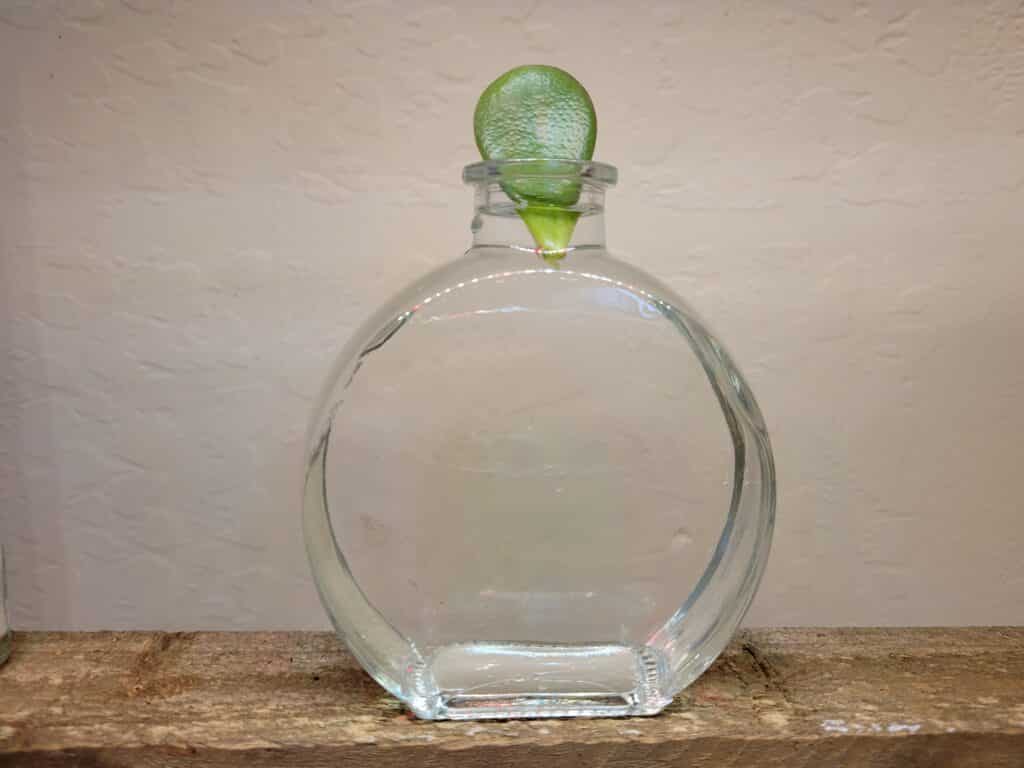
Propagating jade plants in water can be done, but it’s certainly not ideal. Most succulents are prone to rotting, so a semi-permanent home in water is a little more risky than other options. Since water propagation for jade plants is rarely successful, we don’t recommend going this route; however, if a challenge is what you need, then this way is for you. Here’s the run-down of how it’s done.
Step 1: Gather materials
For water propagation, you’ll want to swap out trays, pots and soil with any type of narrow, short container that can hold water (clear is best!). Otherwise, you’ll need just about everything else: your shears, rubbing alcohol, rooting hormone, and of course, your jade plant.
Double check that everything is sanitized, including your water vessel and shears! This will help protect your plants from fungal and bacterial diseases.
Step 2: Locate your cuts
Locating the spots where you’ll snip off your cuttings is just the same as it is for the soil propagation method: you’ll need to identify whether you’re taking a stem cutting, or just nipping off a few leaves to build your plant collection.
For a stem cutting, you’ll cut just below the fourth set of leaves from the tip of the plant; remove the fourth set of leaves, but leave the rest on for photosynthesis. No fancy angles are needed for succulents like jade. However, if you’re only after leaves, then you can cut them right up against the stem, being careful not to actually cut into the stem. Sharp blades are key here.
Step 3: Make the cuts
Once you’ve decided where to cut your starts, go ahead and gently but swiftly make the cuts. Once you’ve done so, make sure to dip any exposed cuts in rooting hormone, which will help to increase the odds of your jade propagating successfully in water.
Let the new cuttings sit out of water for a few seconds with the rooting hormone on them, and then place them in water so that the water is about 20% of the way up the bottom of the smallest leaf, or just before the first set of leaves for a stem cutting. Too much water can cause rot, so make sure to check the water levels daily.
Step 4: Water maintenance
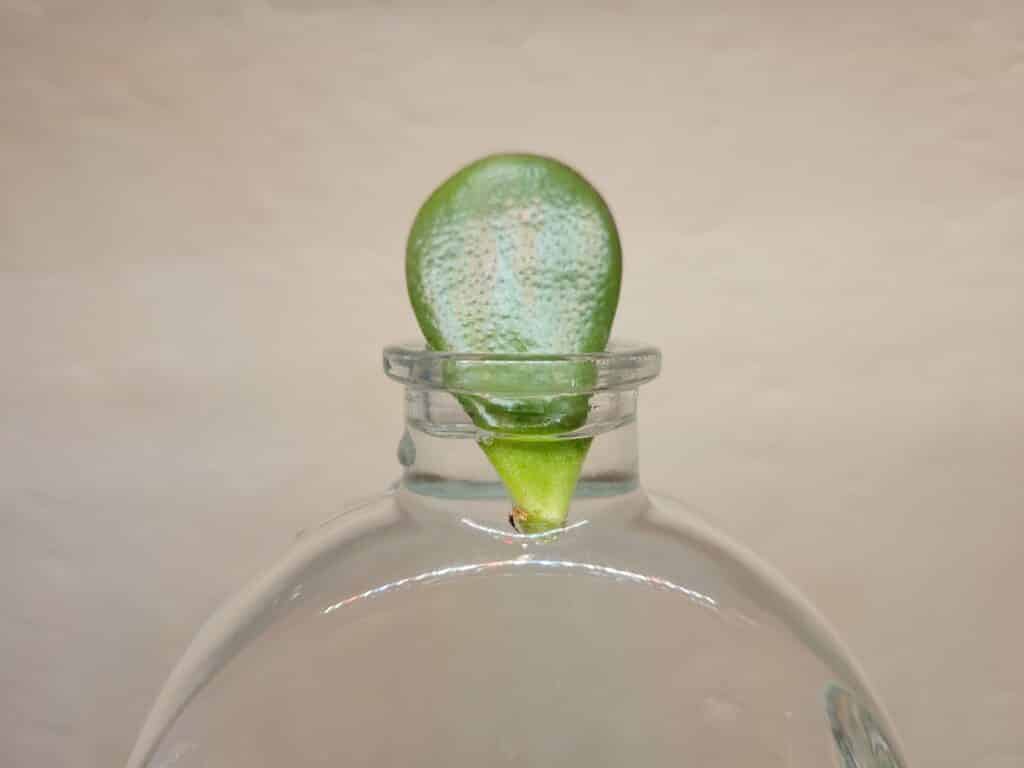
Every day, or every other day at the latest, you’ll need to check your jade cuttings to ensure that they have fresh, clean water. Continue this process until either your jade leaves are sprouting new leaves, or a stem cutting has at least 2 subsets of roots (a root growing from a root, which is also growing from a root). There’s no need to fertilize your jade while it’s in water, so don’t worry about nutrients until it’s time to plant them in soil.
Step 5: Into the soil
Once your cuttings have ample root systems on them, they can be planted into their very first pots. It’s best to use smaller pots for jade cuttings, which are typically small and don’t require much room to grow. Using smaller pots allows for the soil to dry more often, which also prevents rot and pests from infiltrating your new jade plants.
Be careful to plant just the roots into the soil, keeping all the jade plant’s new leaves above the soil surface so that they have access to sunlight. Now, you have brand new jade plants!
Repotting Your Jade Plants
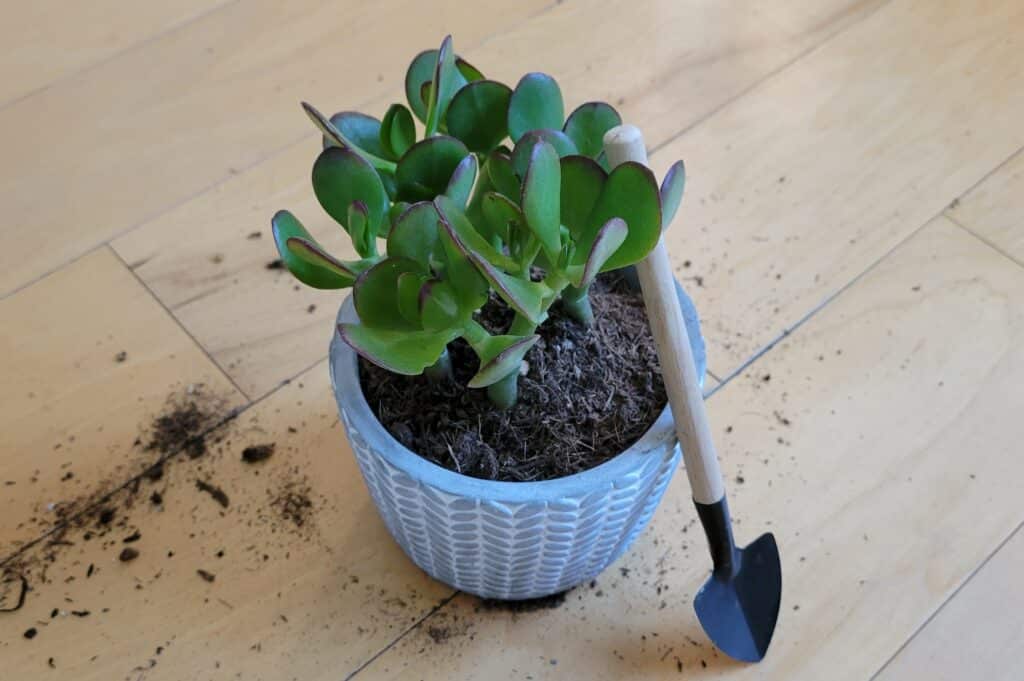
While jade plants don’t grow particularly fast, they do eventually need to be repotted. Signs that it’s finally time for a new home for your jade plants include rapidly drying soil, roots poking out from drainage holes, and overcrowding (the plant looks too big for its pot).
Jade has a tendency to become easily rootbound, so watch out for these signs within the first couple of months after you’ve planted cuttings in their first pots. If your plant does end up with a tangled root system, you can gently use a small bonsai rake or a comb to break up the outermost layer of roots, which will help to encourage root growth in all directions.
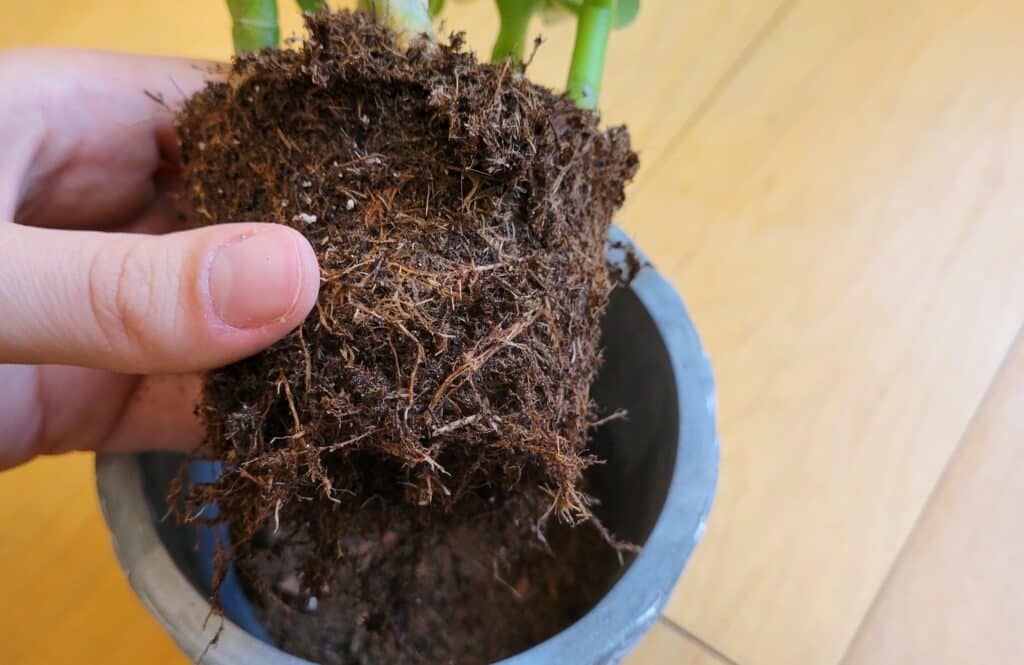
Choose a new pot that has room enough for your jade plant, plus an inch around the sides and under the bottom. Good pots to use are plastic, ceramic, and terra cotta, which dries quickly. Make sure the new planter has enough drainage holes for a succulent, as well as a tray underneath to catch any water runoff and condensation.
Jade isn’t picky about soil, but you can use a pre-mixed succulent or cactus soil if you’d like. Otherwise, you can use standard potting soil you may already have laying around to pot these little guys up!
Caring for Your Jade Plants After Propagation
Once your cuttings are grown, they require a lot less maintenance from you. Jade only needs to be fertilized every six months with a weak cactus or succulent fertilizer, and repotted once a year at most.
They can go several days without water in colder months, but may require more frequent watering if your region gets particularly warm in the summer months. Keep an eye on soil moisture levels to determine whether you need to water; most of the time, you can simply dip a finger into the soil to check if the top inch is damp. If not, it’s time for a drink!
Jade plants need plenty of sunlight, so a dark, damp office isn’t an ideal place for a jade plant to live. If your space has windows that let in sunlight for most of the day, then you’ve got an ideal location.
Jade likes to have at least eight hours of bright, indirect light each day, but if you just don’t have the resources coming in your windows, you can also supplement with a full-spectrum LED light just above your plant for the same amount of time. If you do place your jade near a window, rotate it a quarter-turn each week to prevent it from becoming “leggy” or growing out without much foliage.

