
If you’re anything like the rest of us crazy plant lovers, chances are you’ve come across a variety of pothos or two in your quest to fill every shelf with something living and green.
Pothos are incredibly popular houseplants due to their inviting and exotic aesthetic, but also for another reason: they are incredibly easy to propagate.
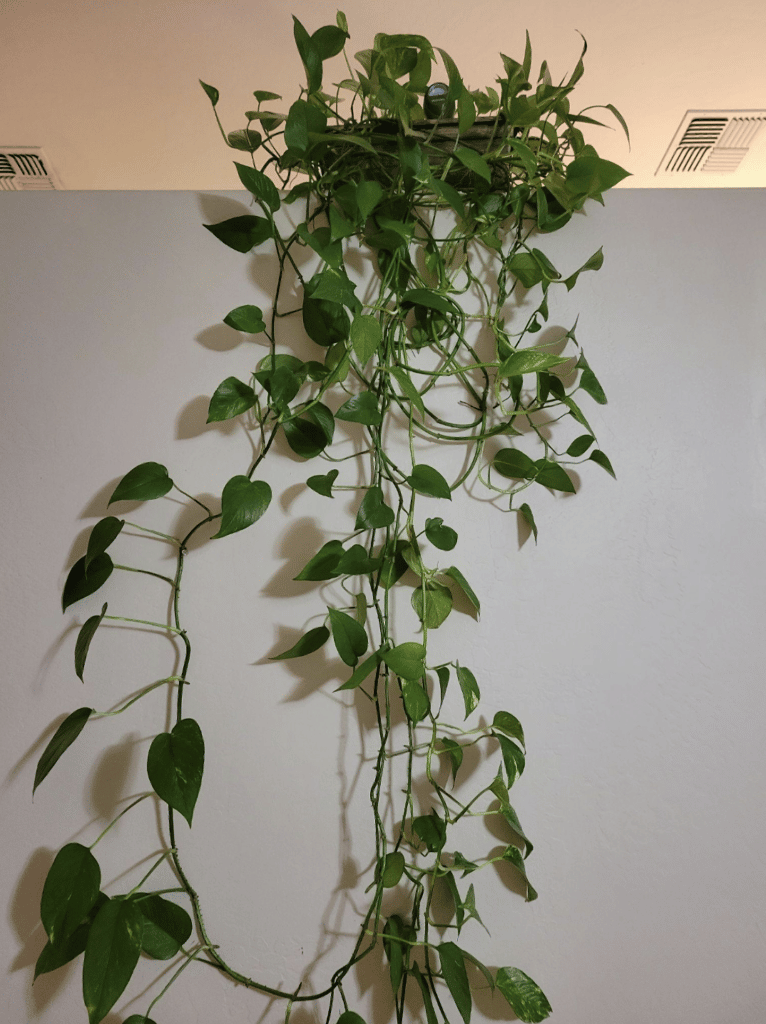
Most pothos vines will look similar, with emerald-green leaves stemming from vines and covered in aerial roots. Depending on which species you end up with, colors and growing patterns can differ somewhat.
Propagating pothos is an interesting and inexpensive way to produce many plants from one. Of course, there are commercial tactics for propagating plants like pothos on a large scale, but this is a simple process that can easily be achieved at home.
Instead of purchasing multiple containers of pothos, you can instead start with one plant, whether it’s from your neighbor’s plant or from a home and garden store, and create multiple others to help fill in the spaces where vines would add the perfect finishing touch.
Tools for Propagating Pothos
As with any project, there will always be tools. However, unlike the home repair tool kit gathering dust in your garage, plant tools are a must for basic general plant maintenance and for propagation. When it comes to vining plants like pothos, tools are a lifesaver and will save you lots of time on pruning and detangling.
Plant Shears
Almost any sharp blade will do, but plant shears are designed to make a clean cut, which can help prevent infection and poor regrowth after a plant is snipped. You will need your shears to be sanitized before using them for the same reasons; a blade can bring just as many pathogens into the plant stem as a pot of old, broken down soil. Basic rubbing alcohol will do in most cases, and if you don’t have any lying around, then dish soap and hot water are a close second. Never use hand sanitizers or disinfectant sprays on tools that touch plants.
Rooting Hormone
While this stuff isn’t technically a necessity, using rooting hormone will greatly improve your cuttings’ chances of making it to maturity. Rooting hormones are super easy to find at most big box stores that carry gardening products, and are fairly inexpensive, since a small container can last a very long time. This is the best bang for your buck to help encourage new root growth before a cutting runs out of water and nutrients to photosynthesize. To help prolong the life of a jar of rooting hormone, store it in a cool, dark place to use year after year.
Jars, Vases, or Test Tubes
If you have any plants in your home, you already have these lying around. A basic vessel to hold clean, uncontaminated water is absolutely essential to any propagation method. A huge plus here is that pothos look amazing as cuttings in clear glass, so watching them take root is both interesting and aesthetically pleasing. Aim for glass that’s easy to clean; those with narrow necks make it difficult to scrub out algae and sediment, so you’ll want to make sure you can at least fit a bottle brush into it for optimal cleaning.
Plant Tags
One tricky part of propagating pothos is knowing where it came from. If you’re propagating multiple species, you’ll want to label them in order to identify them in case they get mixed up. This is especially important if you’re dealing with cuttings that have no leaves, which will be covered later on. Labeling your cuttings can also help determine how long they take to root, grow, and mature, which is super handy if you plan to keep propagating your pothos. They’re also a dime a dozen, so it’s almost silly not to have them in your arsenal.
Starter Soil
Seed starting soil also happens to double as a lovely propagation medium! Typically formulated with bases such as peat and coco husk seed-starting soil generally doesn’t contain large bits of perlite but can be tossed with vermiculite, which acts as a sponge to keep moisture near delicate new roots. You can either mix up your own soil for your pothos cuttings or use a premixed soil sold at any garden store. Watch out for mildew in premixed bags, which can be detrimental to young plants and even spread to other plants nearby.
Types of Pothos Propagation
While it may seem like propagation is a straightforward process, there are actually multiple avenues one can follow to produce many plants from one. Of course, some methods are simple while others are high-tech and science-ridden, which also grants you the opportunity to explore different methods and find one that works well for you.
Since pothos is a relatively easy-going plant with obvious points of growth, or “nodes”, propagating it is super fun and easy. For any propagation method, you’ll need some basic knowledge of plants and how to use tools for cutting them.
In this section, we’ll cover some of the most common types of propagation for pothos. The simplest methods are quick and easy, but yield less overall plants.
On the other hand, some methods can produce thousands of baby plants using just one little piece of tissue.
No matter how experienced you are, propagation is always a fun and interesting challenge that leaves you with the overall goal: even more pothos plants!
Here are the primary methods used for propagating pothos both for at-home hobbyists and experienced growers:
- Water propagation
- Soil Propagation
- Tissue culture propagation
Water Propagation Method

This method uses simple cutting techniques to make new plants from existing vines. This is also arguably the easiest method to propagate pothos, since the vines themselves can simply grow roots in water after being severed from the original plant. There are a few caveats to that statement which we’ll go over here. Here’s a stepwise guide for propagating pothos cuttings in water:
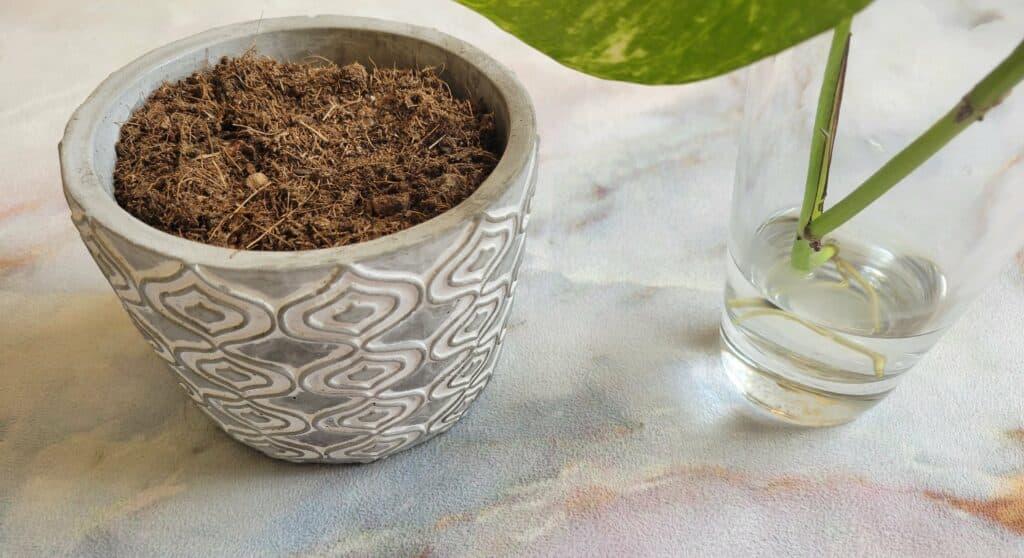
Step 1: Prepare your materials
This is where you’ll start. To get everything ready, make sure you have a glass container of clean water (purified is best, but filtered tap will do), clean, sharp shears, and a sanitary work space such as a disinfected countertop or table. Open up your jar of rooting hormone, if using, and have it at the ready. The idea is to be able to reach it quickly after making cuts.
Step 2: Take the cuttings
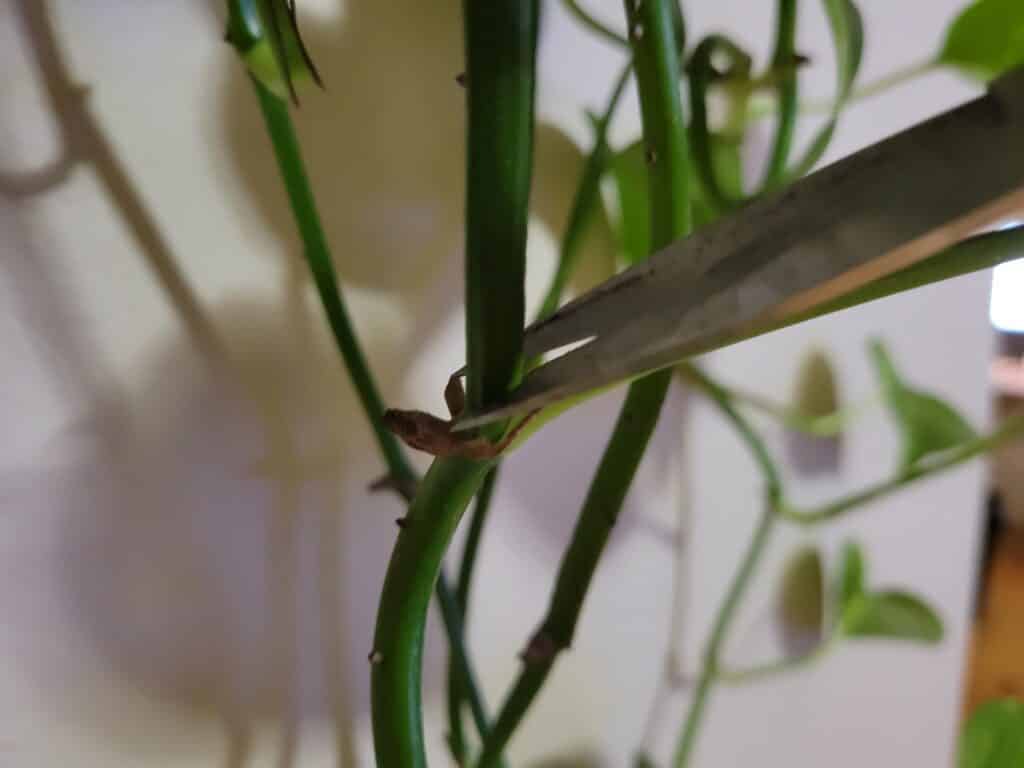
Now that you have everything ready, it’s time to make the cut. Pothos vines should have at least two leaves, but ideally three, on each cutting. Don’t cut just beneath the third leaf; instead, cut just below the fourth leaf and after the node, which you will then remove with the blade. Try to get the node intact; you don’t want to cut too deeply into it. This is where new roots will grow.
Step 3: Dip in the rooting hormone
The idea here is to get the cutting into the hormone with the first 15 seconds after severing. This is because it takes a plant 15 seconds to react to the trauma of being cut, and it will begin to scab over the wound as quickly as possible. Getting the rooting hormone in the plant before then gives a cutting a much bigger dose of the hormone, which will help it to build a strong root system faster and increase its chances of survival.
Step 4: In the water

The next stop is in the water. After about five seconds with the rooting hormone on the freshly cut node, gently place it in your vessel of water without disturbing the hormone powder directly on the wound. If some of the powder washes away, it’s okay; it’s still in the water, and the cutting is still being exposed to it. After the first three days, you will need to change out the water with fresh water every other day to ensure that the baby roots will have plenty of fresh water available. Never let roots dry out.
Step 5: Planting in soil
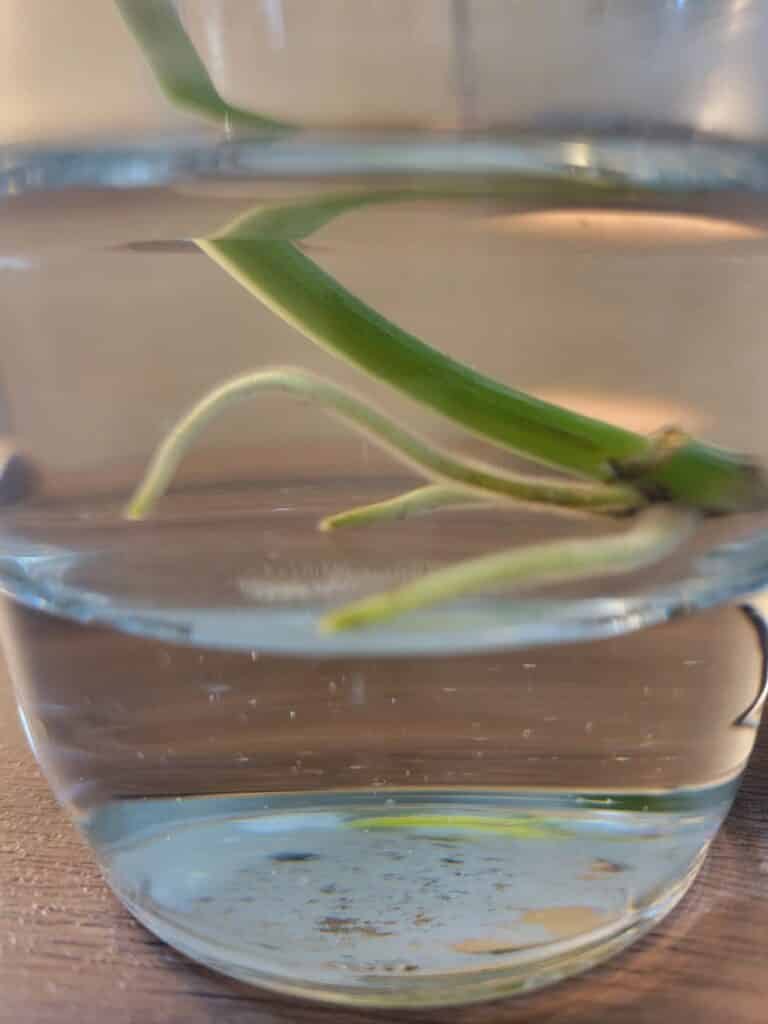
The moment of truth has come! Once your cutting has a root system with three subsets of roots (a taproot with roots that have smaller roots on them), it can safely be planted in soil. Your soil should be starter soil, and should remain moist until the plant has established a hearty root system, where you can see roots coming from the bottom of the pot or between the soil and sides of the pot. After this period, you can water as you normally water your pothos plants!
Soil Propagation Method
For the experienced home horticulturist, soil propagation is a great method to try with pothos, which are generally more forgiving than other tropical houseplants. That being said, there is still some finesse required here, so keep this in mind if you decide to propagate with soil instead of first rooting in water. Rooting hormone is an absolute must with this method so that cuttings can root fast enough to absorb water from the soil, rather than having constant access to pure water. You’ll need a small, sanitized, plastic pot filled with clean, moist starter soil that is free of mildew and fungi, as well as the tools mentioned above.
Step 1: Prepare your materials.
Just like the water propagation method, you’ll need to have a clean workspace with everything you need in one place. Shears, a pot with prepared soil, purified water and rooting hormone should all be readily accessible to you when you make a cutting of your pothos. Give yourself plenty of space to work in so that your tools and new soil aren’t contaminated by the old soil of the original pothos.
Step 2: Make a cutting
The same principles of the water method apply here. However, instead of three leaves, aim for two; this way, the cutting won’t need to work as hard to maintain its leaves and can focus its energy on producing a nice, healthy root system. Cut just below the third node so that it’s still attached to your cutting; then, remove the third leaf with your shears without nicking the node itself. Be careful not to damage the node, which can slow down the rooting process.
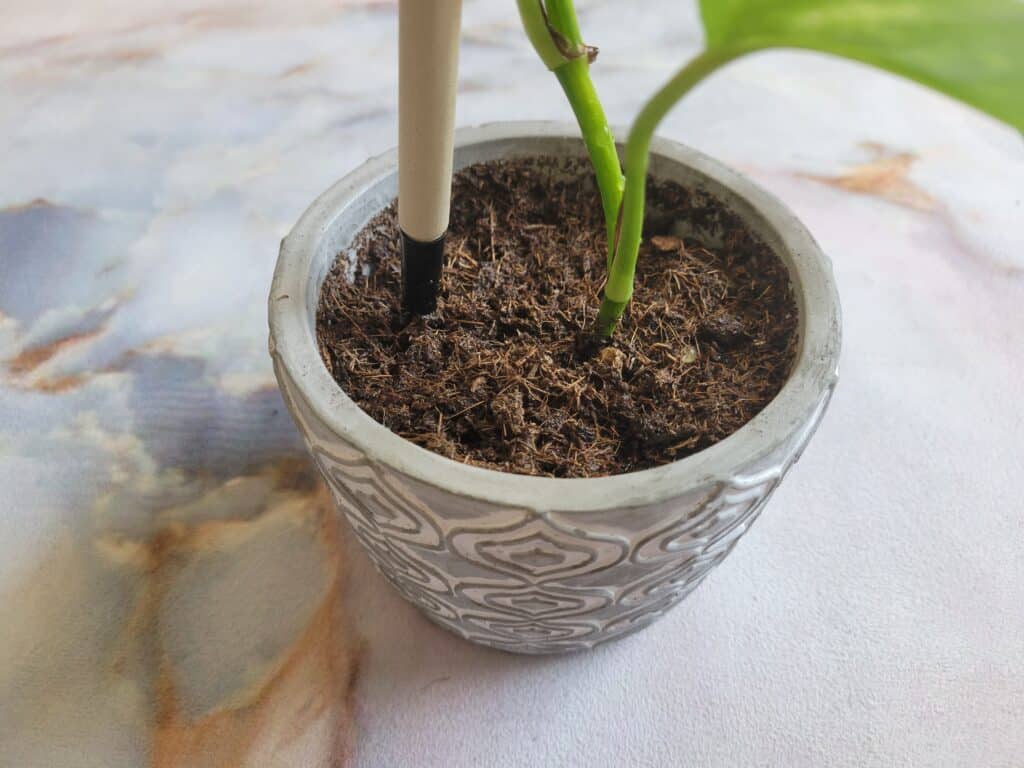
Step 3: Dip in rooting hormone
The 15-second rule is really crucial here. Immediately after you finish making cuts to the new cutting, dip it straight into the rooting powder and then into a pot of softly packed soil, until the stem is about halfway to the bottom of the pot. Then, water the soil around the stem enough to saturate the soil without washing away all the hormone powder. This is all one fluid step, so make sure you’re confident that you can get all this done in under a minute, and you’re good to go!
Step 4: Water daily
Since the soil method means roots take longer to grow, daily water is needed for the first month of new life for your pothos cuttings. During this time, if the soil does dry out, the new roots will dry out and become unusable to the plant; it will have to start the rooting process over again, which is very difficult to do for a plant with no access to water or nutrients. Watering every day and allowing water to drain through the bottom holes of the pot ensures that the roots will stay plump and healthy.
Tissue Culture Propagation Method
We won’t go into detail about each step of the process of tissue culture propagation, since it’s such a timely and delicate process, but the main idea here is to grow plants in a test tube. The tube will have an agar based gel in it containing nutrients needed for plant cell growth, and will be completely sterile before propagation. This method is typically performed under an air cabinet with a steady supply of filtered, pathogen-free air coming in, and contaminated air going out. A little plant anatomy here: the stems and leaves of plants contain somatic cells. These pretty much keep the plant alive by turning nutrients into usable plant fuel. The nodes are where the sex cells reside, and these are what we need to produce thousand of plants from one piece.
After the agar is poured into the tube, it is allowed to set almost entirely, sort of like Jell-o; then, when the medium is soft enough to poke but set enough to hold up a tiny piece of plant material, the carefully sliced and sanitized node is placed about halfway into the gel. The medium encourages the cells to replicate, which produces oodles of brand-new, tiny plant clones from just a single piece of plant tissue. This process takes many months and constant attention, so it’s not ideal for performing at home.
Knowing When to Propagate Pothos
Although propagating can be a super satisfying activity, overdoing it can most definitely kill your beloved pothos plants. You can technically propagate a single vine, but to protect the original plant from stunted growth or pathogens, you should take care not to propagate one plant too much. Plant merchants will oftentimes make several cuttings from just one rooted stem of a plant for a quick profit, but these don’t generally have a great success rate and the original plant is destroyed in the process.
To make sure your original pothos plant stays intact, only take cuttings if the plant has several vines, most of which are at least a foot long. This way, the pothos won’t see the loss as a serious problem, and will have plenty of other leaves to help out with the photosynthesis cycle. It helps to dip the end of the vine you took cuttings from in cinnamon to kill any creepy crawlies like bacteria and fungi before they infiltrate the plant’s newly open wound. You’ll have a much easier time getting that vine to regrow, as well.
Beginning Stages of Pothos Propagation
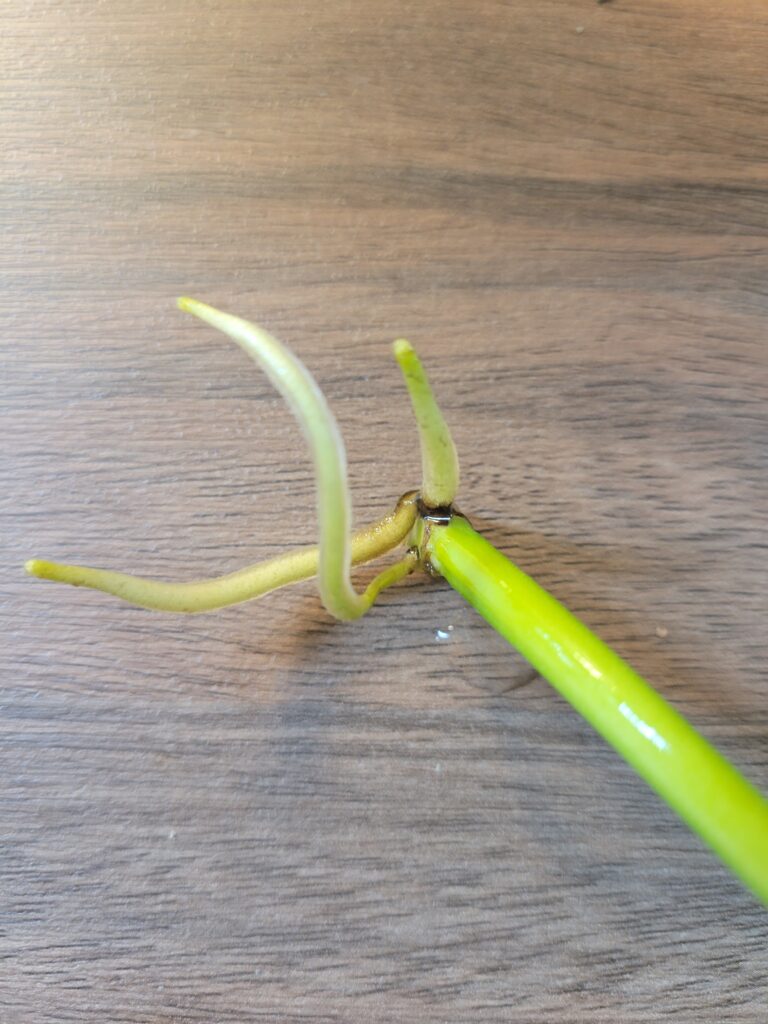
Let’s say you happened to receive some cuttings from a friend or family member, and you have no idea what to do with them; or, you came across a rare species of pothos and need to get a small portion of it to take root. There are several types of cuttings aside from the ideal two to three leaf model, but these will be less likely to root and therefore grow into healthy plants themselves. However, in some cases, it’s still possible. Commonly called a wet stick, node, or just a stem, these types of cutting require far more care and attention than standard stem cuttings. They’ll need to be in a warm, moist environment with plenty of light until roots and a stem begin to take shape.
Making the Cuts
If you’re not sure exactly how to take the first step cutting a pothos vine, there are easy guidelines to follow which help to determine where to make cuts and how to apply them to your method. A big rule of thumb is to remember to cut at 45 degree angles; this seems to be the magic number, as plants root well when cut at an angle like this! You can also use straight cuts, which are flat against the surface of the stem, to remove the bottom leaf from the node you’ll be rooting. No matter where you cut, make sure that you miss the node with your shears; these nodes are an important part of root development, and the health of your future plant!
Caring for a Pothos Cutting
To care for a new cutting, you need the basic essentials that plants generally need: light, warmth, and water. Pothos cuttings also benefit from humidity, namely due to the aerial roots that protrude from their vines. This allows them to soak up minimal amounts of water from their environment, which helps to get things going in the roots department. The primary focus is the ensure that the cutting is in a clean environment to prevent rot; this includes changing the water for a cutting every other day, as well as scraping off any mildew that grows on new soil. This won’t kill it off entirely, but will help prevent it from becoming a nuisance to a cutting.
What to Expect From Here
Once you’ve got your cutting all settled in, it’s time to wait for roots to grow! It can take about four to six weeks for roots to come in, and then a few weeks past that for a more established root system. It’s recommended to wait two months before repotting a cutting or planting a cutting in soil for the first time. The more roots a cutting has, the better its chances are of survival and healthy growth. It’s fairly easy to maintain a cutting as it takes root, but there are some challenges that arise from time to time, but knowing what to look for is the best prevention.
One common situation is that a cutting grows or opens a new leaf before it grows roots. It may seem like this is counterproductive, but if a pothos vine already had lots of energy invested in making a new leaf, then it will focus on that task to help gather more sunlight. It will use the extra light to speed up the rotting process from that point on. If your pothos cutting grows a new leaf, don’t worry; this is perfectly fine!
Another issue we see frequently with pothos cuttings is that they can fall ill if left in dirty water (high in nitrogen) or allowed to dry out in soil. If a cutting’s leaves begin to shrivel back and change color, there’s an issue with water. Cuttings in soil should be watered daily to ensure that there is always moisture available to the cells at the node where roots will grow. Similarly, a cutting grown in water can become sick; if this happens, remove your cutting from its water, gently rinse the roots in a bowl of barely soapy water and then rinse in a bowl of plain water. Use a new container or thoroughly wash the one the cutting was in when it fell ill.
Although it may seem complicated at first, propagating pothos can be fun, interesting, and a great way to make brand new plants for free in your own space! With a moderate amount of attention and care, your pothos cuttings will take off before you know it. Whether you intend to give them away or let them take over your living room, there’s no such thing as too many pothos plants.

Thank you for this detailed tutorial on how to start cuttings; not only how to perform each step but the reasons why. I feel I can go forth and propagate much more successfully armed with this knowledge.
Thanks for reading! Send us some pictures of your progress!