
Purple heart, also known as Purple Queen, is an extremely popular houseplant due to its rich, vivid purple hue. Adding to its allure are the long, slender leaves that grow from each node along the plant, creating a lovely stacked aesthetic that adds something sophisticated to a space.
These lovely little plants bear small, tri-sided blooms in shades of pink and violet. There are also a variety of different types of purple hearts out there, so you can always find one that wows even more! Unsurprisingly, new hybrids hit the market all the time.
Propagating these plants is incredibly easy. Once you get the hang of their growing patterns and the best times of the year to take cuttings, it’ll be nearly impossible for you to stop making new purple heart plants. Who could, when they look so cute as small plants?
While you should definitely try not to fill every corner of your house with these (they’re not exactly pet or child-friendly), making a few starts to give to friends or bring to work is a fun and rewarding process. Let’s dive in.
History and Culture
Purple heart is actually native to Mexico, near the Gulf Coast region, where humidity from the ocean helped the purple heart’s leaves adapt very fine hairs designed for catching water from mist out of the air, then pouring it down the stems to the soil beneath the plant for use.
They were first documented by the famed Edward Palmer, a British botany enthusiast and archaeologist, back in 1907. By today’s cartography, it was found just south of the state of Texas, where many tropical-to-desert species originated.
Today, purple heart serves a purpose in indoor spaces. Known to improve air quality, it’s strategically used in office landscaping and interior design. If you live somewhere sunny, you may have seen them planted in large containers in malls. It’s even used to beautify parking lots and outdoor landscaping in hotter climates.
What You’ll Need to Get Started
Every propagation project requires a basic set of common gardening tools that you’re likely to already have on hand. Aside from some of the more uncommon purple heart propagation methods, most everything can be found at a local garden store. Here’s what you’ll need and what you need them for.
Plant Shears
A solid, sharp set of plant shears is what makes propagation successful. If you don’t have a sharp pair, you can always substitute sharp, clean kitchen scissors or a new razor blade for them. Make sure that your blades have no rust on them.
Another important part of using any kind of blade to propagate plants is sanitation. Blades should be sterile, or clean, at best. You can use a variety of methods to achieve clean enough shears for taking cuttings.
Rubbing Alcohol
Speaking of clean shears, rubbing alcohol is by far the best way to go about sanitizing your pots and tools for propagation. This stuff can be used for cleaning work surfaces, accidental finger knicks, and well, the list goes on. You get it; this stuff is cheap and there’s no reason not to have it around anyway.
Anything that has an alcohol content of at least 70% or higher is a good candidate for cleaning. Other useful cleaners include hydrogen peroxide and lemon juice, although these are a bit messier and don’t just evaporate away.
Growing medium
This one’s pretty obvious, but we’ll touch on it anyway. You can use any sort of growing medium you’d like for purple heart; leca, soil, water, moss, and anything else you can think of. If it can hold water, purple heart will root in it.
For soil propagation, use a soil that has a good ratio of perlite. The more perlite, the better, so long as you have some larger chunks in the soil to help prevent occurrences of over or underwatering. Perlite is your best friend for rooting any plants.
If you’re air layering, you will need moss and some sort of horticultural string or twine. Make sure the moss you use is not dyed, treated, or otherwise made water resistant. It absolutely will not work. Gather enough to form a 2” diameter moss ball in your hand.
Rooting hormone
Rooting hormone comes in both powder and liquid forms, but the powdered type lasts much longer and keeps better. This stuff, when applied to new cuts, helps a cutting to grow roots much faster and provides it with enough growth hormones to sustain itself in the process.
It also makes air layering much easier. Rooting hormone accelerates the rate at which a node will produce new roots, as well as how fast they grow once burgeoned. It isn’t necessary, but it’s a nice tool to use for propagation success.
Jars or pots
Depending on whether you want to use the soil or water propagation method, you’ll need something to put your new cuttings in. For planters, aim for smaller sizes, like 4” plastic grower pots. These are sturdy and help keep moisture in where the roots need it.
For water propagation, find some glass jars or vases that will support a standing cutting and will only submerge the bottom inch or two of the cuttings. Vases with smaller openings work really well for this application. If you have them laying around, now is the time to use them.
When to Propagate Purple Heart
Propagation of purple heart is best done when the plant is in a growing season, either Spring or Summer. This will give you the healthiest, newest shoots for making cuttings. The plant itself can then simply replace those cuttings or put more energy into other shoots.
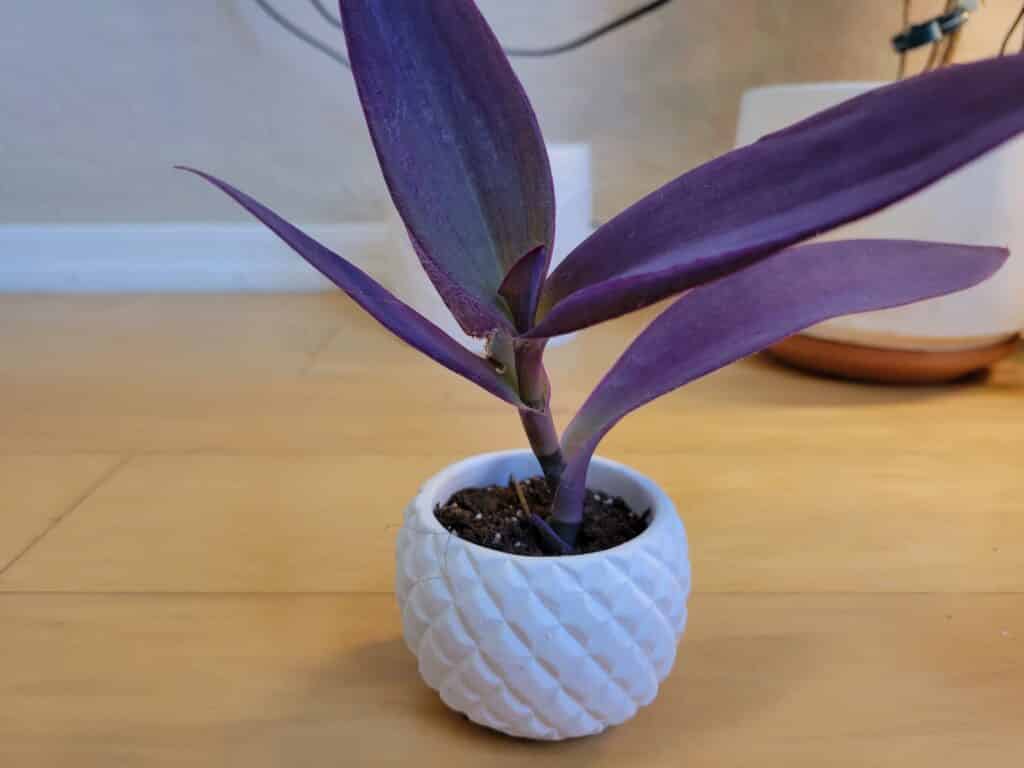
Don’t take cuttings of this plant until you have a large cluster of foliage to choose from. While it may be tempting to propagate a small plant, younger plants have a harder time recovering from losing nodes than established ones.
Try to only take cuttings once per year for outdoor-grown purple heart, or twice per year for indoor purple heart. Indoor-grown purple heart can be propagated any time of year, but it’s still best to stick to the growing seasons!
How to Take Cuttings From Purple Heart
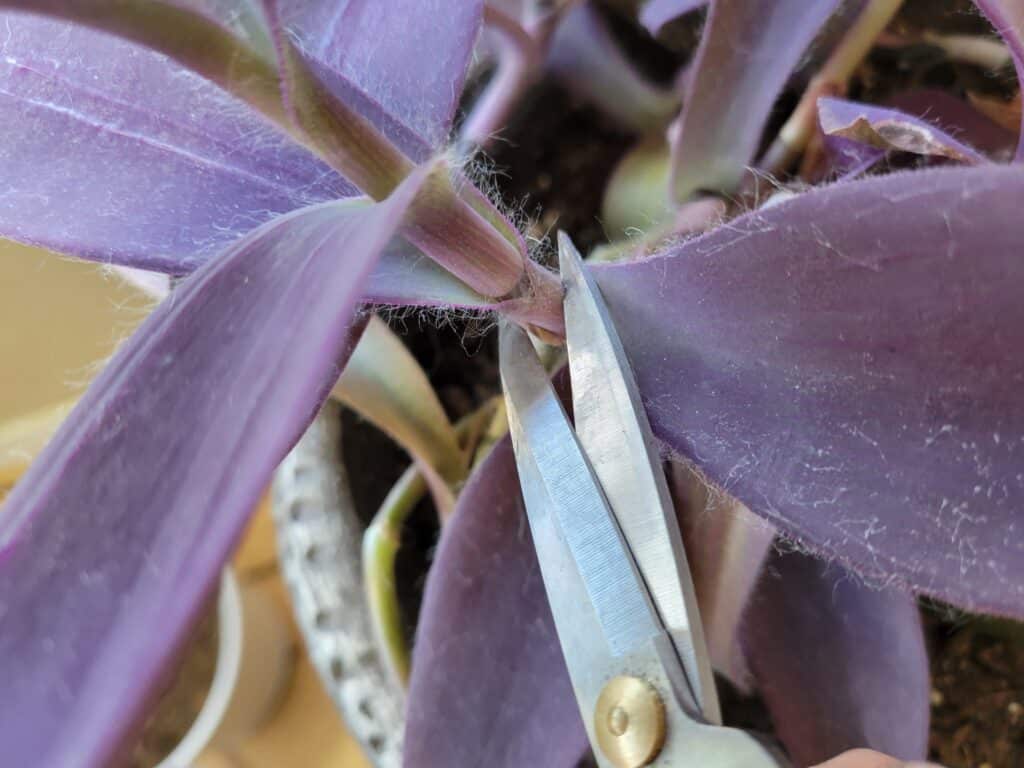
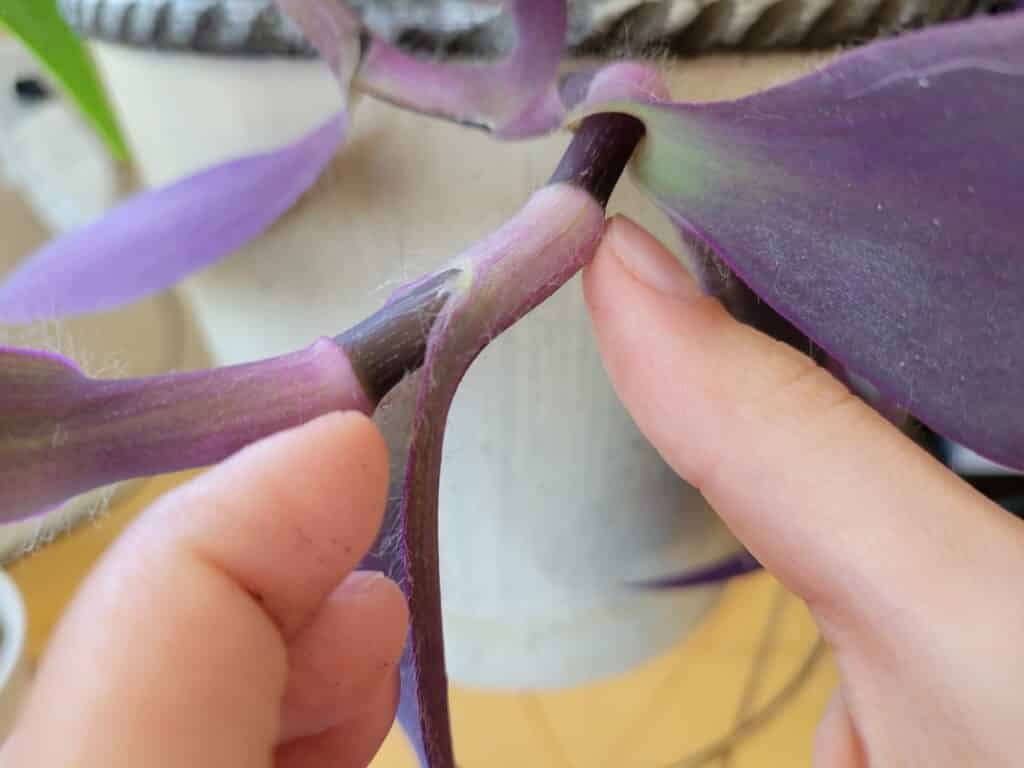
Like most plants that can be propagated from cuttings, purple heart has a node at each site where a leaf is growing. This can be identified by the slightly bulbous lump at the base of each leaf, where cells that are able to form roots lie dormant.
These nodes are where you will carefully make your cuts. Using a sharp, clean blade, quickly and carefully sever the stem just below the node where you want your cutting to start. Typically, three nodes in is a great place to start.
Cutting at a 45 degree angle is best for succulent-type plants like purple heart; the more area there is for roots to grow from, the better. However, it doesn’t have to be this exact angle. Doing this just gives your cuttings a better chance at rooting more quickly.
Once you have your cuttings away from the original plant, you can begin to propagate them using whichever method works best for you. We’ll cover what to do with these cuttings next!
Types of Propagation
Purple heart makes a great candidate for all sorts of propagating techniques, but we’ll just cover the three most common ones here. Since this plant is such a fast grower, it’s perfect for propagation experiments if there’s one here you haven’t tried yet!
Below are the steps to follow for each of the three propagation methods we’ll cover. Make sure you read through before you start your propagation project so that you have a good understanding of how it works if you’re a beginner!
Here are the propagation methods that we will be covering in this article:
- Soil propagation
- Water propagation
- Air layering propagation
Soil Propagation Method
This is the easiest way to get more purple heart plants at once. They go straight from the plant to the pot, and while these new plants need a little more attention in the beginning stages than full-grown plants, they fill out a space nicely.
Have some well-draining pots with moist soil ready for this propagation method. You’ll want to have these full of soil that’s been watered and saturated, but not full of standing water. Drainage will be important later on. Here’s how it’s done.
Step 1: Gather your materials
Get all your frantic running around in search of supplies over with beforehand by getting everything ready to go before you start. Make sure you have a nice clean, dry space to work in where there aren’t any contaminants nearby.
This is also a good time to sanitize all your tools. Any stray bacteria or fungi spores hanging around on your tools from other plants can cause cuttings to fall ill and die before they can put out roots, so it’s important that you keep everything clean and free of microbial hitchhikers.
Step 2: Locate your cuts
Once you have everything in one place, it’s time to scope out where you’d like to make cuts on your purple heart plant. Try to find nodes that have at least two leaves above them. Once you find your ideal cutting spots, you can mark them with string or twine to remember where to slice.
Try to avoid taking too many cuttings from one plant at a time; this works well for making lots of plants at once, but it puts a lot of unnecessary stress on the original plant itself, and it now has to spend more energy on replacing the lost foliage.
Step 3: Making the cuts
Now you’re ready to take the leap! Using a clean, sharp blade or shears, carefully cut between the nodes at an angle. Don’t cut into the node you’re rooting, but also try not to damage the existing node that’s left on the original plant where you took a cutting. Remove the bottom leaf where the lowest node is with the same blade.
Once you have all your cuttings together, you can apply some honey or cinnamon to the open cuts of the original plant to prevent infection. This is optional, but it can save you lots of time and resources trying to save a sick plant in the long run!
Step 4: Rooting hormone
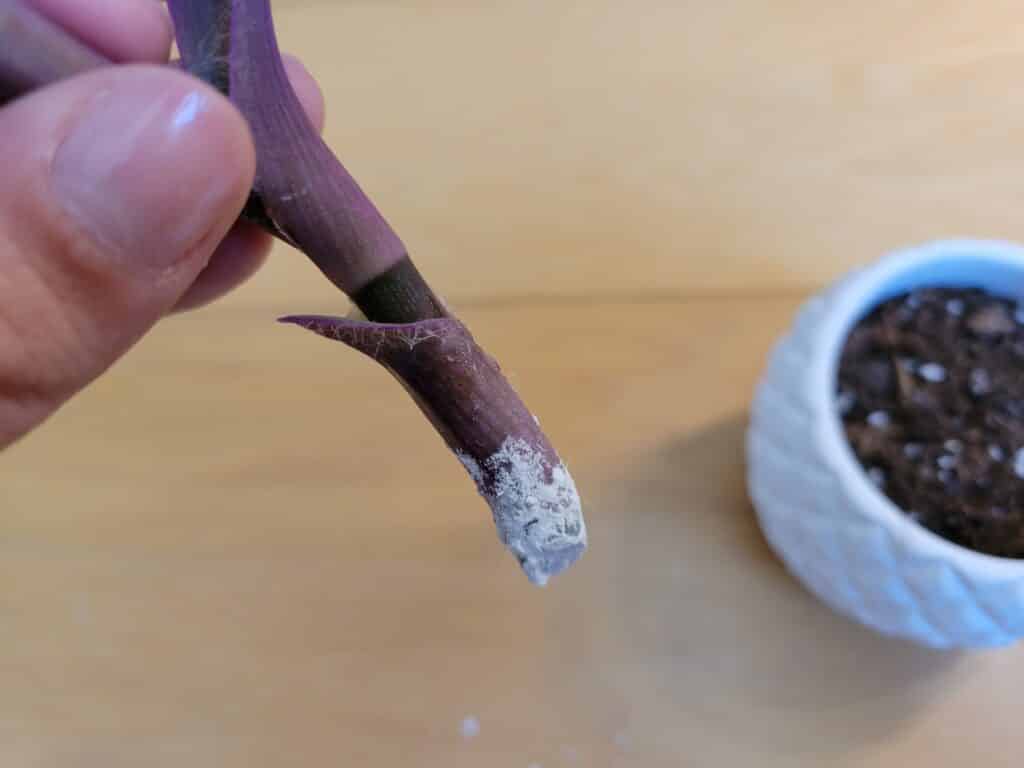
Time to dip your cuttings into the rooting hormone. Gently dip the bottom centimeter or so of stem and open cut of each cutting into the rooting hormone powder. From here, you can either let them sit for a few minutes or move right onto planting.
Allowing these dipped cuttings to sit for a few minutes gives the plant a chance to make a thin “scab” layer that will protect it from any soil-borne illnesses. If you’re using steamed soil, this isn’t an issue. It just gives the cuttings a better shot at rooting, but it really isn’t necessary!
Step 5: Into the soil
Now that your cuttings are all clipped and dipped, they’re ready to go into the pots of moist soil you have prepared. These should be relatively small, around three to six inches in diameter. Make sure there is no debris or standing water in the soil.
To plant your cuttings, simply push them into the soil until the bottom-most leaf sits just above the top of the soil. Your cutting should be able to support its own weight in the damp soil, but you may need to help it along by placing a stick or plant tag in the soil for support.
Step 6: Water them in
Once you have all your cuttings in their respective pots, you can settle the soil in around the sensitive new cuts by giving them each a small splash of water. For the first week, the water needs to remain at least damp; after that, you can dial it back more.
In about two to three short weeks, your cuttings will have a small root system established. At this point, you can water as often as you water your original plant. Maintaining the same watering schedule as the original plant had before helps cuttings acclimate to being in their own containers.
Water Propagation Method
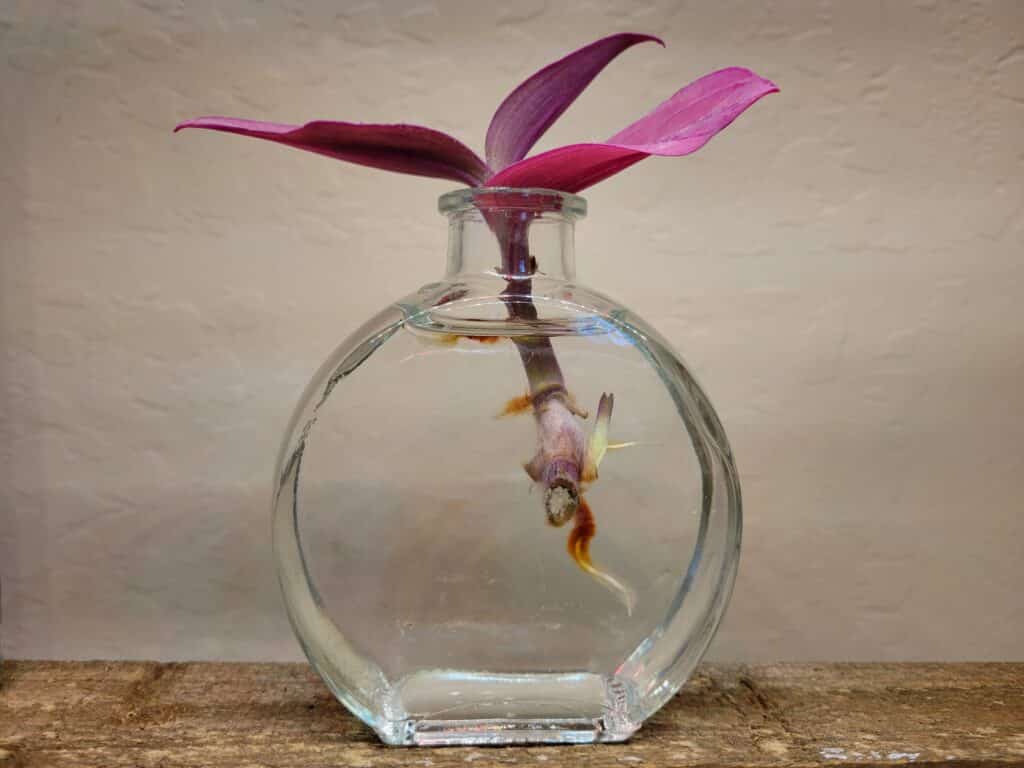
Propagating purple heart in water is just as easy as propagating in soil, but with extra steps. Although soil propagation can be a faster way to get purple plants in pots quicker, propagating them in water gives you a chance to see the roots growing.
Watching the roots grow on water propagated plants not only makes the process more rewarding, but also makes for unique and beautiful decor. For the next couple of weeks, you have a vase or jar with purple foliage flowing over the sides, which looks amazing!
Step 1: Gather your materials
To get everything set up, you’ll need your tools, including shears, rooting hormone, and a jar or vase. Have some paper towels ready in case you need to clean up any spilled water. Your jars should be filled with fresh, clean water.
Sanitize your tools using rubbing alcohol, or clean with warm, soapy water. This prevents any creepy crawly bacteria or fungi from getting into your cuttings. Your workspace should be clean as well for the same reason.
Step 2: Cutting the plants
When you’re looking for a good place to cut, look for a node that gives you about two or three leaves after the node you’re cutting at. In one clean swoop, make the cut at an angle to remove the cutting from the stem.
Then, if you want to help your original plant stay healthy, you can apply a dab of honey or cinnamon to the open wound on the original plant to prevent infection from anything lurking in the soil.
Step 3: Prep the cuttings for water
Remove the bottom node’s leaf with a sharp blade or shears, so that you have one node on the base of the cutting that doesn’t have a leaf. This node will pull all the weight for the rooting process, so having its own leaf to maintain makes it harder to root.
If you do leave the bottom leaf, chances are the cutting will drop it sooner or later. Any leaf matter that is submerged in water will rot, as well, so be careful not to let any of the leaves touch the water.
Step 4: Rooting hormone
Purple heart will root without it, but rooting hormone helps to speed along the rooting process, which greatly increases the plant’s chances of thriving as a cutting. Without roots, the plant can’t absorb much water, so getting roots going right away is important.
Simply dip the bottom centimeter of the cutting into the rooting powder, then let them sit for a few minutes to cover their new wounds with a film that helps protect them from pathogens. After time’s up, situate your cuttings in water so that just the stem is submerged in water without leaves.
Step 5: Water maintenance
If your cuttings are in water, it needs to be fresh water, and that goes for the whole time they call a jar or vase home. Change out the water your purple heart cuttings are in every couple of days, and watch for debris or algae.
If you do end up with algae in the water, you can remove the cuttings, wash out the container with soapy water, and place them back in. This doesn’t prevent the algae from coming back, but cuttings can’t tolerate any sort of soap or algae treatment, so at best the cleaning keeps the algae at bay until you can plant your cuttings.
Air Layering Method
This method is both super fun and aesthetically pleasing! Finding a plant that can be air layered is tricky, but air layering itself is easy. This is a great way to expand your propagation methods and try out something new if you haven’t already done it.
Air layering allows the cutting to stay attached to its original plant while it grows roots. There’s no point in time where a cutting is removed from the plant without roots, so it makes for a more successful cutting, if you have the patience for it!
For this project, you’ll need moss that can hold moisture, some sort of twine, plastic wrap, and a pair of sharp, clean shears or a razor blade. You can also use rooting hormone to help the cutting realize what’s happening so that it grows roots more quickly!
Step 1: Gather your materials
Getting everything in one place is crucial for the success of this propagation project. Make sure you have everything you need before you start, and anything that you can anticipate needing, such as rubbing alcohol or paper towels.
Clean all the tools you’ll be using with rubbing alcohol or warm, soapy water to remove any bacteria or fungal spores that might have hitched a ride from your other plants. You’ll want to have the healthiest cuttings possible without infecting the original plant.
Step 2: Locate a node
For most other propagation processes, the idea is to find a node where you won’t miss a large piece of the plant. It’s the same idea, here, but you can actually go in a little further since your cutting won’t be removed from the plant for a few weeks.
Try to aim for having at least three nodes above the spot where you intend to air layer. This allows you to start with a larger plant, but it won’t be so large that you take half of the original plant with it.
Step 3: Open the node
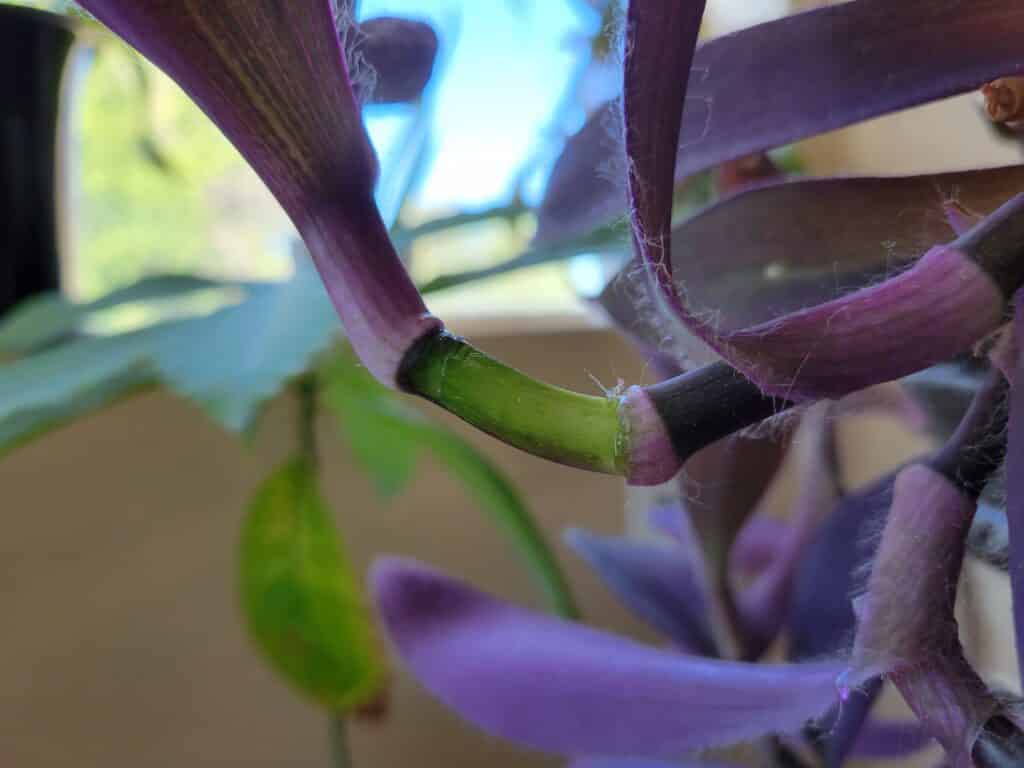
To begin opening the node, first wipe down the outside of the stem with some rubbing alcohol and a cotton swab or paper towel. Clean all sides of the node, as well as any nearby stem that’s touching the node. After you remove any contaminants, grab your shears or razor blade.
To remove the outermost layer of tissue from the node, very gently use one side of a blade to barely take off the top layer of the stem from one end of the node to the other. . This lesion should be no more than a millimeter deep; the idea is to only take a small bit away to encourage roots to grow from the lesion.
Step 4: Rooting hormone
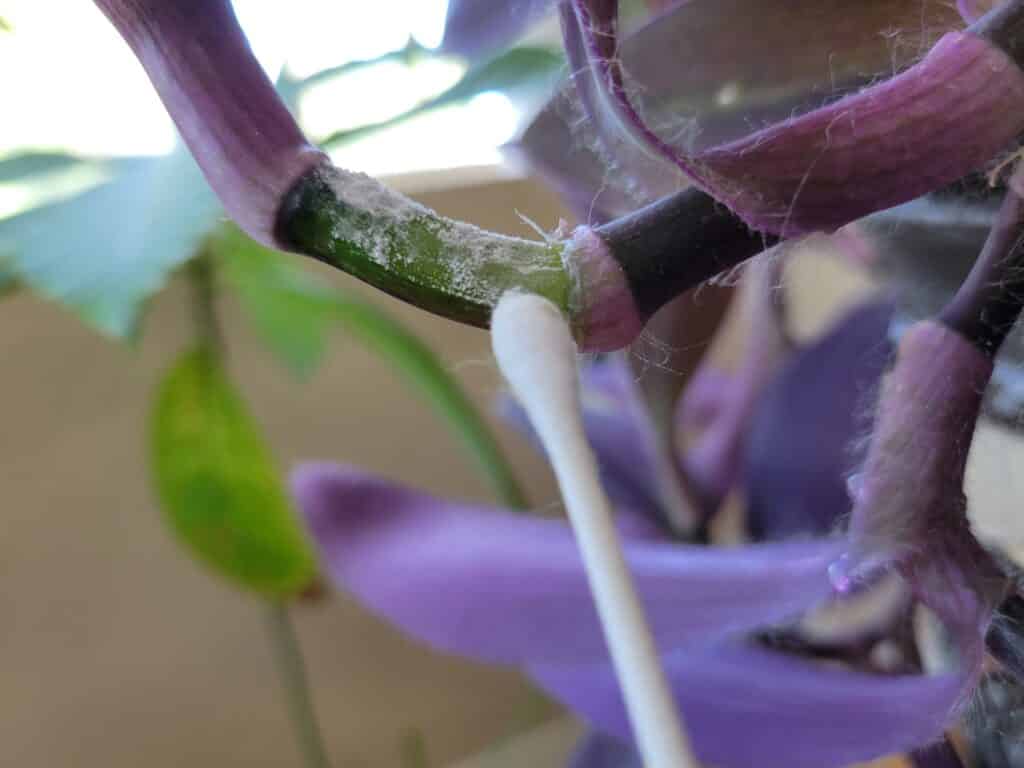
You should now have a chunk of stem the length of a node that has no outermost layer of stem. From here, use a cotton swab or a gloved finger to apply rooting hormone to the entire length of the cut portion of your node.
The rooting hormone serves a very important purpose here; without it, the plant may decide to cut its losses and drop that section of itself in an effort to preserve its own life and precious resources. Purple heart responds very well to rooting hormone, so it should take very well to this procedure in almost any climate.
Step 5: Moss wrap
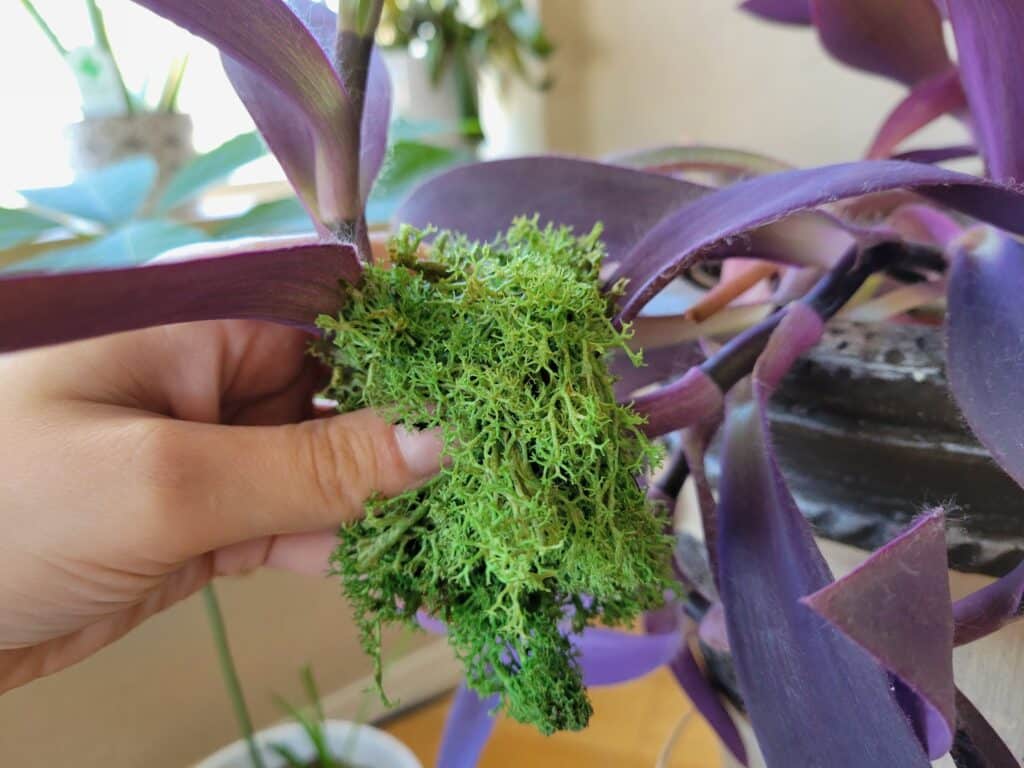
Now, you can start to build up a nice, solid, fist-sized ball of pre-moistened moss. It should not be dripping wet, but rather just moist enough to still have some bounce. Once you have your moss ball ready, it’s time to apply it to the open node.
Carefully wrap the moss ball around the node, ensuring that there’s an equal thickness of moss around the entire node. Use some twine to secure the moss ball in place, but do not wrap it tightly. You should only use enough twine to gently hold the moss ball in place without holding it.
Step 6: Plastic wrap
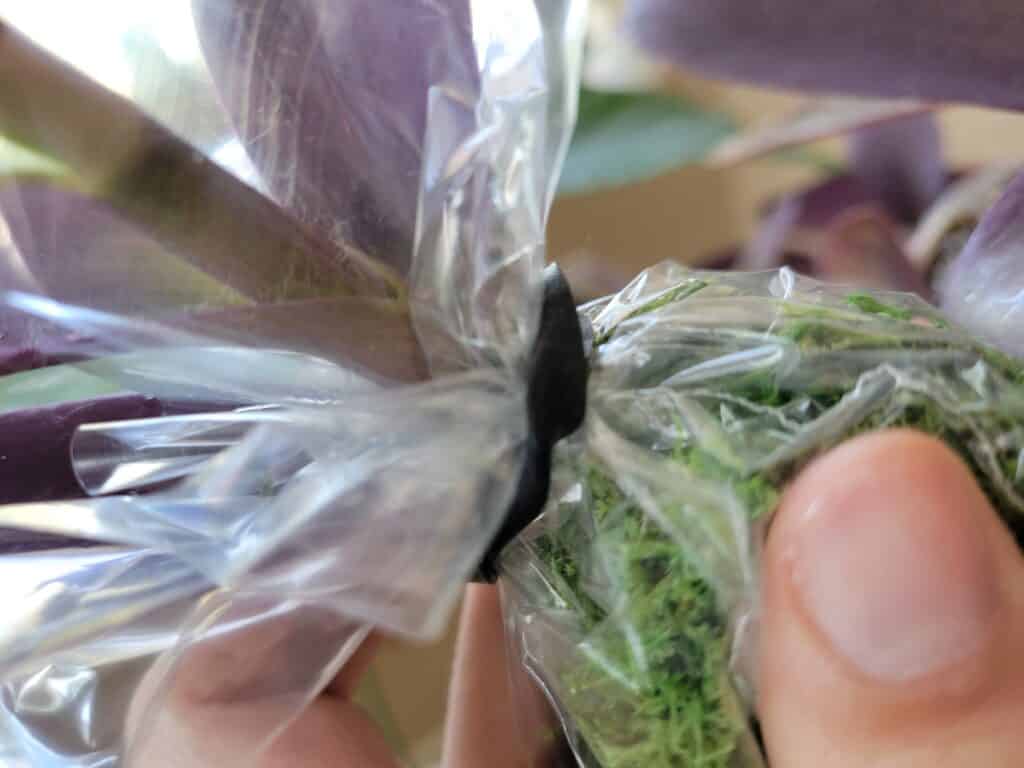
To maintain moisture and create a sort of miniature greenhouse environment, wrap enough plastic wrap around the moss ball to secure it at both ends. There should be enough plastic to hold in moisture, but not so much that you can’t add more moisture if needed during the rooting process.
Using your twine, secure the plastic wrap carefully at both ends of the moss ball to finally hold it in. Tie the top end in a way that it can be easily released if you need to add some mist to the moss in case it dries out. A simply slipknot works well for this.
Step 7: Rooting time
It takes anywhere from 6-8 weeks for a purple heart to form a root system that can sustain a larger cutting. During this time, be sure to frequently check the moisture in the moss, and never let it dry out completely. If the moss dries out, there’s a good chance that any roots will be ruined.
Once you can see a visibly strong root system, you can snip the cutting off at the base of the next node in so that you have your cutting with a small chunk of stem underneath the roots. Feel free to trim that stem down for easier potting, but don’t cut any roots.
Potting a Purple Heart Cutting
After you’ve propagated your purple heart using whichever method you prefer, you should have some brand new purple heart babies! Now that they have healthy, hearty root systems, they can be planted into their new pots.
To pot a new purple heart cutting, use soil that contains perlite or vermiculite for root support. Aim for a pot that is about twice the size of the new root cluster, whether it’s a small plastic grower pot or a decorative one with good drainage. Pots without drainage holes kill purple hearts due to root rot, so stray away from that route if possible.
Pot up your cuttings into their pots, and provide them with some support if it seems like they want to fall when you water them for the first time. You can use anything you have lying around, such as a pencil or a popsicle stick, to do this.
After a couple weeks of bright, indirect light and ample water, your cuttings should start establishing in their new homes! Keep them happy by providing the same care you did for their original plant; bright, indirect light, and moderate to light watering.
Fertilize your new plants every six months with a dilute mixture of well-balanced fertilizer. Any sort of cacti, succulent, or houseplant fertilizer will do the trick. Enjoy you new family of purple heart plants!

Excellent guide to prop all the cuttings I’ve taken from my apt complex’s untended purple hearts.
That’s awesome!
Thanks for all the information on the purple heart. I want to plant a wide boarder in my garden with it, what do you think the average spacing should be?