
Snake plants are a houseplant classic that never go out of style. Not only have they made countless appearances in homes, offices, and even films over the years, but they also continue to shine in modern, simplistic environments. The styling possibilities are absolutely endless!
As with most houseplants these days, however, buying a decently-sized snake plant gets pretty costly. While most of us won’t fork over a ton of cash for another snake plant, the other option is to make more snake plants, but for free! It’s the best way to keep your snake plant population growing without your wallet shrinking.
History & Culture of Snake Plants
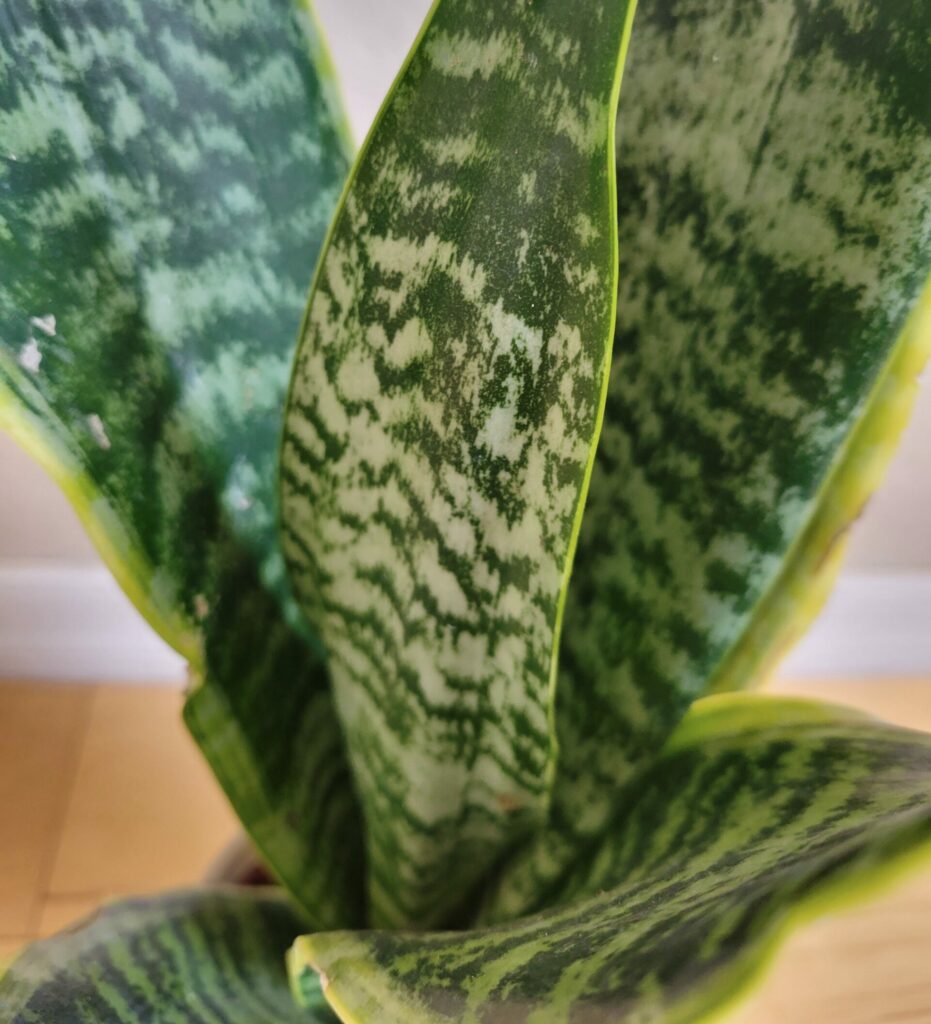
Native to the dry, rocky regions of West Africa, snake plants are adapted to very hot, very dry climates. They’ve evolved some pretty cool functions to combat this environment and to make the most of the water they do receive. Thus, the vertically-growing, tough leaves of snake plants emerged.
Snake plants are also an important part of African culture and tradition. They were first introduced to Europe in the late 1700s, but it wasn’t until the early 2000s that more and species began to flood the market. The traditional snake plant we all know and love had been living with humans for hundreds of years by then.
Once classified as a Sansevieria, some snake plants were reclassified in 2017 as members of the Dracaena genus. Believe it or not, snake plants are actually capable of flowering in the wild, with short stalks of small, pale green flowers, though this isn’t common indoors.
Tools for Snake Plant Propagation
Snake plants can be easy to propagate with the right tools. Since this plant is a little unlike others you may have, you’ll likely need to use tools that are a little different than the ones you would normally use to trim and maintain your plants. Here’s what you need to have on hand.
Plant shears
To take plant cuttings, you need something to cut them with. Short-bladed shears won’t get the job done well for snake plants, since their stalks are generally wide and tough. Instead, opt for sharp shears with longer blades that can reach at least halfway through a leaf.
If you don’t have such shears, you can also use freshly sharpened kitchen or fabric scissors, so long as there is no rust present on the blades. It’s also important to avoid using any sort of blades or scissors that are damaged or could otherwise be dangerous if they happened to slip!
Rooting hormone
The key to snake plant propagation is rooting hormone. Snake plants are incredibly slow-growing, but rooting hormone is there to help speed things along so that your cuttings can take root faster without the risk of wilting or drying out before then.
Rooting hormone can usually be found in powder or liquid form, and while both are just as easy to use, powdered formulas are best for ensuring that the hormone actually stays where it needs to be, sticking to the sap that leaks out when snake plants are severed.
Water containers
If you plan on trying out water propagation, you’ll need something that can be dedicated for use as a rooting vessel. Try to find something that gives you enough room to easily fit the leaf into the water without hitting the sides.
It helps to use clear or green-tinted glass, so that sunlight can reach the new roots as they emerge. This isn’t a necessity, but it’s also something that can help speed up the rooting process.
Plant labels
If you’ve only got one type of snake plant, then labeling them might not be as important to you. However, plant tags can help with all sorts of information keeping, especially if you’re someone who’s not great at writing things down!
Plant labels are great for jotting down information about the plant, including propagation date, planting date, and dates when you fertilize. You can write down where you purchased a plant, when you repot it, and even how often to water.
Pots & Soil
Whether you’re trying soil or water propagation, you will need these supplies at some point. Given that snake plants aren’t huge on a lot of room or water, it’s best to keep them in smaller-sized pots where they have enough room to grow, but not so much that soil stays wet.
Speaking of soil, snake plants are acclimated to very dry, well-drained soil in their natural habitats. Therefore, you should try to mimic that as much as possible by using a well-drainage soil including lots of perlite and coco husk chunks to give you plants some air to breathe.
Rubbing Alcohol & Soap
To keep things clean, you’ll need cleaning supplies. Since many plant-borne pathogens, such as fungi, bacteria, and viruses can spread around on the surfaces of your plant shears and pots, it’s a good idea to sanitize everything with rubbing alcohol or soap.
Soap is necessary for snake plant propagation because of the nature of their leaves; they’re most porous at the base where you’ll be cutting, so gently washing with mild warm soapy water using unscented soap can help reduce the chances that your cuttings will get sick.
How to Propagate Snake Plants
Without the help of test tubes, fancy equipment, and perfectly controlled environments, we plant lovers are left with just a few options for propagating our beloved snake plants. And, while we know that it takes so long for them to grow, the end result is well worth a little of our time each day. Here’s how to do it.
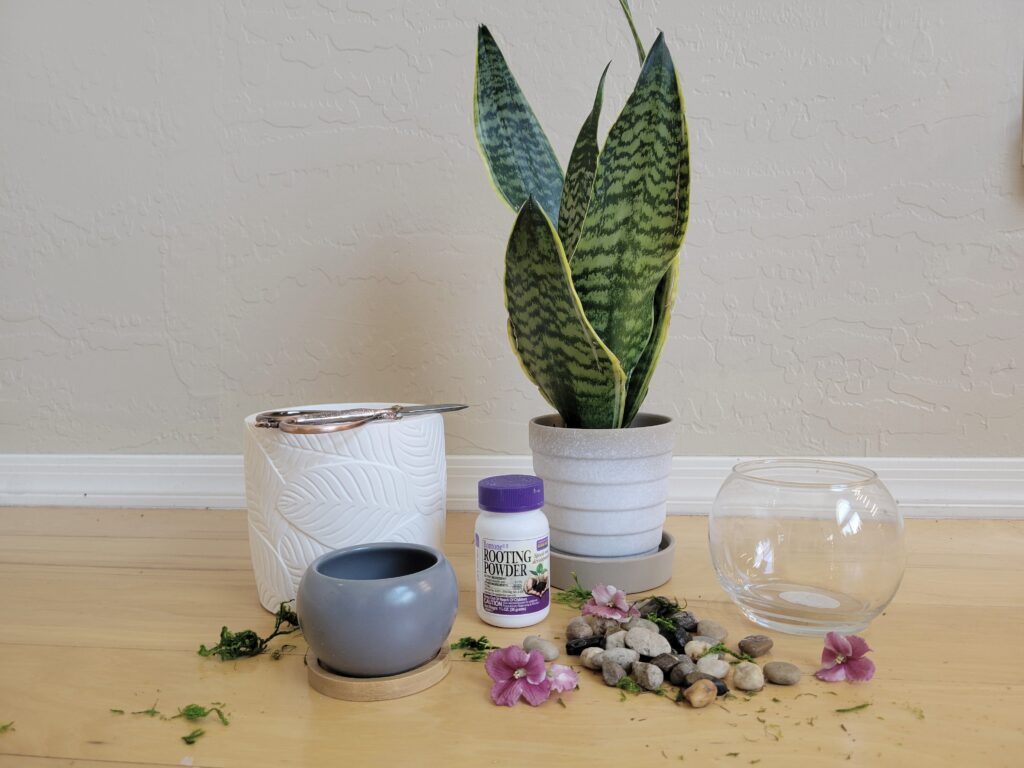
Step 1: Gather your materials
First things first, you’ll want to get all of your propagation tools and other things in one spot, where you can find everything easily. It helps to have a bowl of warm, soapy water nearby, as well as some rubbing alcohol and cotton balls.
This is a good time to disinfect everything, too. Rub down your shears with some rubbing alcohol, and use rubbing alcohol to clean your water containers. Removing any bacteria that might be nearby helps out a lot, and keeps the water clean for longer. Fill your water container with fresh, clean water after it dries.
Step 2: Clean the leaf
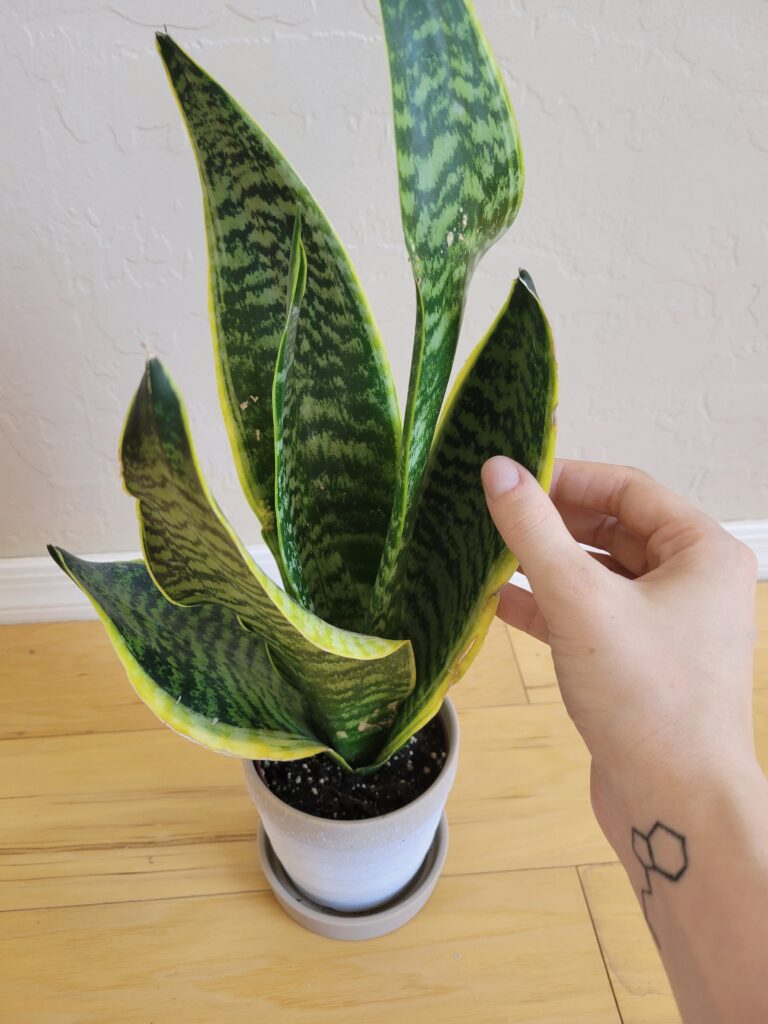
This is the easiest step. To clean the leaf you’re planning to cut, even if you’re going to take more than one leaf for cuttings, take a cotton ball and dip in warm, soapy water until it’s wet, but not saturated.
Then, carefully clean each leaf you plan to cut from top to bottom. Stick with outer leaves, which are easier to both clean and cut. If the plant still looks well-balanced without it, you can cut it! Allow the leaves to dry before making your cuts.
Step 3: Plan the cuts
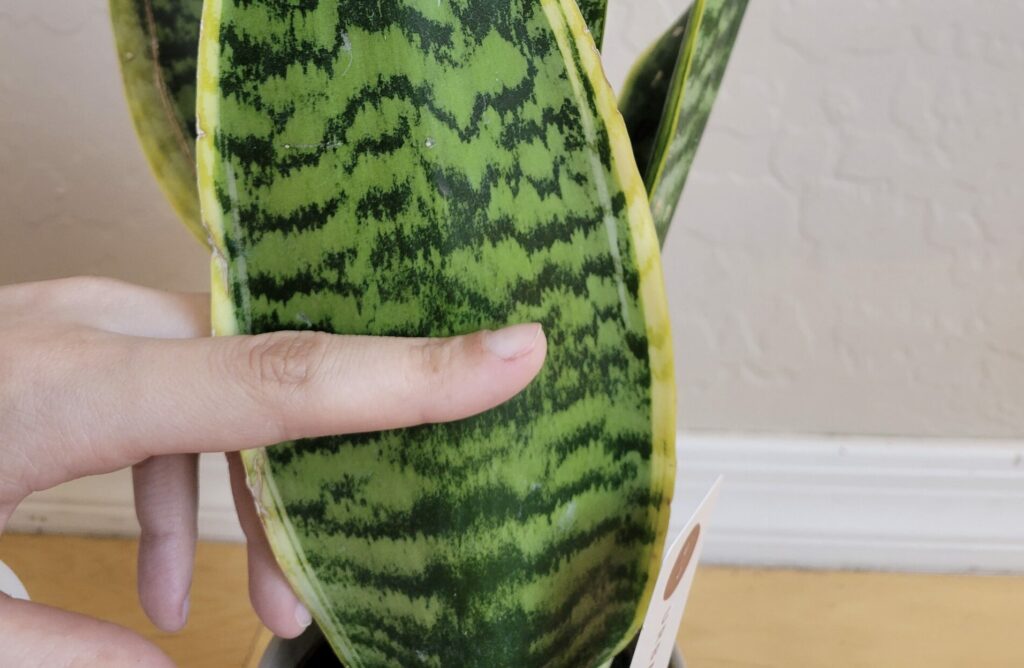
The trickiest part about propagating snake plants is knowing where to cut. This depends not only on the species of snake plant you have, but also the maturity of the leaf, the amount of sunlight and water it gets, and the sheer size of each leaf.
For broad-leafed snake plants, Try to aim for a higher spot on the leaf where it begins to narrow. Your cutting won’t be as tall as the original plant at first, but it will be healthier. Having less roots to grow right away means it can focus on growth sooner. For thinner leaves, go for the area just before the base of the plant.
Step 4: Make the cuts
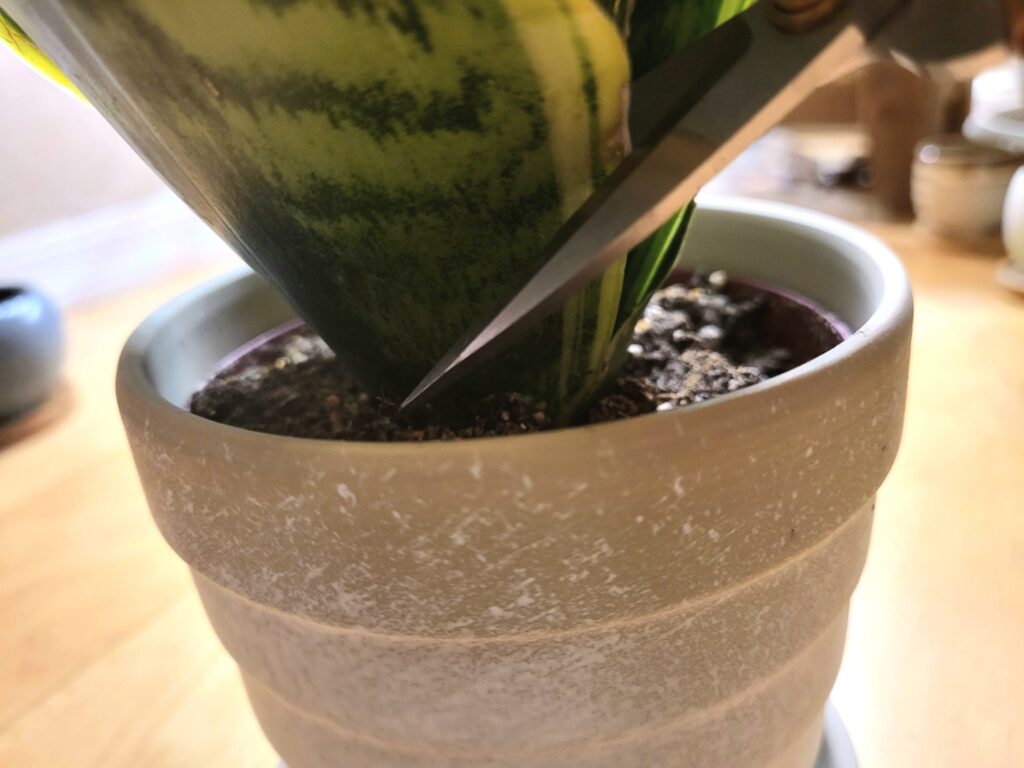
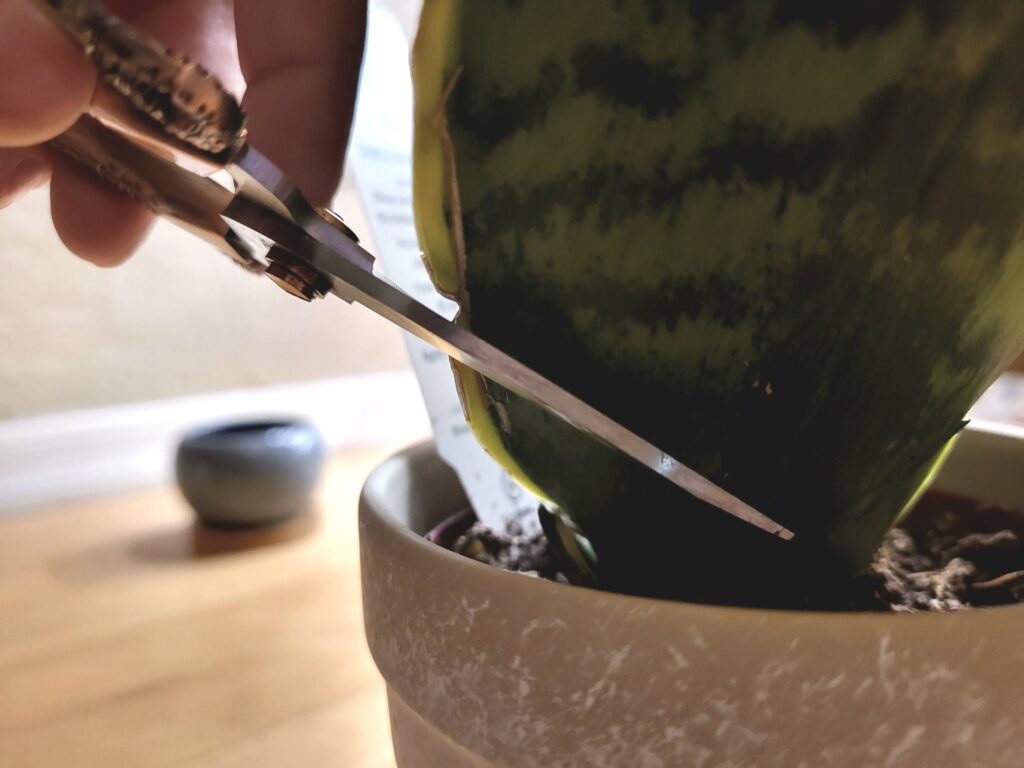
If your snake plant’s leaf is more than two inches wide, then you’ll need some tricky handiwork here. First, cut into the leaf from the highest point you intended to cut from, downwards at a 45-degree angle until you reach the halfway point. Repeat on the other side to remove the cutting.
For leaves that aren’t as wide, or under two inches, you can make one swift snip at the same 45-degree angle so that the cut goes entirely through the leaf. You may need to make more than one snip, so long as they’re both in the same directional line.
Step 5: Rooting hormone
Now that your cuttings are free from their original plant, you’ll need to give them a boost so that they can start rooting right away. Rooting hormone sends a signal to the plant that it needs to focus on growing roots instead of growing in height.
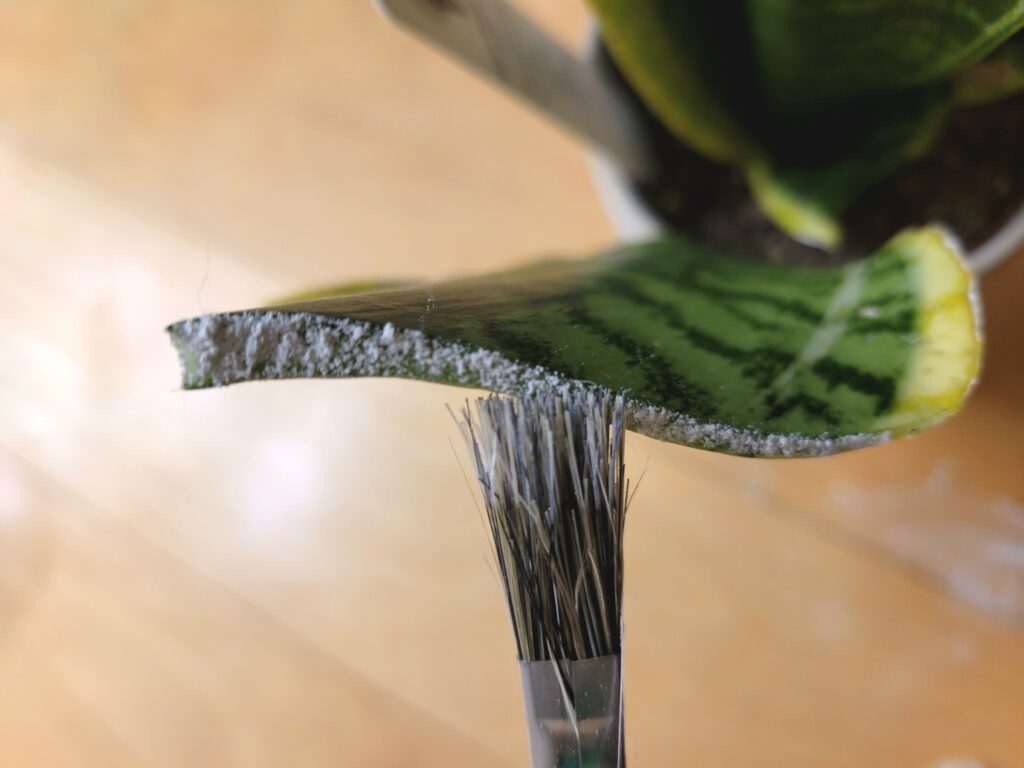
To apply it, use a brush or a cotton swab to pick up powder or liquid rooting hormone, then gently dab onto the fresh cut at the new base of the leaf you removed. Try not to pack it on too thick; most of it will fall away anyway, and plants only need so much to get the job done.
Water Propagation Method
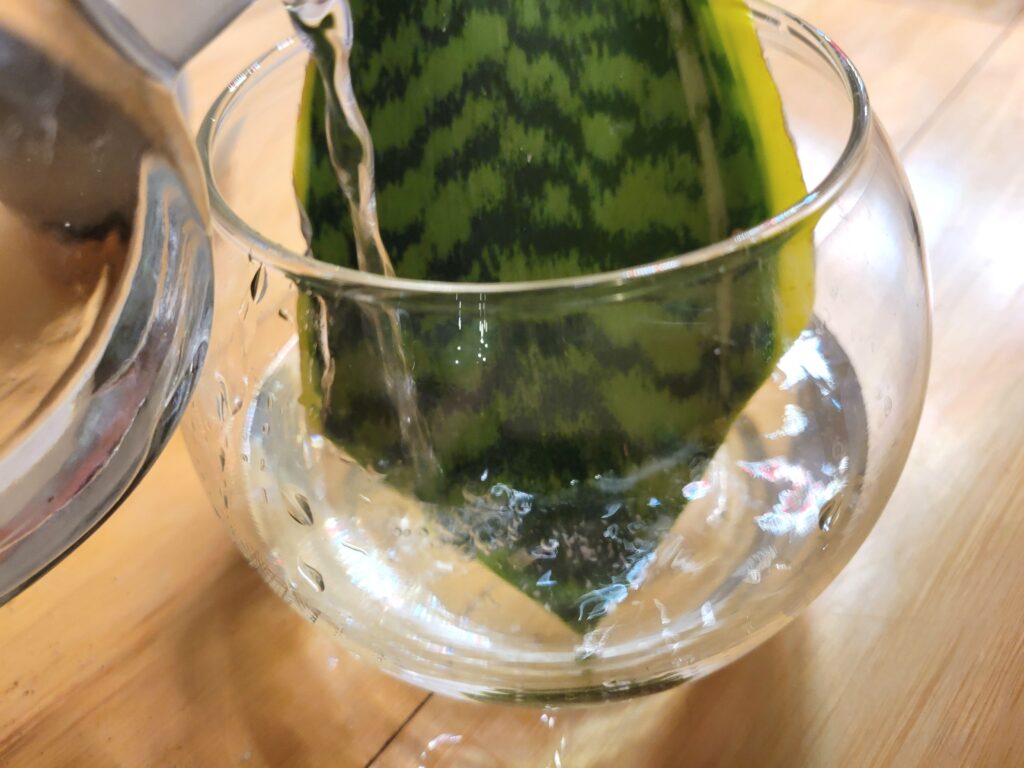
For this method, all you need to do is place your new snake plant cutting into a vessel of fresh, clean water that is full enough to cover the entire leaf cut and then some. Try not to submerge the leaves over halfway; this encourages rot, since snake plants don’t get lots of water in the wild.
Then, there’s the general daily maintenance. Every day or two, be sure to empty out all of the water from the container the cutting is in. Rinse out the container, then refill with fresh water and replace the cuttings. Cutting shouldn’t be out of water for more than a minute.
With the water propagation method, it typically takes a snake plant around six to eight weeks to grow its first roots, but it will be longer before you can pot into soil. Make sure that you see at least a few long, thicker roots before potting.
Soil Propagation Method
To root snake plants in soil, the process is a little different. You’ll need a pot nearly full of moist soil, but not waterlogged. It should be soft enough to press the snake plant cutting into without bending or damaging it.
Plant the snake plant cutting straight up and down into the soil, about two inches down or until the cutting can hold itself up. Then, gently water with a small stream of water to help set the soil. Allow any excess water to drain out completely to prevent root rot.
For the first two weeks, the water should remain evenly moist throughout. Don’t let the soil dry out in this time; it could be detrimental to the cutting. After two weeks, water only when the top soil is dry, until the eight week mark. You can water as you would normally would your original snake plant!
Caring for New Snake Plant Cuttings
Your new baby snake plants need lots of care and attention during their rooting phase. Whether or not they root in time to draw nutrients up before they’ve used up all their stores depends on the care they receive.
The absolute most important aspect of rooting new cuttings is sunlight. Snake plant cuttings need at least six to eight hours of bright, indirect light per day. Without enough sunlight, your cuttings won’t root very quickly.
Avoid placing them in direct light. Direct light can burn sensitive cuttings, but strategic placing or the use of sheer curtains can keep your cuttings happy. If you don’t get enough light naturally through windows or skylights, you can also use full-spectrum LED lighting.
Water propagated snake plant cuttings need to be maintained regularly. If the water appears murky or discolored, it’s been dirty for too long. Try to make sure the water stays clean, so that the roots of the cuttings aren’t hindered by toxic water levels.
Cuttings planted in soil should be watered regularly. Moisture meters are a great tool to make sure the soil is always moist where the roots are growing, but after awhile, you can tell by the weight of the pot and the appearance of the soil when it needs to be watered again.
Since snake plant cuttings don’t have roots, they don’t need fertilizer. Stems alone can soak up some water, but not much; either way, it should always be available to them. Try not to keep cuttings in soil saturated too much or let water sit in the bottom of the pot.
Potting Snake Plant Cuttings
To pot rooted snake plant cuttings, you’ll need a pot that’s about three to four inches in diameter. This size is perfect; the plant can stay in this pot for quite awhile before it needs to be repotted, and it’s cozy enough for snake plants to be comfortable in.
If you’re planning on planting several snake plant cuttings in one pot, you can size up a bit, but be sure to use a shallower pot so that the soil doesn’t stay wet for too long. Plant them at least three inches apart from each other.
Plant each cutting so that the roots are under the soil, along with a small section of stem about a centimeter in length. The cuttings should stand up on their own, but if they don’t, then you can try planting them a little bit deeper until they do.
From this point, your new snake plants are ready to be treated as mature adult plants! Water only when the soil is nearly dry, but not bone dry. Snake plants will survive well in low light conditions, but they don’t grow unless they have brighter light.
Troubleshooting Snake Plants
In some instances, a snake plant cutting doesn’t quite grow as planned. There are a few common reasons a cutting won’t make it, but these aren’t usually very obvious to the untrained eye. Here are a few common issues that you may run into with snake plant cuttings.
No roots
If after eight weeks, there still aren’t any roots, it’s a good indication that something’s wrong. Watch for signs of burgeoning roots; you may have a late bloomer on your hands, but if there’s no sign of any changes at the cut site, then it may be too late.
One of the most common reasons that a snake plant cutting doesn’t root is a lack of clean water or sufficient sunlight. If you forgot to change the water out a few too many times, it may have become toxic to the cutting with mineral buildup or nitrogen levels getting too high.
Changing out the water frequently is the best way to make sure your cuttings not only survive, but also root properly. It also keeps out harmful bacteria, algae, and any other pathogens that might infect the plants.
Yellowing color
Another common issue with snake plant cuttings is yellowing. If you notice that your cutting is starting to become discolored and bleached-looking, your cutting is on its way out. This is likely due to overwatering; it sounds a little redundant in water propagation, but it’s possible.
Cuttings that are yellowing are usually not salvageable, but you can still try. Try to keep water levels lower (just above the rooting portion) in water. For soil cuttings, the problem is almost always a lack of drainage in some form or another.
Make sure that cuttings in soil can drain entirely once they’re watered. If water sits in the bottom of the pot or the soil stays waterlogged without drying at all between waterings, your cuttings may be in worse shape than they can come back from. Try repotting in dry soil.
Pests
Snake plants aren’t susceptible to many pests, but spider mites and mealybugs aren’t picky. These two pests are most common on snake plants, but if yours was ever grown outdoors before propagation, it could also be susceptible to blight.
Insects that infest snake plants can be removed and deterred with pesticides like neem oil, but concentrate on the areas where they could hide. Fortunately, there aren’t too many places like that on snake plants except at the base.
Blight, on the other hand, can’t be cured. It presents as brown spots on leaves, which grow day by day and cause wilting. Your best bet is to start over with a new snake plant, but you should check nearby plants to see if they’ve been infected.
