
It doesn’t matter who you are; if you’ve had houseplants, you’ve had a spider plant. There’s also a really good chance that you still do. If that’s the case, why not make a few more? Spider plants are fun to propagate, and it’s rewarding to be able to take the pups and help them grow into their own spider plants.
They look great literally anywhere, and they immediately give off that tropical plant vibe. This classic is easy to propagate and care for, which makes it perfect for both propagation beginners and more experienced horticulturists.
History and Culture of Spider Plants
Spider plants are a big part of houseplant history. Originally from the South African rainforests, spider plants are a tropical plant with centuries of appeal. There are dozens of different species in the wild, which isn’t surprising given that spider plants are a member of the asparagus family (which also has a wide range of species).
It is thought that the spider plant was first introduced to modern-day Europe as far back as the late 1700s, but it took nearly a century before this plant became a common household commodity. The gorgeous leaves inspired the name “ribbon plant” before it was known as a spider plant.
Today, spider plants are grown in homes and offices around the world. Their ability to adapt to a wide range of climates makes it perfect for literally any setting minus the subarctics. However, they’ll grow happily in rain or shine; whichever type of climate you live in, one of these will survive in your house.
Spider Plant Reproduction
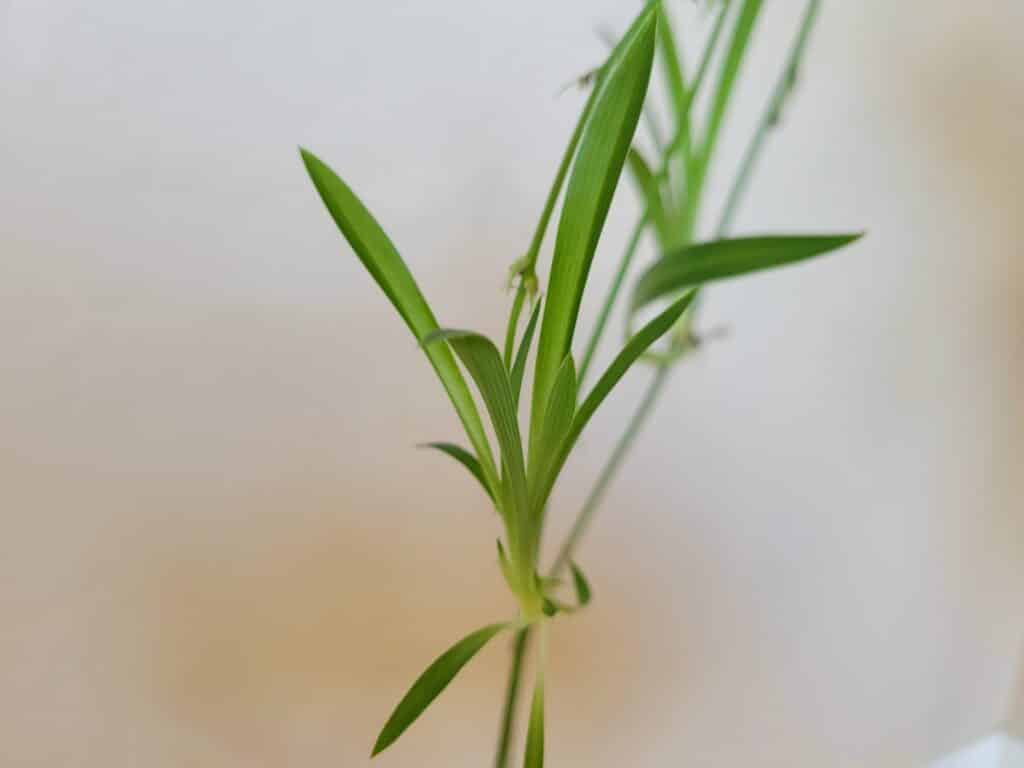
Unlike most other plants, spider plants utilize a very unusual technique seen in a surprisingly small percentage of known tropical houseplant species. Spider plants use a “walking” technique, which involves growing a pup, or a whole new plant, on the end of a long tendril after the bloom is spent and falls away.
Similarly to plants such as the walking iris, a spider plant will simply plop a pup down right next to itself in the soil, rather than try to gamble on pollination or other means of reproduction. The pup grows its own roots, and at that point, it’s ready to find some good soil and start maturing.
This gives them tremendous reproductive success; in the wild, they often serve as ground cover for tropical rainforests in South Africa. In huge clusters, spider plants look a lot like grass; they don’t grow over two or three feet high, and they prefer to stick together. It’s really a breathtaking scene.
Delightfully, you can take advantage of this clever tactic to produce some of your own spider plant babies. There are a few different ways to get this done. Some are more natural, while others include the use of hormones to encourage the new plants to really take off.
Spider Plant Propagation Tools
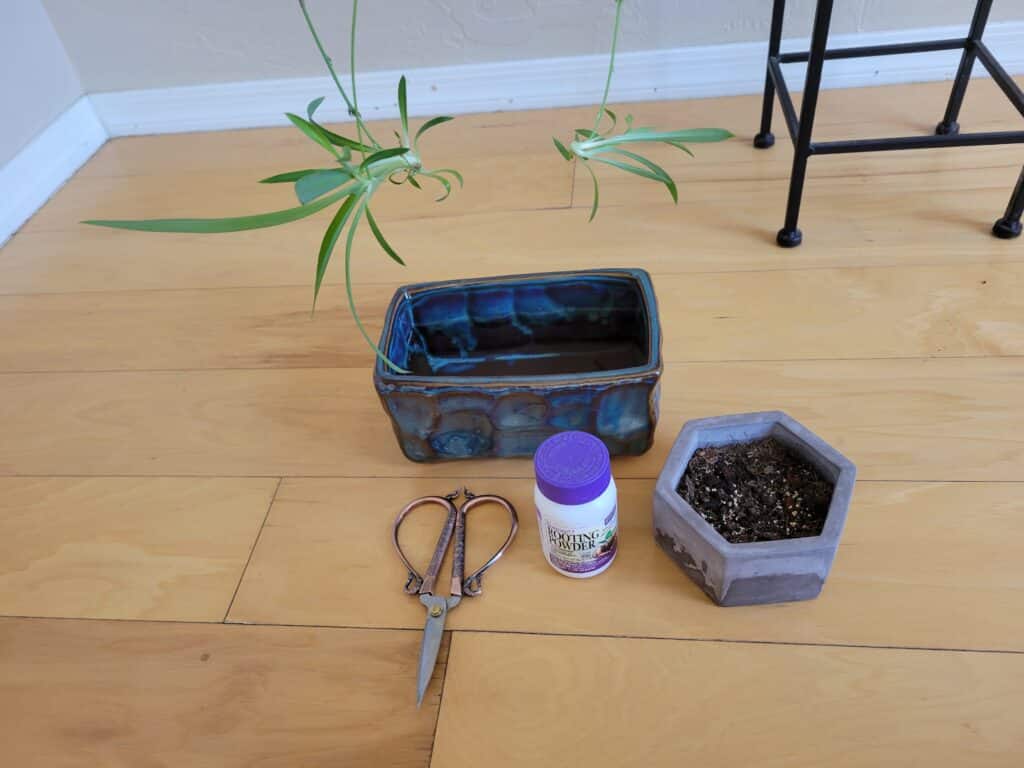
As with all propagation projects, there’s a basic set of tools you’ll need to make sure everything goes smoothly and your original plant and pup have the best chances of success. Having the right tools is important for plant propagation, especially if you want your plants to thrive.
Plant shears
The most important tool to have for plant propagation is some sort of sharp blade that is free of rust and grime. Shears are perfect for this type of application, considering they can make a cut in one fell swoop without damaging the plant stem at all. If you don’t have shears, a clean razor blade will work as well; just be careful not to nick yourself in the process!
Propagation containers
This is basically a fancy term for either pots or glass jars for raising your cuttings in. They’re great to have on hand anyway, in case you “accidentally” buy another plant from the store that needs repotting or you end up with some cuttings from a friend’s plant. You’ll need some smaller-sized ones on hand for this project.
Rooting hormone
This stuff is a lifesaver for plants that don’t like to root right away. Since plants can’t survive long without access to water, and roots are that access, some cuttings have a hard time beating that race. So, rooting hormone comes in to save the day. It encourages new root growth twice as fast for most plants!
Plant labels
If you’ve got more than a few spider plants, it’s a good idea to keep some plant tags around to make sure you can differentiate between the different types you have when they’re too small to identify. It’s also a good spot to write down information such as the date of cutting, water changes or when you fertilize.
Filtered water
Small plant starts often have a hard time resisting the negative effects of chemicals and minerals that are present in tap water. Hard water can burn sensitive new roots, which is detrimental to their growth. To avoid any complications like this, it’s best to use filtered or bottled water, but distilled is what’s best.
Soil or vermiculite
If you’re planning on skipping the water propagation process in favor of rooting your spider plant babies right in the soil, then you’ll need a good supportive soil to start. Anything that has a mixture of peat and perlite is great; or, if you prefer not to use soil, you can use just vermiculite (granted that it always stays moist)!
Propagating Spider Plants
So, you’re probably wondering how a plant that literally makes its own starts and then plants them needs any help, but there are obviously no lush tropical rainforest floors available in your house (we assume) for these plants to just conveniently land in. That’s where you come in.
Propagating spider plants can be done in very similar ways to what you’re likely already used to if you’ve ever propagated another plant. We have both the water and soil methods, as well as a more natural route that involves very little to maintain. All these options are great options, so try to branch out a little and have fun with this forgiving plant!
Here are the two main propagation methods that we will be covering:
- Soil propagation
- Water propagation
Soil Propagation Method
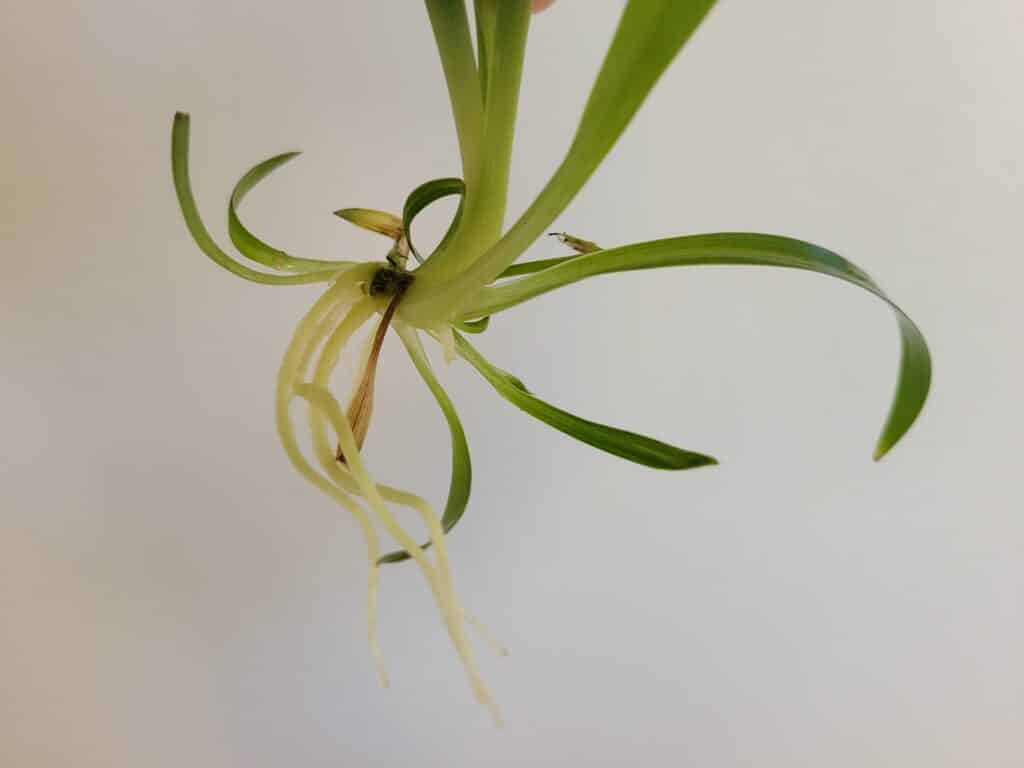
Alright, this is the best method to use if you want more spider plants in pots right now. For the soil method, you definitely want to wait until your spider plant’s pups have roots of their own startin to grow; in this case, they should have at least some sort of root growth started, no matter how much there is.
Even a small root node that’s visible is enough, but the more roots, the better. Absolutely crucial to the success of this method is making sure that your spider plant pup always has access to water, but without drowning in it. It may sound a little contradictory, but it works. Here’s how to do it.
Step 1: Gather your materials
This is often considered the most important step to take. It includes getting all of your tools ready for your project, as well as getting everything clean and ready to use. You can use an ammonia-free cleaner to sanitize your work surface, and rubbing alcohol to remove any harmful pathogens from your tools.
Cleaning everything is super important, as bacteria and fungi can hitch a ride on your snippers from your other plants. You can also spread plant viruses and pests from plant to plant with unclean tools, so really, it’s just best practice.
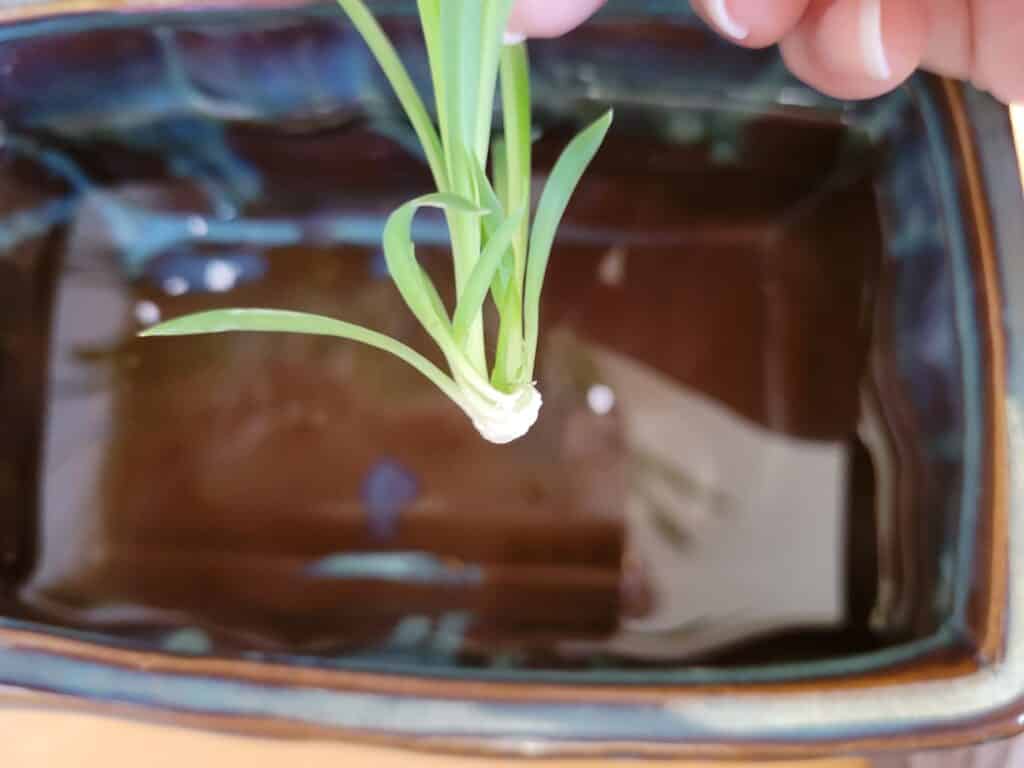
Step 2: Snip your cuttings
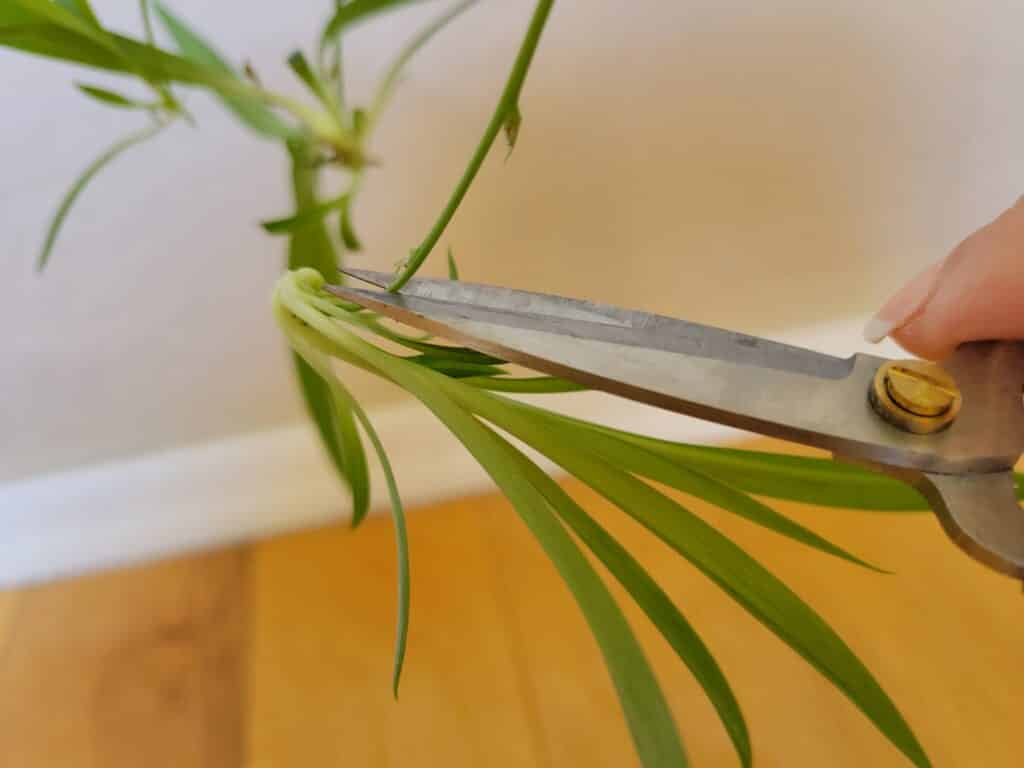
This part should be done with care. Sure, you can pluck a pup with your fingers, but again you risk that transfer of pathogens. So, using your very sharp and clean shears or blade, gently cut the pup away from the stem by cutting about one centimeter away from the pup.
Of course, you don’t need to cut away all of the pups at once; start with just the ones that have roots or root nodes showing, and leave the smaller ones unless you’d prefer to just nip them off as well. Once you have all your cuttings, it’s time to propagate.
Step 3: Rooting hormone
While using rooting hormone on a plant that has already started on roots may seem redundant, it isn’t. Spider plants are a fast growing plant, and to grow quickly, they need to be able to absorb lots of water and nutrients through their root systems.
Thus, the rooting hormone. This will speed up the rooting process and give your new cuttings healthy root systems fast. All you have to do is dip the base of the pup into the rooting hormone enough to cover the bottom node, and you’re good to go.
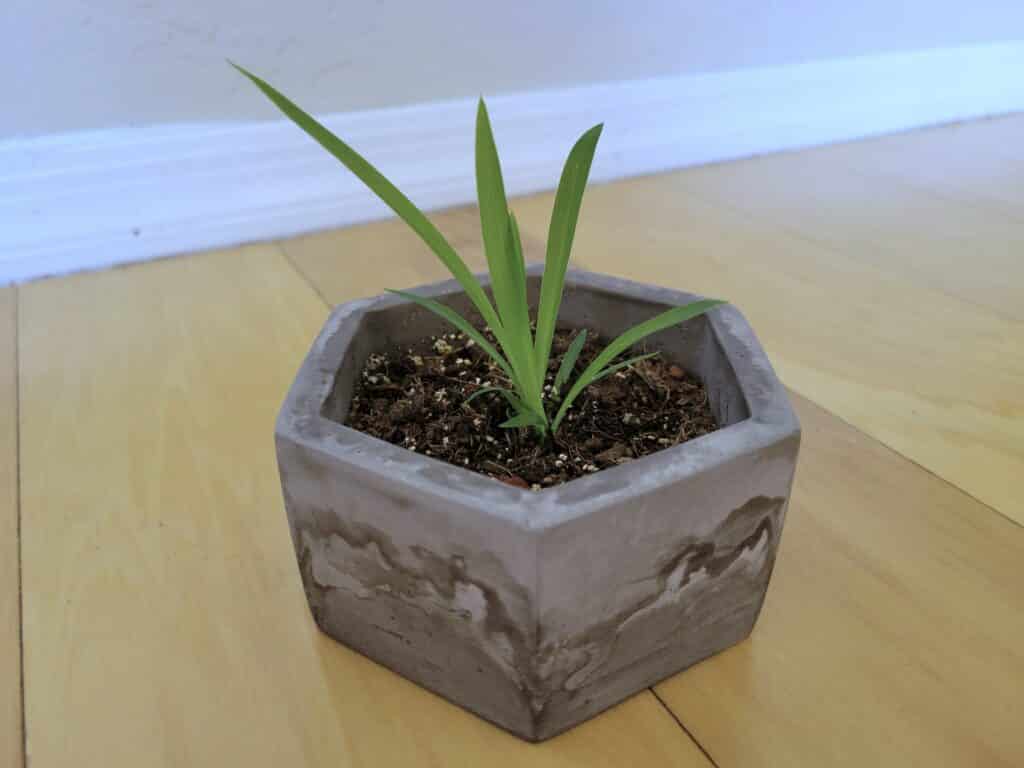
Step 4: Into the soil
Now it’s time to get your pups into their new homes. You should have a few small pots filled with moist soil ready for these guys to go into. Dig a small hole in each of the pots, just deep enough to bury the node where the leaves stem from, and then place the cuttings in.
Lightly tamp the soil down around the base of the plant, then water slowly until the soil is completely saturated. Make sure that any excess water is able to drain from the bottom of the pot to prevent root rot.
Step 5: Water, water, water
For the first two weeks, you should make sure that the soil in your pots is always at least somewhat moist. Doing this will help new roots better break through the soil to create bigger taproots, and also helps to keep the new roots from drying out and dying.
Spider plants love water, but don’t like to sit in soggy soil constantly. Allow just the very top of the soil to dry out before you water again, and check to ensure that drainage is happening and water isn’t sitting in the bottom of the pot.
Water Propagation Method

Propagating spider plants in water is almost as easy as breathing. Since spider plants hail from a very wet climate, they love water; they can even grow in water alone in their natural habitats (not in our tap or drinking water, though), which makes them perfect candidates for water propagation!
It’s also a fun way to display your spider plants as they grow their roots. Given the right vase or pot, spider plants look fantastic in water. They make great centerpieces or accents around your other plants. This method also requires less maintenance than the soil method. Let’s get started.
Step 1: Gather your materials
This is where you get everything ready to avoid running around in circles when you can’t find what you need! It helps make the process smoother and easier, and prevents you from having to search for anything you forgot to grab before you started.
Of course, you need a sanitized workspace, as well as clean tools. Everything you use that touches the cuttings should be free of any bacteria or fungi spores, so it’s best to use rubbing alcohol on your shears and vases, as well as ammonia-free cleaner for the surface you’re working on.
Step 2: Cut the pups away
It might sound a little dark, we know, but now is the time to remove the pups from their stems. You’ll want to limit your candidates to those that either have established roots or at least visible root nodes (where a small lump appears at the bottom of the cutting).
Make a swift cut right about a centimeter away from where the stem meets the pup’s base. This prevents any damage to the pup itself, which could be detrimental. If you’d like, you can also trim away the stem from the original plant using the same method.
Step 3: Rooting hormone
Once you have all your pups in order, it’s time to give them a little boost. Since plants can’t absorb any water or nutrients without roots, you’ll need to help them along. Rooting hormone can make the rooting process faster by encouraging the plant to grow new roots or kick-start existing ones to grow faster.
All you have to do is dip the pups into the rooting hormone powder until you’ve gotten powder on the entire bottom node of the plant, up to where the leaves start to grow out. It won’t matter a whole lot if you can’t saturate the whole node; they’re going into water, after all!
Step 4: Into the water
With rooting hormone on your pups, you can start to place them into water. Try to gently lower them into water without disturbing the rooting hormone too much; some will inevitably wash away, but it’s good to still have a touch of the stuff still attached to the pup. The rest will dissolve and be used by the pup anyway.
Make sure that just the bottom of the pups are submerged; you don’t want too much foliage to be underwater. However, a couple lower leaves in the water won’t hurt, and they don’t mind being partially submerged, so it’s okay if you can’t set them up to be perfect.
Step 5: Water changes
You’ll want to leave the pups in their initial rooting hormone-rich water for a few days. Once the water starts to look murky, you can begin changing it out every couple of days to prevent any root rot or an excess of nitrates. Fresh water is what’s available in the rainforest, and so mimicking that is best.
Keep your pups in water until their root systems are lush and full. You’ll want at least three sets of roots to lower the risk of shock once you plant them in soil, and they’ll help your plants transition from water to soil better. You can also opt for leca instead of soil with this plant!
Caring For a Spider Plant Cutting
So, you’ve got all these new spider plant pups happily growing, and they’re doing well. However, they do need some basic necessities, just as mature spider plants do. There are a few simple parameters that spider plant pups need to grow into healthy, happy mature plants.
The first necessity is light. Without adequate sunlight, your pups will have a hard time rooting; they need bright, indirect light, but not as much as a mature spider plant needs. The green coloration on your pups should be a dense, medium green. If your leaves are looking a little bleached out or discolored, look to light first to solve the issue.
Next up is food. A very common misconception is that new cuttings need lots of nutrients to grow into maturity. While this might look good on paper, it absolutely will kill your pups if they’re overfertilized. Avoid using any fertilizer for the first month, then use a very minute dose of diluted indoor plant food eerie six months.
Last but not least is water! Spider plants love water, as you may have already gathered, so keeping them hydrated is super important. Try not to ever let the soil dry out completely, and check water levels in vases to make sure they have enough for the plants to drink. Evaporation is big during warmer months.
Potting Spider Plant Cuttings
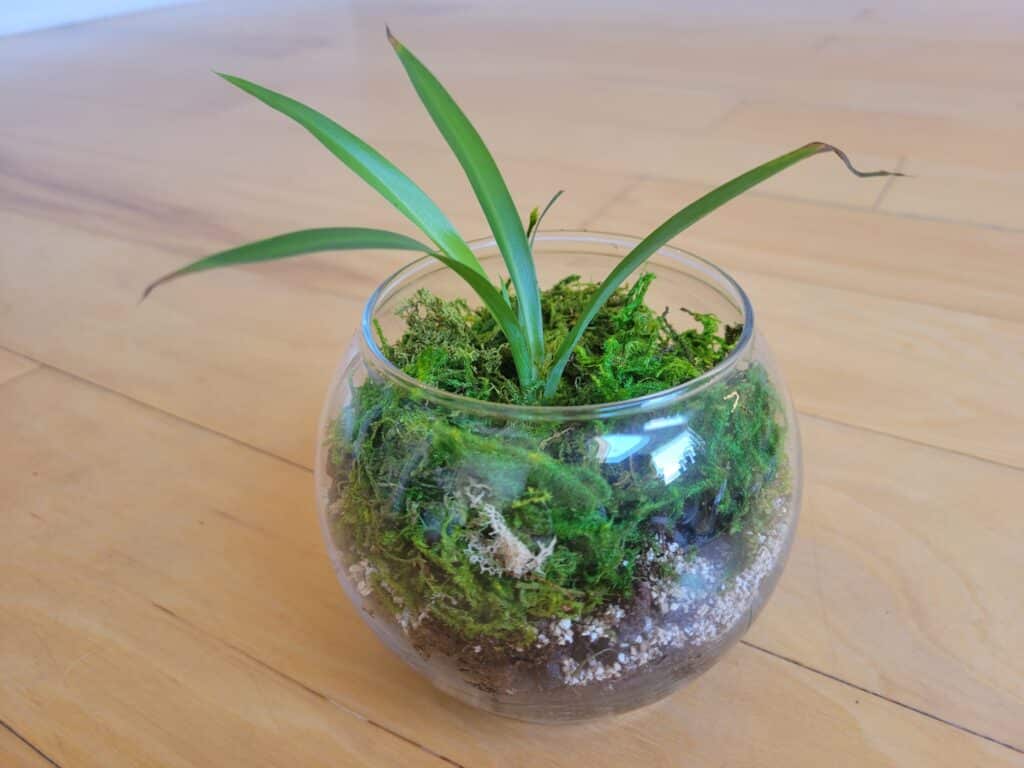
The best thing about spider plants is that they’re so versatile. They can be used in terrariums, planted with other tropical plants, and even hung in baskets, where they can really stretch out to their full growth potential. After about six weeks, your pups should be ready to plant in their own containers.
Opt for pots that have enough room for the roots to grow. Spider plants hate being pot bound, and planting in small containers is the leading cause of this issue. However, don’t go too big, either; constantly wet soil makes for a great breeding ground for pests like fungus gnats!
When you’re planting your pups, you can also plant a few of them together in one pot to fill it out faster. The more pups you plant together, the more room they’ll need for root growth. Try to space them at least six inches apart in any container you choose.
No matter what you plant your new cuttings in, make sure there is some form of drainage. For pots, go for drainage holes that allow water to flow out of the bottom of the pot. For terrariums, use large pebbles in the bottom to give the water a place to escape to. Never water up past the soil line.
Try to let the soil in your new pots dry out in the top inch before watering. While spider plants can survive in water, they can’t survive long in waterlogged soil; the soil itself actually chokes out the roots, which causes them to rot. The dead matter then creates all sorts of chemical imbalances in the soil, so best to avoid overwatering!
Troubleshooting Spider Plants
Sometimes, spider plants aren’t happy with their growing conditions. There are lots of reasons a spider plant would be unhappy, but most of these are very common and easy to resolve. Let’s get into a few of the most common spider plant issues.
Browning leaf tips
If your spider plant has browning leaf tips, it’s trying to tell you that something’s up. However, this is really a one-symptom-fits-all kind of situation, so try to analyze its soil conditions and think about what could be causing this problem. Here’s a list of possible causes.
Over or under-watering
Brown leaf tips can be a sign that your spider plant is either getting too much or too little water. To remedy this, you can either repot into a moisture-control blend of soil with lots of perlite, or you can use a moisture meter to determine when to water. The top two inches of soil should be dry before watering, but don’t let the soil dry out beyond that.
Soil acidity
Another common problem is soil acidity. If you use tap water to replenish your spider plants, there could be excess fluoride or salt buildup in the soil. While spider plants can absorb the water they’re given, they don’t absorb these chemicals, which then just sit in the soil, causing it to become acidic. Flush out your soil with filtered water monthly to avoid this.
Soil acidity is also caused by overfertilization. If fertilizer can’t move through the pot, it will build up in the soil, which burns the roots of a spider plant. Only fertilize every six months, and use a dilute of any tropical or houseplant-formulated fertilizer. Anything that is well-balanced should do the trick.
Sunlight exposure
This is a more common issue than you might think. While spider plants certainly like their sun, direct sunlight can burn them, and they can’t photosynthesize fast enough. If your leaves are looking pale or bleached out, this is most likely the cause. Snip off the brown tips and move into a lower-light area.
Slow growth
If it’s been a few months and you haven’t noticed any new growth, there’s a chance your spider plant isn’t getting enough of something it needs. If the leaves are especially dark green, then moving your plant into a better-lit area will help encourage new growth. Similarly, too much light can cause the same problem.
Another issue could be that your plant isn’t getting enough water or nutrients. Try using plain spring water to provide some essential minerals without giving too much. Alternatively, you can try using a slow-release fertilizer method such as food spikes to amp up the foliage.
Root rot
The bane of houseplants’ existence is root rot. Not all root rot is caused by overwatering, but a vast majority of it is. Moisture meters and adequate drainage are essential for spider plant health. Another common cause of root rot is soil or fungus gnats.
These little guys like to burrow into the soil and attack root systems. Some species will only eat dead root matter, but others will feast on the fresh, tender root shoots that form when roots are growing. Use sticky traps or sand overtop the soil to keep them at bay until your spider plant recovers. Repot once all signs of the flying pests are gone!

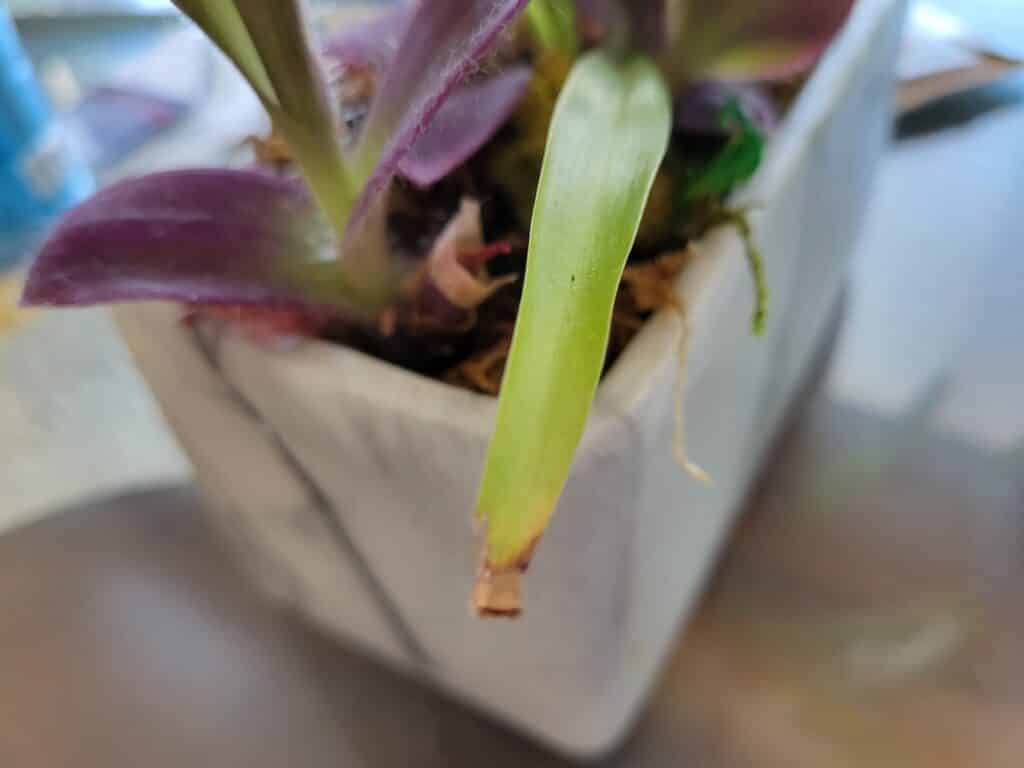
Thank you so much for educating me about spider plants, so helpful and very informative. Do you have any suggestions on Wandering Jews? Would love to hear from you on this topic.
Thank you in advance