
The name Zamioculcas zamiifolia is a tough one to master, but that’s ok; this plant is affectionately known as the ZZ plant. Simple and modern, ZZ plants are a timeless treasure that have become increasingly popular amongst new plant hobbyists and experienced gardeners.
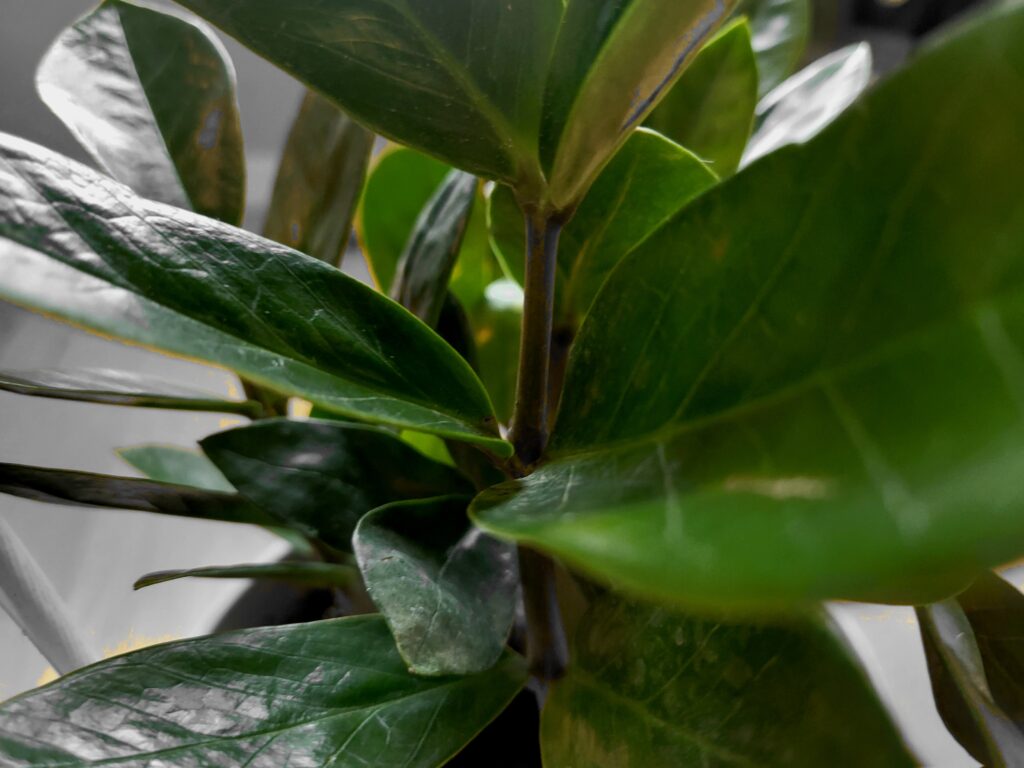
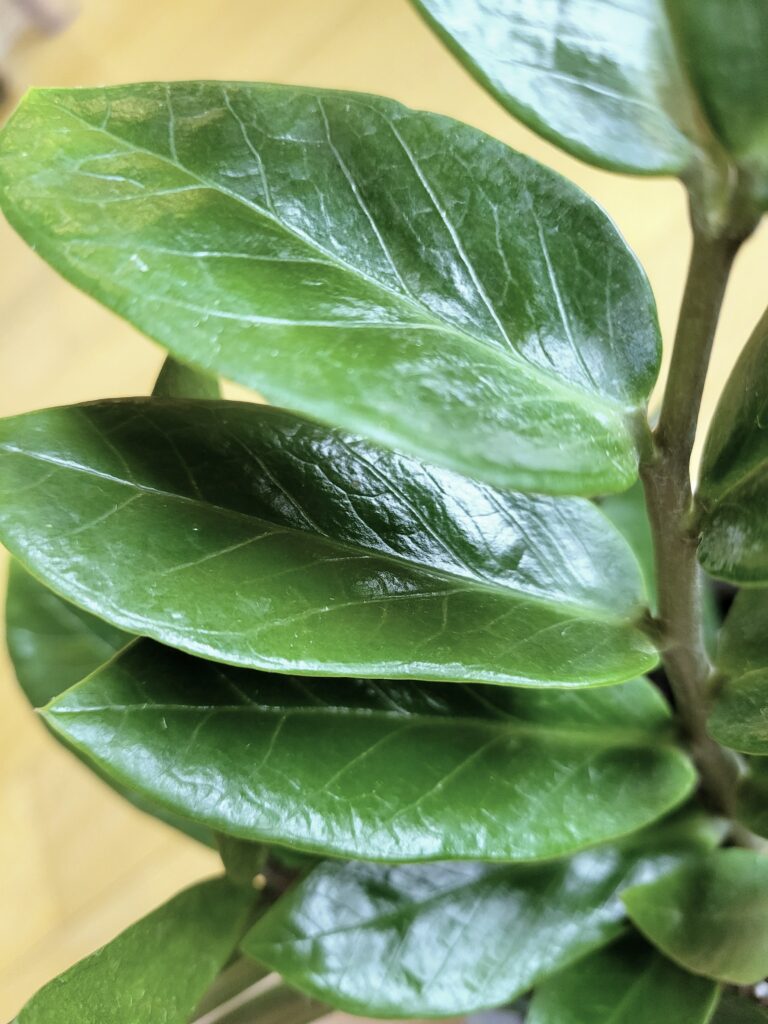
The long, tall stalks of this plant are accented only by pairs of leaves that grow opposite each other from the top to the bottom of each stem. Its foliage ranges in color only from a nearly black green hue to bright and vivid variegated patterns in green and creamy yellow.
It’s understandable that folks who are lucky enough to own a ZZ plant want to make more of them. They grow in a wide range of conditions, look amazing in nearly any space, and will tolerate some neglect from time to time.
History & Culture of ZZ Plants
An original native of East and South Africa, ZZ plants are rhizomatous perennials in their natural habitats. Their entrance into today’s growing market was more recent than other popular houseplants, but nonetheless, they’ve become more popular than some of the classics.
Despite not hitting mass cultivation markets until the 1990s, the first ZZ plants were discovered and studied back in the early 1800s. They were originally classified as a Caladium species, but were reclassified as a Zamioculcas in the early 1900s.
Surprisingly, ZZ plants are capable of producing flowers, but this is an incredibly rare occurrence in captivity. More often than not, indoor environments just don’t provide the ideal parameters for blooming, but it absolutely can happen if you’re lucky!
It’s important to note that while these plants are extremely gorgeous and easy to grow, they absolutely are toxic if ingested by people or pets, so it’s best to keep this one up and out of reach of cats, dogs, children, or curious visitors.
Tools for ZZ Plant Propagation
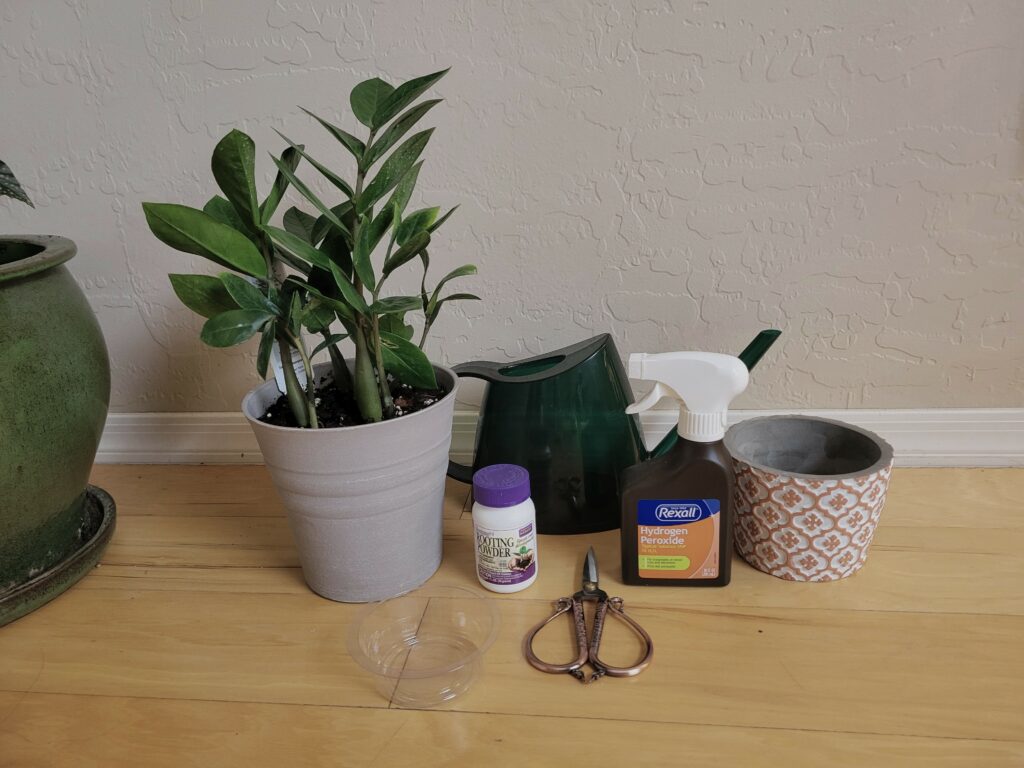
Since there are multiple ways to propagate a ZZ plant, there are also multiple tools you’ll need for your project to be successful. Whether or not you’re the kind of person to leave tools in the last place you’d look for them, it’s generally a good idea to have everything ready to go in one place.
Plant shears
The number one propagation tool that’s essential for taking stem cuttings or trimming roots are plant shears. They should be sharp and free of rust. If shears aren’t available, you can also swap out for a razor blade or sharp kitchen scissors.
No matter what type of trimming apparatus you choose, make sure that the blades are sharp enough to make one swift cut through a stem or a problem root. Using dull blades can mangle vital plant tissue at the site of the wound.
Rooting hormone
The stuff of legends, rooting hormone can make propagating ZZ plants a whole lot easier. These plants are notoriously slow rooters from cuttings, but rooting hormone can help ensure the success of the rooting process.
Without roots, plants will eventually die. The goal is to encourage rooting long before that point, but with ZZ plants, cuttings can take several months to root. Ideally, rooting hormone can speed up the process, but it won’t be by much in the long run. However, the roots that do grow will be bigger and healthier.
Water container
Whether it’s a vase, a glass, or even a plastic tray, cuttings will require a home for the next few months. Any clear or green translucent material will do, particularly if it’s easy to clean and refill often. Try to go for something with a wide mouth.
You can use canning jars, bud vases, or even empty plastic containers, given that anything you use should be cleaned thoroughly first. If you have a propagation station, most ZZ plant stems will easily fit and will happily hang on a wall or sit on a tabletop with proper light.
Pots & soil
At some point during the propagation process, no matter which route you choose, you’ll end up needing the basics of making more plants: pots and soil. Pots should be about twice the size of the root ball on a rhizome, but larger if you plan to accommodate more than one in each pot.
ZZ plants like a well-draining soil mixture that allows for good airflow to the roots. Any mixture that contains porous materials like perlite or vermiculite will help to make ZZ plants feel more at home. At the same time, avoid soils that easily become waterlogged or break down quickly.
Rubbing alcohol or hydrogen peroxide
Cleanliness and hygiene might be a given for us, but for plants? Most of us don’t consider that plants can benefit from good hygiene as well. Keeping the tools we use to cut and plant them clean can help prevent the spread of infection plant-borne diseases.
These diseases can be anything from bacteria to fungi or viruses, and they can hitch a ride on the surfaces of pruners and reused pots. To prevent your cuttings from getting sick, clean your tools and pots before you start your project.
Types of ZZ Plant Propagation
The anatomy of the ZZ plant is what gives away its possible propagation methods. There are quite a few ways to propagate this plant, but some of them would be difficult to impossible to do in a house or apartment. That’s why we’ve limited the types of ZZ plant propagation to the most common ways to get the job done.
Here are the two main propagation methods that we will be covering in this article:
- Root division
- Stem cuttings
Root Division
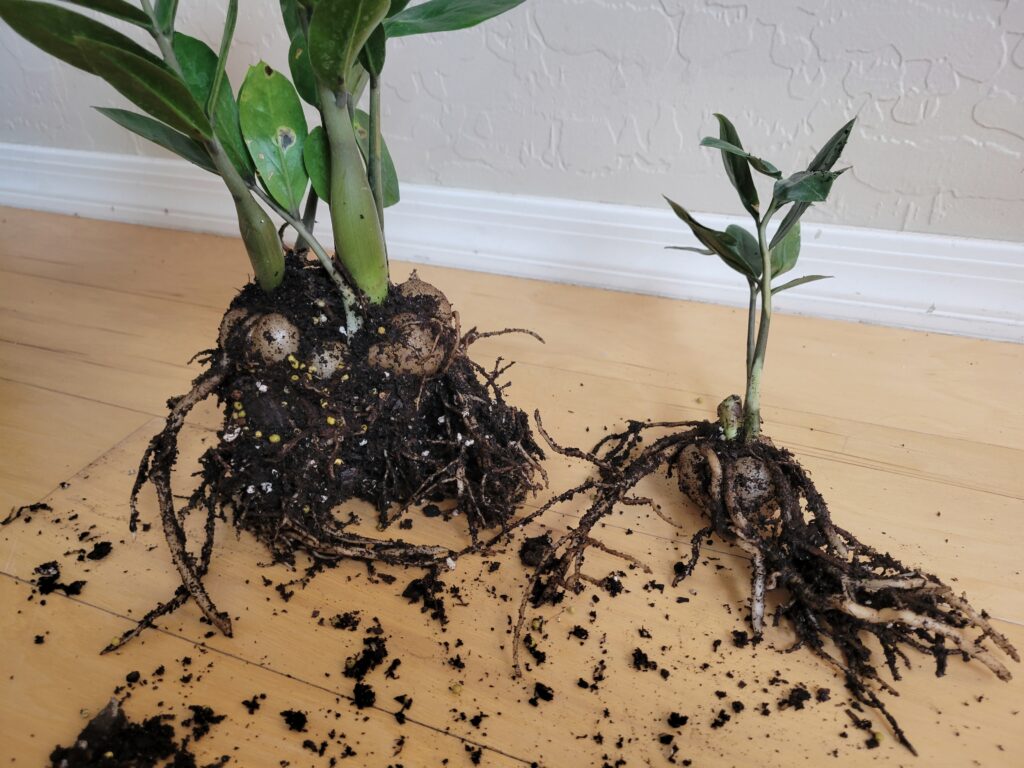
The fastest way to get results from propagating a ZZ plant is by root division. Essentially, what happens is a large group or cluster of rhizomes is broken up into smaller groups or individual rhizomes, which then themselves grow and divide into more rhizomes over time.
It’s a fairly simple and easy way to make more plants out of one plant, if the ZZ plant you have is large enough to divide. Most of the time, if there are multiple stalks in one pot, there’s a really good chance that there are enough rhizomes to divide.
Using this method, you’ll end up with several smaller plants. This is a great method to use if you happen to have a larger ZZ plant that’s had a chance to grow and produce more rhizomes in its pot. Here’s how this process looks.
Step 1: Gather your materials
To get everything ready to go, read through the tools and form a checklist. Make sure you have your pots and soil, ZZ plant, some fresh, clean water, and a tray for old, discarded soil. Having these things ready to go makes the whole process much easier.
You should also have a clean workspace ready to go. If you’re dividing your ZZ plant on a surface that you frequently use for other things, such as cooking or repotting other plants, it’s a good idea to sanitize it before you start.
Step 2: Unpot your plant
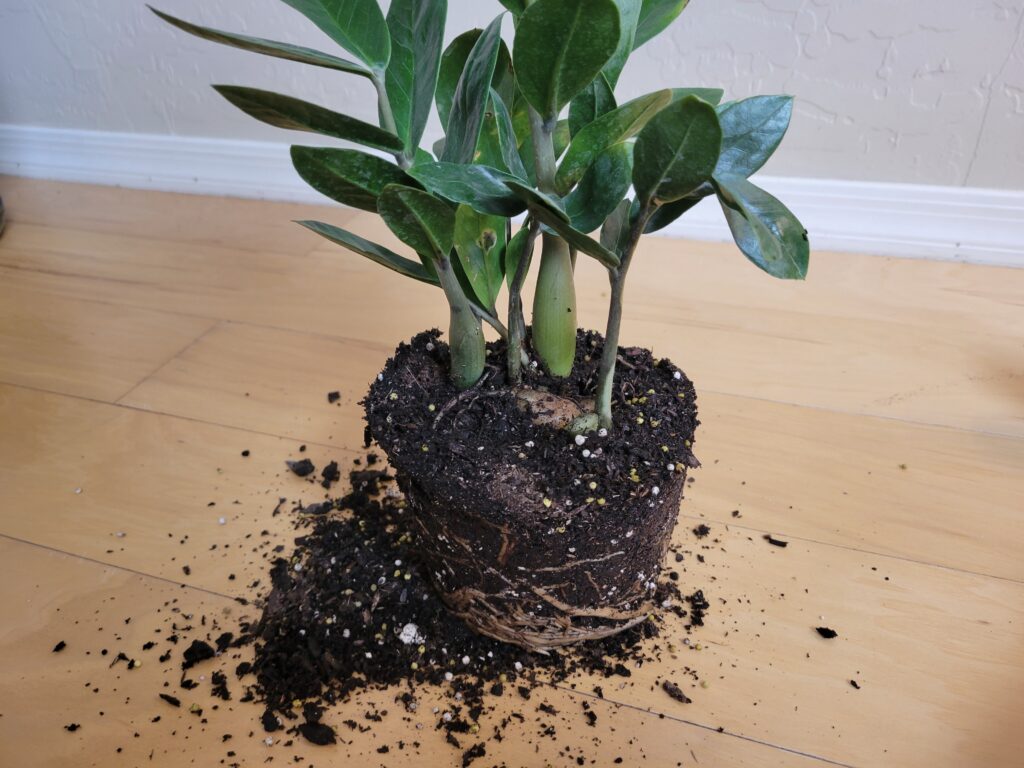
To coax your ZZ plant out of its pot, gently press along the sides of the pot to help release roots that may have adhered the pot’s inner surface. This also helps release roots that are bound at the bottom.
Once the plant seems loose enough to release, slowly tip the pot upside down with your hand on the soil around the stems. Release the plant into your hand and then remove the pot from the roots. Loosen the roots by carefully removing soil from the bottom of the root ball.
Step 3: Identify the rhizomes
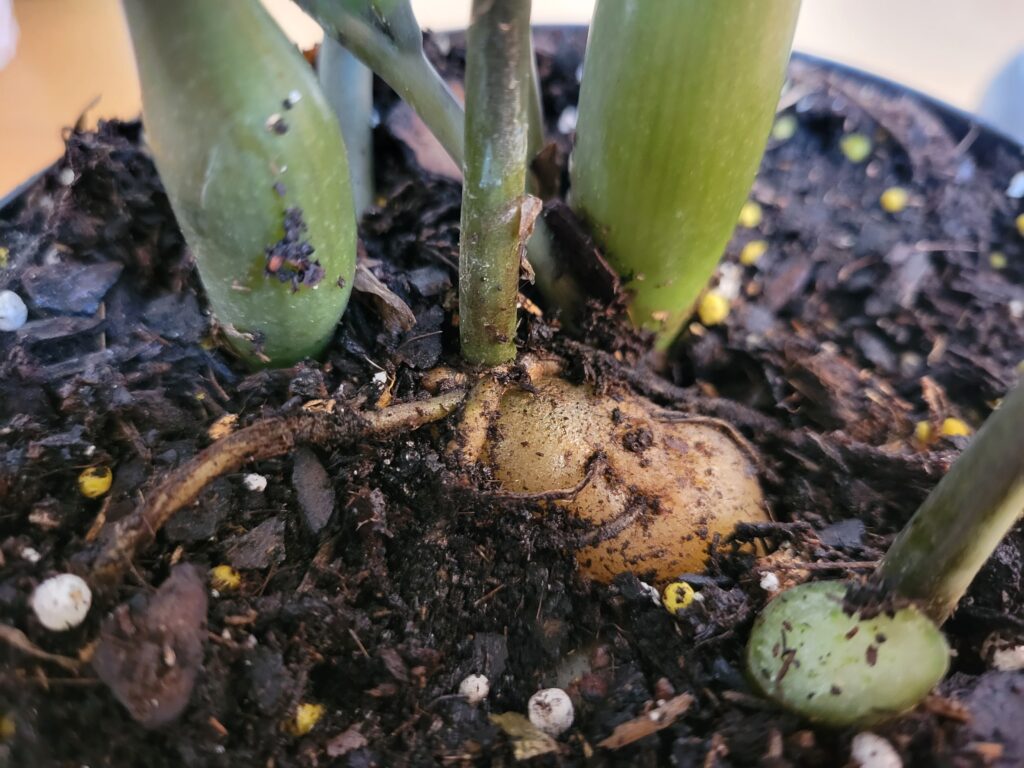
The rhizomes of a ZZ plant look a little bit like potatoes. They’re small, usually brown, and sit below a plethora of roots forming from the base of the plant’s stem. Each rhizome has its own root system.
There may be clusters of rhizomes as well. To break them apart, cut them apart at the joint where the rhizomes are connected. Most of the time, they’ll easily break free on their own. Sometimes there are no connected rhizomes, which makes the next step even easier.
Step 4: Separate the rhizomes
Depending on how many starts you’re looking to have, there are several different ways to split up rhizomes. You can either remove one rhizome at a time from a cluster until you have several, or you can group several rhizomes together in one or two different pots. It’s up to you.
Try not to separate rhizomes that have hardly any growth on them yet from larger rhizomes. It’s likely that the new rhizome is still dependent upon the larger rhizome it’s attached to, and may struggle to continue to grow without the parent rhizome.
Step 5: Repot the rhizomes
Now that you have your rhizomes separated, you can start to plant them into their respective pots. Try to aim for at least three stalks per pot, which will help a freshly divided plant look fuller. However, for a fun minimalist look, you can try only one stalk in a slightly smaller pot.
To properly pot these plants, fill the bottom of each pot with soil. With one hand, hold the plants in the pot so that the rhizomes will sit just below the soil’s surface. With the other, fill in the area around the roots with soil and water until the water drains freely from the bottom of the pot in large quantities.
Stem Cuttings
The process for stem cuttings looks quite a bit different from root division. This is the slowest way to propagate ZZ plants, but it can be rewarding if you’re willing to wait several months before a cutting turns into its own plant.
This process is also far less likely to yield viable results. FOr the most part, ZZ plants can be propagated in water, but sometimes a cutting isn’t mature enough or doesn’t have enough foliage to support itself during the long rooting process. If you’re in it for the long haul, though, this method is for you.
Stem cuttings from a ZZ plant can look great in water as decor, or in a propagation station setup that features both a wooden stand and a glass tube. A single ZZ plant stem looks sleek, elegant, and modern styled alone. Here’s how it’s done.
Step 1: Gather your materials
Before you get started, round up all the tools and supplies you’ll need for this method. You should have your water container or propagation station, rooting hormone, plant shears or razor blade/scissors, and some rubbing alcohol or hydrogen peroxide.
This is a good time to make sure everything you use will be clean. Essentially, cutting a stem is creating a wound for both the cutting and the original plant. By using rubbing alcohol or hydrogen peroxide to clean your tools and containers, you can help prevent your cutting from getting sick.
Step 2: Locate your cuttings
Whether you plan to take one or more cuttings, you should decide before you start which stems to cut. Try to find the most mature stems; these will be at least eight inches long and have several sets of leaves.
It helps to use string or twist ties to mark the stems you’re after to avoid accidentally cutting the wrong stems. Once you have a good idea which stems you’ll be cutting, clean and grab your shears to get ready for the actual snip.
Step 3: Making the cuts
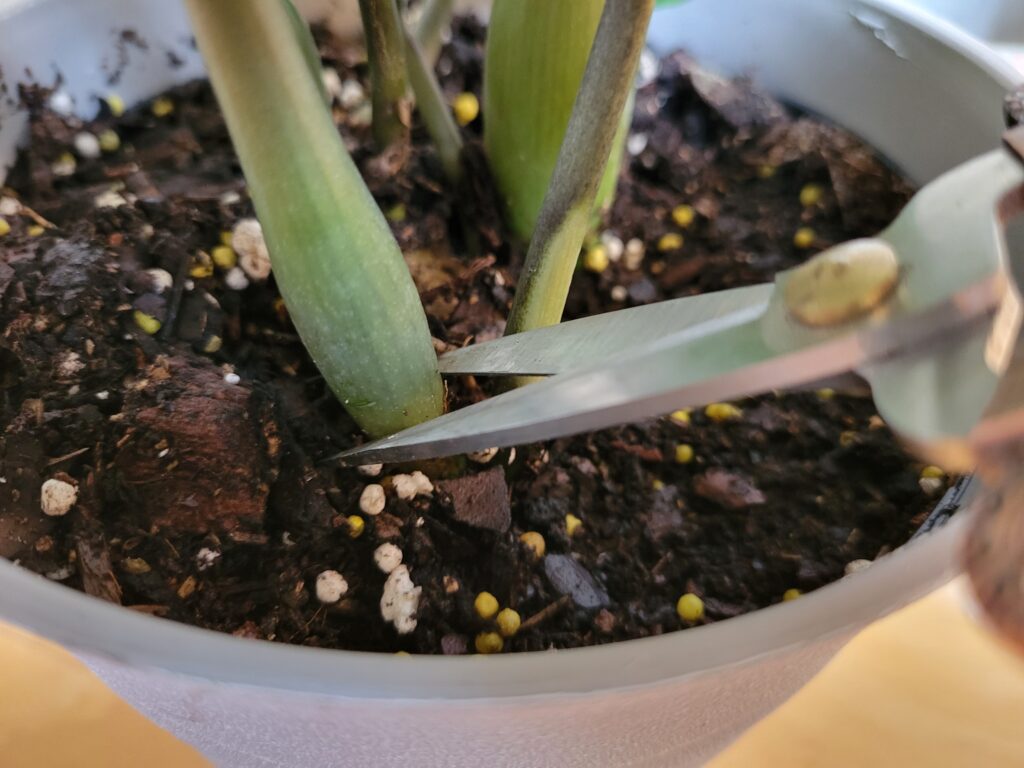
With ZZ plants, where you cut could be the difference between a successful cutting and a failed project. Each stem will have a sort of swollen spot near the base of the plant; this is a good way to tell if a stem is mature enough to propagate.
You will cut just below this area, at somewhat of an angle. Your cuts should be done in one swift motion. Try not to cut underneath the soil, which could harbor bacteria or fungi that can try to infiltrate the cutting before it’s lifted away from the plant.
Step 4: Rooting hormone
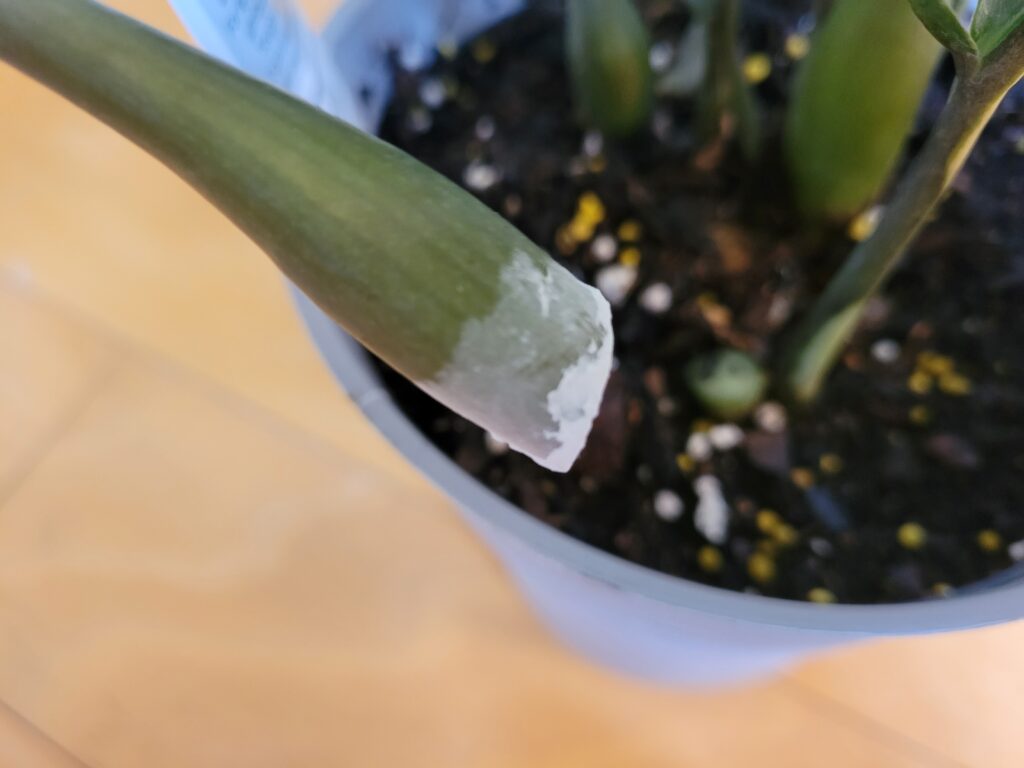
Some growers prefer to let ZZ plant stem cuttings sit for a few minutes to allow a callus to form over the cut part of the plant. Others don’t bother, yet both methods have been documented to be successful. This method uses a bit of a dry period as well.
Immediately after cutting them away, dip just the bottom centimeter or so of the stem into your rooting hormone. After this point, allow the stems to sit for about ten minutes before placing them into fresh, clean water.
Step 5: Maintaining the water
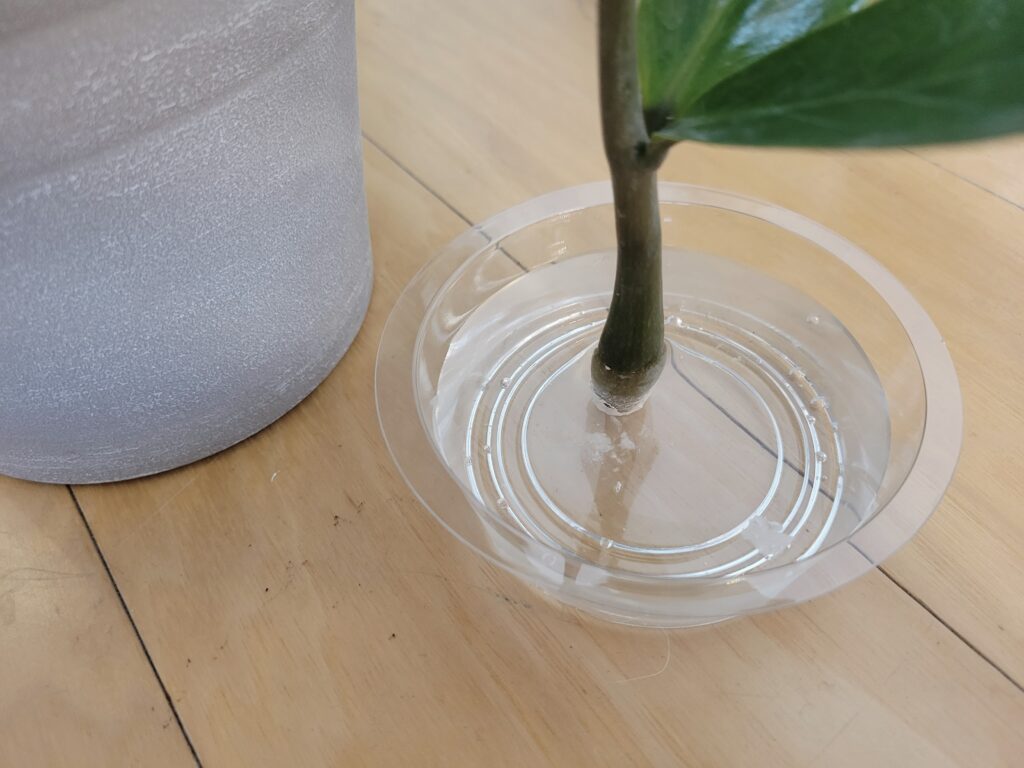
ZZ plants are generally composed of fairly tough tissue that doesn’t wilt on command, which makes it easier to care for in water. Very rarely will leaves fall into the water, and fortunately so. There isn’t a lot of care for a cutting in water except the water itself, and light.
Make sure you change out the water for your ZZ plant cuttings every few days to prevent the buildup of bacteria or fungus spores in the water. These types of pathogens can cause water to become toxic to any cuttings that are living in it.
How to Care for ZZ Plant Cuttings & Divisions
The time it takes for a new ZZ plant cutting to mature is fairly hefty compared to other commonly propagated houseplants. Rather than the typical two months or so, it can take ZZ plant stems up to six months to grow roots, and close to a year before you may start to see new shoots.
During this time, ZZ plant cuttings need adequate light and fresh water. Place them in bright, indirect sunlight, but not so much that the leaves remain a light emerald green color. Cuttings are at a higher risk of sunburn damage than established plants.
Cuttings should also be kept at warmer temperatures. They generally need a 60 degree fahrenheit minimum temperature, but nothing warmer than 80 degrees fahrenheit. While this temperature range may seem a little strict, most households fall within this range.
If your house gets colder than 60 degrees fahrenheit, it may be a good idea to place your ZZ plant cuttings near a warm appliance or a heater (but not directly in front of it). Keeping temperature in mind, a good way to check the plant’s temperature is by measuring the temperature of the water it sits in.
After a while, you should begin to see roots forming. These should begin to grow much faster if the growing season is coming, or if it’s already been a few weeks into the growing season. Cutting take longer to root in colder seasons.
Root divisions, on the other hand, can be treated like full-grown plants almost right away. Monitor the soil for dampness frequently by either feeling the top inch with a finger or using a moisture meter to determine when the plant begins to dry.
New root divisions should be watered a bit more frequently than mature plants for the first two weeks as they settle into their new living arrangements. They should receive the same bright, indirect light that mature plants do.
As with cuttings, root divisions that are newly planted alone should not be allowed to become too cold. Cold temperatures are more difficult for a single-stemmed plant to withstand, even if it has two or three more on the way up.
It helps to group potted root divisions together or amidst other plants for the first month or two to help it maintain a bit more humidity and warmth until it gets settled in. Once it begins to grow out a little more, you can find it a more permanent place to live in your home or office.
How to Plant Stem Cuttings
ZZ plant stem cuttings take a long time to grow roots. However, once they do, they’re yearning to be planted in soil. There should be enough roots to hold the plant upright when planted in soil. Ideally, a cutting that’s ready for planting has several roots with roots growing from those.
Before you remove the cutting from water (never let the roots dry out entirely, which happens fast), get your pot and soil ready for planting. Fill it about three quarters of the way full with slightly damp soil, and create an indent in the middle of the soil where the roots will be planted.
From this point, you can use one hand to hold up the cutting and the other to fill the soil in around the roots and the base of the plant. The soil should come up about a half an inch above the point where the stem meets the first roots.
If there is a rhizome already growing from the cutting, you can make your hole slightly bigger to accommodate it. If the rhizome has grown wide, be sure to use a slightly wider pot to give your ZZ plant a little more room for future roots to grow.
Once your cutting is planted, water it well to help the soil settle around the roots and offer moisture to the growing roots that will come in in the weeks to follow. Keep this soil moist for at least a month after planting, but never let water sit at the bottom of the pot. Waterlogged soil can kill roots quickly.
Troubleshooting ZZ Plants
Occasionally, ZZ plants have a little trouble adjusting to their new arrangements. This can be due to a number of issues that include errors during propagation, climate incompatibility, and even poor quality soil. If your ZZ plant is having a hard time, try to diagnose the reason why first.
Yellowing leaves
Sometimes, ZZ plants lose leaves. This isn’t a very common occurrence for these plants. However, each time they lose a leaf, it turns yellow beforehand. There’s a reason for this: a yellowing leaf is a sign that your ZZ plant isn’t happy with something it’s receiving or not receiving.
Sometimes, yellowing leaves can be a sign of overwatering, especially if an entire stem seems to be affected. Dial back watering, and check to make sure any drainage holes aren’t blocked by using a pencil or something similar to push through holes at the bottom of the pot.
Another common issue is fertilizing. Too much fertilizer can cause a leaf or two to become yellow at a time for milder cases. If you accidentally fertilize your ZZ plant way too much at once, the entire plant will yellow and will need to be repotted after a day of soaking the roots in water.
One of the less common causes of yellowing leaves is excess sunlight. It’s rare for a ZZ plant to receive too much sunlight from inside of a house or office, but it can happen. More than eight hours of bright, indirect or completely direct sunlight can scorch the leaves of a ZZ plant, causing yellowing and burnt brown spots on its leaves.
To remedy this issue, try to simply place your ZZ plant elsewhere, further away from direct sunlight. Go for places like beside a window or on a wall shelf for more diffused, indirect sunlight. Windowsills may be a bit much in the hotter months.
Pests
There are a few common pests that infect ZZ plants more regularly than others. Examples include spider mites, mealybugs, scale insects, and soil gnats. These pests are commonly picked up in nurseries where plants are grown in close proximity to each other. These kinds of conditions make it easy for pests to spread from plant to plant.
To deal with flying pest insects, try using sticky traps. These are often sold as small, plastic paddles on stakes that can be placed in the soil much like a garden label. The sticky surfaces catch soil gnats as they attempt to fly away.
For more difficult pests like spider mites and mealybugs, neem oil and soapy water are the best insecticides. You can make a mixture of neem oil, castile soap, and warm water to kill and deter pest insects that take up residency in your ZZ plant. Spray once every month until the problem dissipates, and keep away from other plants until no more bugs remain!
