If you have one of these plants, there’s a good chance you’ve had it for quite some time. Christmas cacti are succulent, evergreen perennial plants that produce scores of brilliantly colored, impressive flowers that are unlike any other indoor blooming cactus.
What’s great about the legendary christmas cactus is that it’s not just about the blooms. Although we may wait around impatiently all year just to watch for signs of their return, these cacti look great in their off-seasons, too.
There’s something fun about cascades of spiky leaves with bright blooms hanging off their ends, and that’s why it’s so much fun to make even more of these plants through propagation at home. It’s fun, easy, and free!
History & Culture of Christmas Cactus
These plants were surprisingly popular and highly regarded about two centuries ago, in the early 1800s. However, by the time the mid-1800s rolled around, growers and collectors had already moved onto bigger, showier things like begonias and violets.
However, some 100 years later, some straggler cultivars made their way into the United States and Canada, where they became a far more popular indoor plant than ever before. There was a time during the 1970s and 1980s when nearly everyone had a christmas cactus in their home.
As the mania spread for new colors and hybrids, people began to collect these plants like trading cards. These days, there are really only a few solid cultivars out there, sporting the same classic bloom colors we’ve grown to love.
Christmas cactus blooms come in shades of salmon, pink, white, red, orange, and even yellow. While it’s unusual to find a christmas cactus bloom in a darker color, some hybrids can be found that look close enough to a deep magenta to pass as purple.
When to Propagate Christmas Cactus
Although most cacti don’t have a particular season for propagation, christmas cacti have some preferences due to their blooming and dormant seasonal differences. Since most christmas cacti bloom in the winter months (depending on where you live), it’s best to work around this.
Instead of propagating just before or during the blooming season, when energy is primarily used for growing blooms, it’s a better idea to propagate after blooming. Once the last bloom falls away, wait a few weeks before you propagate to give the plant a chance to recuperate.
This way, most of the energy is now being redirected to foliage: repairing any wounds the plant may have sustained during blooming, growing new leaves, and expanding the root system. There are more cells available for other purposes, too, such as rooting new cuttings!
Tools for Christmas Cactus Propagation
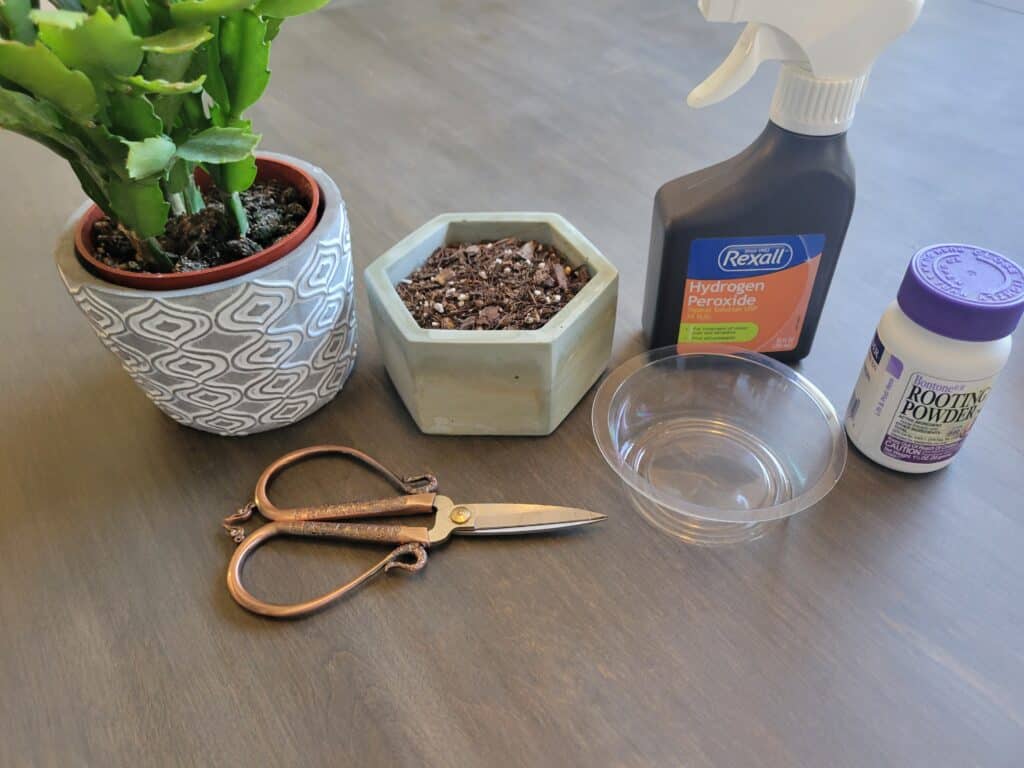
Here are a few tools that you’ll need for Christmas cactus propagation:
Plant shears
Essential for any plant-related project on your workbench, plant shears are the one staple you can’t live without for propagating your christmas cactus. In fact, using shears that are sharpened and are clean and rust-free is especially important.
If you don’t have any plant shears, fret not; you can also use a new razor blade, or even a sharp knife or kitchen scissors, so long as they meet the same criteria: super sharp and super clean. We don’t want rust or dirt on the blades!
Rooting hormone
Rooting hormone isn’t actually essential here, since christmas cacti are super easy to propagate without any extra help. However, the use of rooting hormone allows the plant to get to work on growing new roots faster, which is better for the plant in the long run.
It’s also a great way to help ensure the success of your propagation project. Rooting hormone increases the chances that a cutting will root, which helps out beginners and anyone doing some large-scale christmas cactus propagation.
Pots & soil
Cacti need soil in order to grow and survive, and you’ll need it at some point whether you’re propagating in water or in soil. The best type of soil is a succulent or cactus blend that’s heavy to porous and sandy materials.
Christmas cactus pots should always have good drainage. If there aren’t lots of holes for water to escape, you’ll end up with a root rot situation that could end in disaster. Most plastic pots and terra cotta pots have sufficient drainage for cacti like this one.
Water container
If water propagation is what you’re after, then you’ll need something that you can dedicate to growing your cuttings in until they mature. It should be wide, shallow, and allow plenty of airflow to prevent algae, bacteria and fungi from setting up shop.
It’s up to you whether you want to use glass or plastic, but it doesn’t make a difference one way or another. Glass can generally be cleaned a little better, but plastic is just as good. Make sure to choose something translucent that allows some light to reach new roots.
Plant labels
If you’ve got more than one type of christmas cactus, it’s a good idea to label them. There’s nothing like a fun surprise, but if you want to know which cactus cuttings are which, you can easily attach a small tag or label to each cutting or container of cuttings.
Plant labels are also a great resource for recording information about a cutting, such as when it was propagated, when it began growing roots, and even when it’s planted and repotted. You can also mark fertilizing dates in the future.
Rubbing alcohol or hydrogen peroxide
Keeping your plant tools clean is keeping your plants healthy. Plant-borne pathogens, including fungi, bacteria, and even plant viruses, can hitch a ride on your plant shears or pots and infect the next victim.
By using rubbing alcohol or hydrogen peroxide to sanitize your shears and any other tools you’ll be using, you’re preventing your new christmas cactus cuttings from being infected by pathogens like this and ultimately dying.
Types of Christmas Cactus Propagation
In most instances, christmas cacti don’t need anything special in order to root successfully. These guys are naturally good at rooting from nodes, and they quite often do so in their natural environments. When a leaf falls off, it simply roots on the ground where it landed.
However, we can make this process easier for them. By using basic gardening tools and techniques, you can successfully propagate them and have new plants growing within a matter of weeks. Here’s how to do it using two different methods; you can decide which to try!
Soil Propagation Method
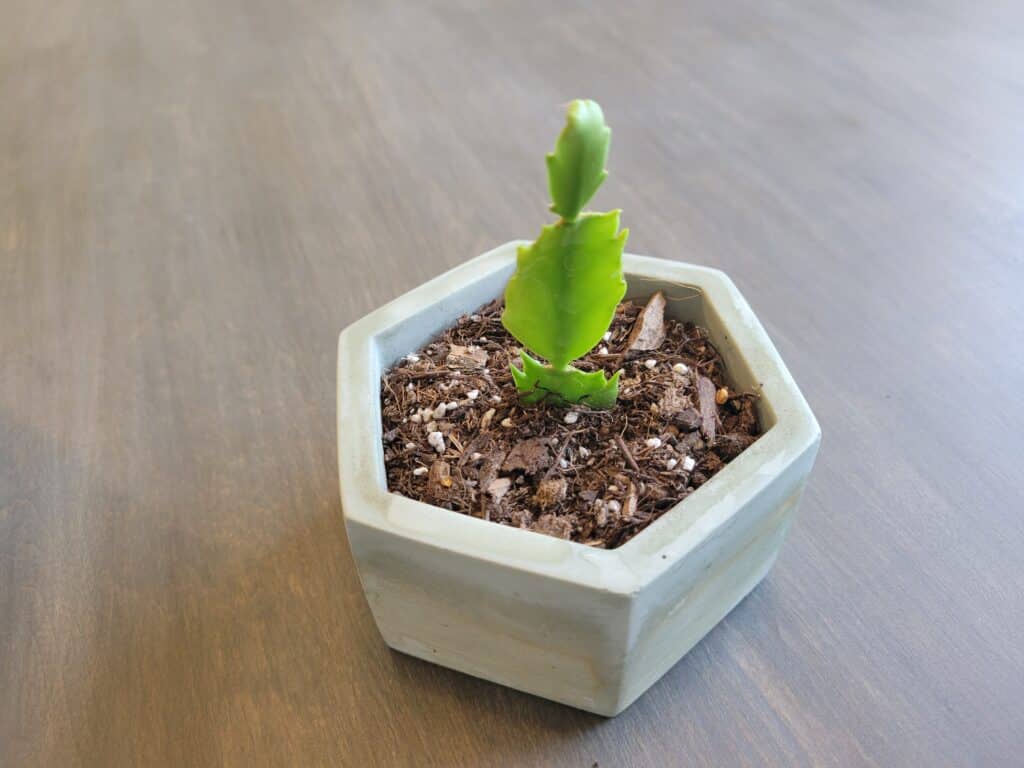
Propagating christmas cacti in soil is ridiculously easy, even if you’ve never propagated anything ever before! This is the best method for beginners to try, especially considering that christmas cactus cuttings can live a long time, even somewhat neglected, if anything goes wrong.
Of course, you’ll need to have an idea of what steps to take in order to get good results. Keep reading to learn exactly how to propagate a christmas cactus at home!
Step 1: Gather your materials
Before you get started on chopping up your christmas cactus, you may want to have all of your supplies and tools closeby so that you don’t have to run around looking for anything with a fistful of cuttings. You’ll need pots, soil, shears, rooting hormone (optional), and fresh, clean water.
This is also a great time to sanitize your tools, including your plant shears. Clean any pots you’re using with warm, soapy water, or give them a good soaking of hydrogen peroxide or diluted rubbing alcohol and dry them before use.
Step 2: Plan your cuts
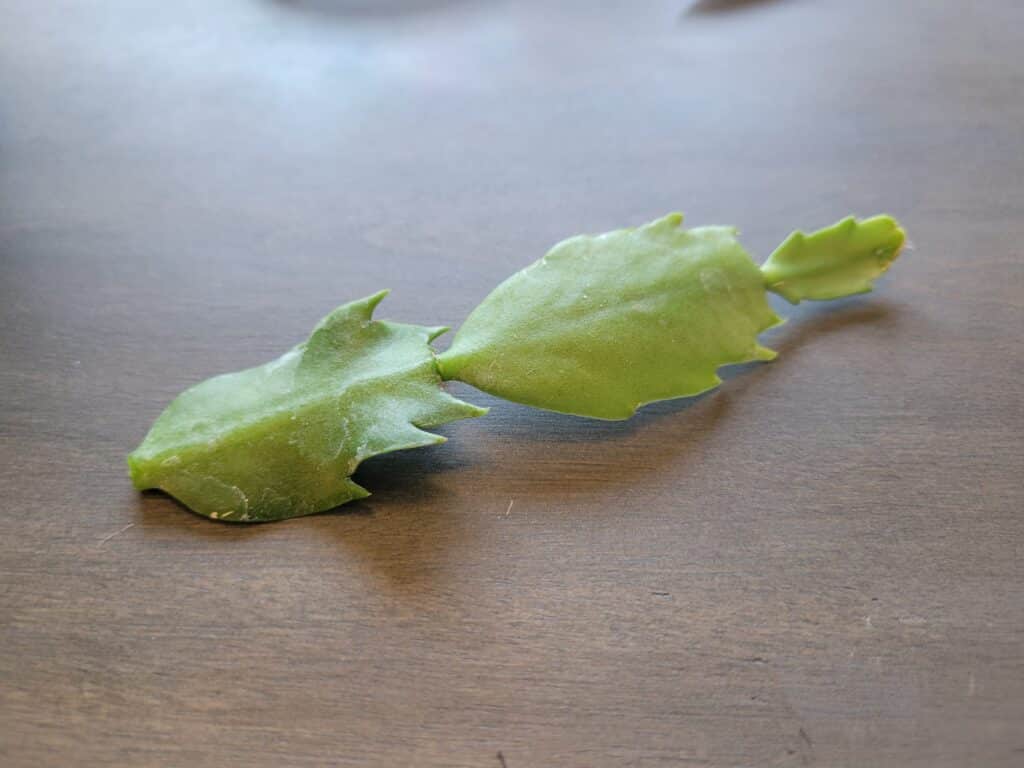
Before you cut any stems away, first plan out which ones you plan to take so that you don’t end up with a lopsided cactus on your hands. Symmetry is oddly important in the plant world. Take stock of the largest, healthiest leaves.
Try to plan for taking at least three leaves from each christmas cactus stem. If you want to start out with one or two cuttings to give them a try, that’s perfect! You can always grab a few more down the road to make more plants.
Step 3: Take the cuttings
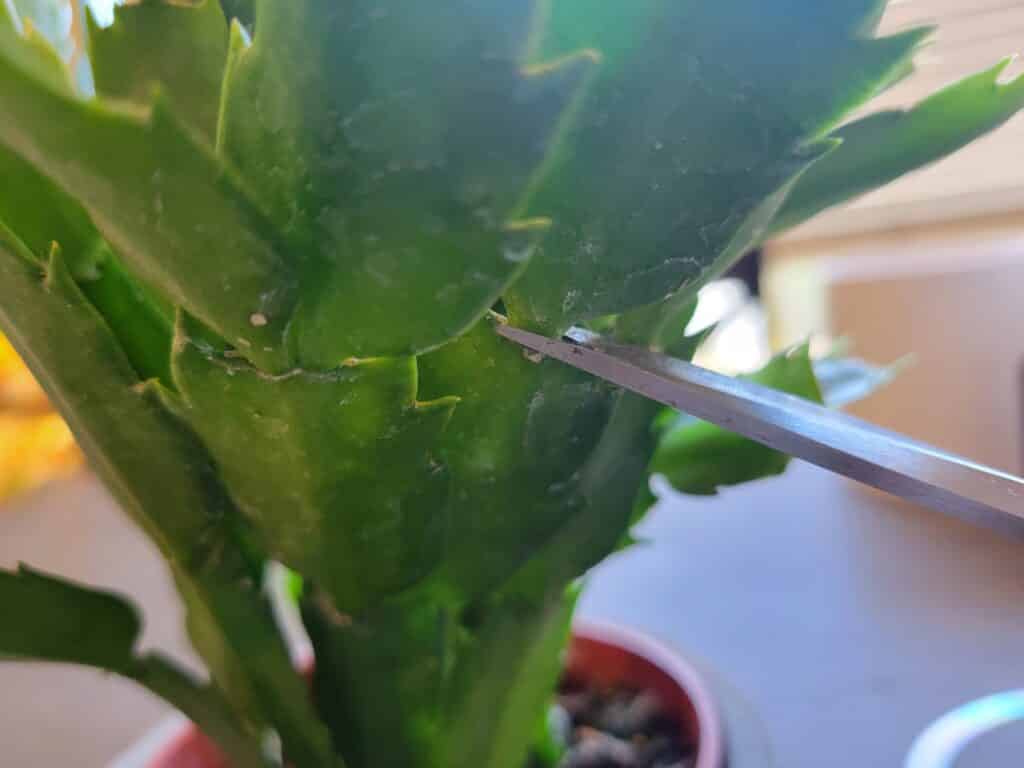
Once you have a good idea on where you might want to cut, it’s time to finally do it! It’s simple: find the spot right between two leaves, called the node, and make one quick cut so as not to cause any damage.
Make sure that you cut just underneath the third or fourth leaf. Each cutting needs enough leaves to continue to photosynthesize, but not so many that the cutting can’t maintain all of its foliage without roots.
Step 4: Rooting hormone
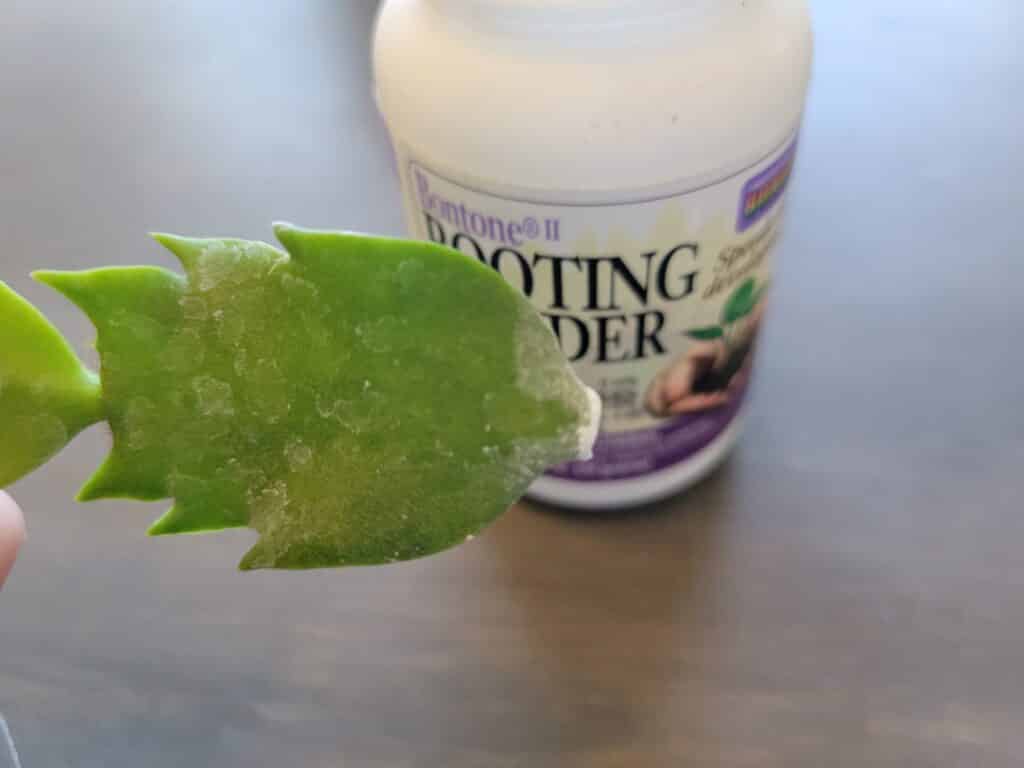
Now that you have your cuttings, you can start applying the rooting hormone. This is as easy as dipping the cut end of each cutting just far enough into the hormone powder to pick some of it up. Let the cuttings sit for a few minutes after you apply the hormone.
By letting the rooting hormone sit on the cut end of the leaf, the cutting has some time to absorb the hormone and send the signal to grow roots more urgently. Then, cells will be sent to the cut, where they can be used to build a new root system.
Step 5: Into the soil
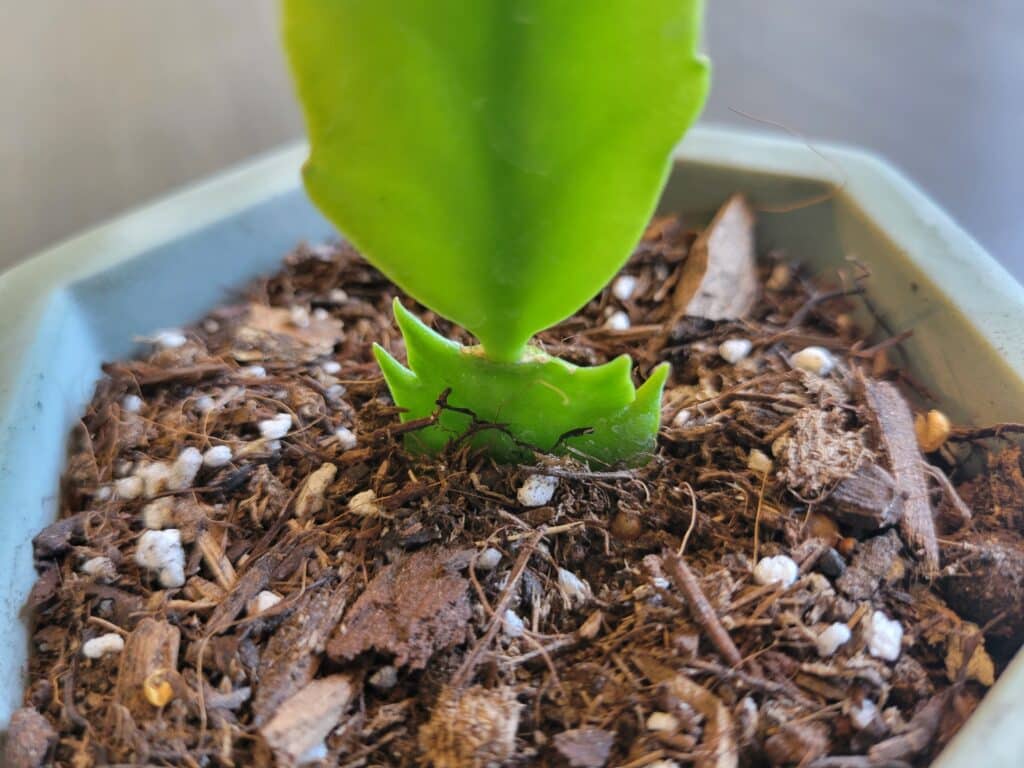
After a few minutes with rooting hormone on the fresh cuts, you can plant your cuttings in soil. Dig a small hole with a finger, then gently press the first bottom half of the bottom leaf into the hole you just created.
You can then press down the soil gently around the base of the cutting with one hand while holding the cutting up with the other. Sprinkle water slowly into the soil to thoroughly soak it, and allow any excess water to drain out of the bottom of the pot.
Suggested Read: Repotting Christmas Cactus: Step-by-Step Guide
Step 6: Watering
To ensure that your cuttings make it to maturity, you’ll need to water them frequently at first, then periodically after that. For the first two weeks, try to water them at least every other day, or as soon as the soil begins to dry at the top.
After the first couple of weeks, the cuttings will have some basic roots starting to grow underneath the soil. While you can’t exactly see them, you can watch for signs of no root growth, like wrinkling leaves. If they appear healthy, you can water them a bit less frequently.
Water Propagation Method
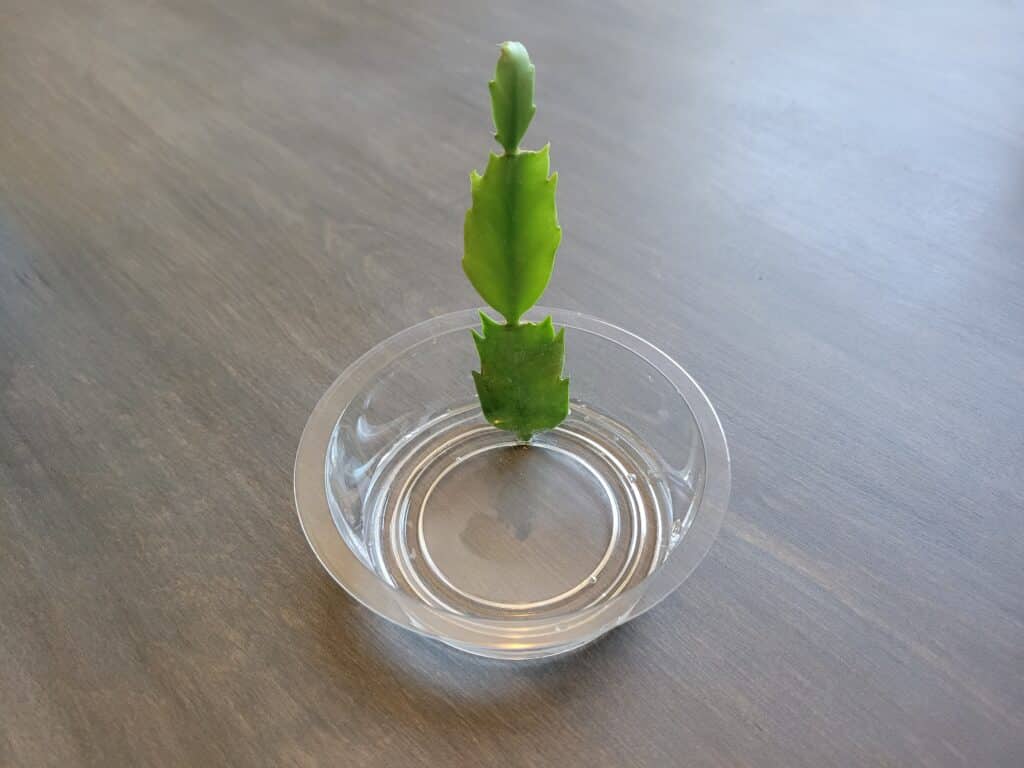
Propagating christmas cacti in water is just as simple, although you may need to pay a bit more attention to root growth than propagating with soil. That’s an advantage this method has over the other: you can actively monitor the root growth!
There’s a bit more to it than snapping off a leaf or two and leaving them in water, though. Here’s exactly how to propagate a christmas cactus in water.
Step 1: Gather your materials
Before you get started, it’s a good idea to gather up everything you’ll be needing to complete the project from start to finish. Make sure you have a water container, fresh, clean water, rooting hormone, shears, and your christmas cactus!
It’s also a good idea to sanitize everything before you start. The most common cause of unsuccessful cuttings after watering issues is infection, usually by a fungus, bacteria or even a plant virus that can hitch a ride on your shears.
Step 2: Plan your cuts
In order to maintain a symmetrical plant, you’ll need to be strategic about where you take cuttings. Your christmas cactus will thank you, too. Look for big, healthy leaves with no wrinkling or soft spots.
Since your cuttings will be about three to four leaves, you can get a fairly good idea of where you want to cut. Try to make sure that the cuttings you take are on opposite sides of each other, and that they won’t be missed somewhere obvious, like an outside stem.
Step 3: Take the cuttings
Now that you have a plan, it’s time to propagate! Carefully hold each stem just above the point where you plan to cut, then in one swift motion, use your shears or blade to sever the stem right between two leaves.
The cut won’t need to be angled, since the plant’s stem is more flat than circular, like other plant stems. If you’re taking a few cuttings, you can pile them up with each other until you have all of your cuttings done and in one spot.
Step 4: Rooting hormone
It’s time to treat your cuttings with rooting hormone. This will give them an advantage in growing roots, which will now happen more quickly, lessening the stress of losing roots on your cuttings. Since plants can’t maintain themselves without roots, they’re extra sensitive.
To give your cuttings a head start on the rooting process, simply dip each cutting where the fresh cuts are into the rooting hormone just enough to cover the open cut. Once you’re finished, leave them to sit for a few minutes before moving on to the next step.
Step 5: Into the water
At this point, you can begin to carefully place your cuttings into the water. Make sure that they’re all standing straight up, and that the water isn’t deep enough to fully cover the first leaf entirely. The water should be shallow, but not so shallow that it dries up quickly.
Avoid using tap water that contains lots of minerals, salt, or sanitation chemicals, as these additives can slow down the rooting process by creating a harsh environment for new roots. Alternatively, you can use bottled spring or purified water, or filtered water.
Step 6: Water maintenance
The most important aspect of rooting any cuttings in water is keeping up on the water itself. Make sure that your cuttings always have fresh, clean water, free of algae, debris, and settling dust.
Every few days, replace the water with fresh water after rinsing out your containers. It only takes a moment, and it’s well worth the effort. By doing this, you can ensure that your cuttings won’t be choked out by invading pathogens that commonly live in water.
How to Care for Christmas Cactus Cuttings
Christmas cacti are plants that are fairly easy-going, for the most part. This means that while cuttings are especially vulnerable, they can generally take some mild neglect. However, for the best, healthiest cuttings, keep a close eye on them!
Mature christmas cactus plants are better suited for brighter, more intense light than cuttings. Their leaves have a constant supply of all the water they need, which isn’t so much the case for cuttings without roots. They can soak up some water, but not nearly as much.
Try to place your christmas cactus cuttings in a location where they won’t receive as much direct light, especially in the first couple of weeks. Once you see signs of root growth, including new growth at the top of the cuttings, they can gradually take more light.
Since cuttings don’t have roots just yet, there’s no need to fertilize them. In fact, your new cuttings won’t need any sort of fertilizer until well after they’ve been planted in pots to mature in. Christmas cacti aren’t particularly needy in the fertilizer department.
How to Plant Christmas Cactus Cuttings
If you propagated your christmas cactus in water, you’ll know when it’s time to plant them in soil. Once you begin to see roots growing off of other roots, you can safely plant them in soil. Try to use soil that’s formulated for cacti or succulents, as it’ll be a well-draining mix.
Opt for pots that aren’t terribly large in comparison to the cuttings. For one cutting, you should have three to four inches of space around it, so use a three to four inch pot. To plant multiple cuttings in one pot, try to space them at least two inches from each other and the pot’s sides.
Planting more than one cutting in a pot helps to fill out the pot more quickly. It’ll also give you an opportunity to separate them down the road, should you at any point wish to fill even more pots with them!
Christmas cacti are typically good in a pot for up to two years or until their roots are growing out of the bottom, whichever happens first. You can trim back their roots mildly between repotting to keep them neat, but this isn’t necessary.
How to Keep a Christmas Cactus Happy
Christmas cacti aren’t needy plants. Much like african violets, they prefer to be watered from the bottom by placing the pot in a tray of water no more than a third of the depth of the pot itself. They’ll happily thrive on top watering, though, if that’s what you prefer.
The top half of the soil in a pot of christmas cactus should be allowed to dry out before you water. If the soil stays too soggy, the roots of the plant will begin to rot, creating a very toxic environment for the plant to try to live in.
After they’re first planted in more permanent pots, wait about six months before you first fertilize. Most soils are already formulated with fertilizer, so feeding right at planting time is comparable to a double dose of fertilizer, which can easily burn roots.
After that, you can fertilize twice per year, or every six months, with a well-balanced fertilizer. There are fertilizers on the market specifically for cacti and succulents, which is what works best for these cute little cacti!
Christmas cacti can tolerate full sun, which means bright, indirect light for most of the day. You’ll notice if your plants get too much light; yellowing on the leaves is a good indicator that there’s too much light, water, or fertilizer.

